Monday, 30 May 2016

Chocolate Mousse and Strawberry Cake


I saw a similar cake to this recently and wanted to give it a go, but adapted to suit the dietary needs in our family. So I have used all my own recipes to make it suitable. It's actually very easy to make, there's just a few steps to it, but none of it is difficult.
There is a brownie base, filled with strawberries and chocolate mousse, topped with chocolate ganache and strawberries.


Of course, if you have your own normal mousse recipe, you could substitute it in here, but for this one, I have made it dairy free. It's a recipe I have made often, usually in this recipe here.


Chocolate Mousse and Strawberry Cake

Ingredients:

Brownie Base
*(this makes enough for this base, and an extra tin of brownies)
200g butter
200g dark chocolate
3 eggs
250g light brown or caster sugar
100g self raising flour
25g cocoa
125g dark chocolate chips

500g strawberries

Chocolate Mousse
400g dark chocolate
2 x tin coconut milk - chilled in the fridge, use the solids only
1 tablespoon icing sugar

Ganache
200g dark chocolate
1 x tin coconut milk - solids only

Method:
Brownie base
Preheat the oven to 180 degrees C and grease and line a 20 cm springform tin (base only) and a small square tin for the extra mixture.
Melt the butter and chocolate over a pan of simmering water. Take off the heat once melted and stir until smooth. Whisk the sugar and eggs together and add the chocolate. Stir in the flour, cocoa and chocolate chips.
Pour half the mixture into the round tin, and the remaining into the square tin.
Bake in the oven for 35 mins (round tin) and 40 mins (square tin).
Remove from the oven and allow to cool in the tin.

Strawberries
Slice the tops off the strawberries to make a flat top. Slice enough in half to line the outside edge of the brownie base. The rest will stay whole to fill the tin.

Chocolate Mousse
Chop the chocolate into small pieces and melt in the microwave, in 30 sec bursts, stirring until smooth.
Remove the solids only from the tins of coconut milk and place into a bowl with the icing sugar. Using a hand held electric mixer, whip until light and fluffy. Pour in the melted chocolate and mix gently until all combined. If you over mix, you will cool it too much and it will start to set. This can be easily fixed by putting the bowl in the microwave for 10 secs to melt it slightly. Mix again by hand.
Place a few spoonfuls of the mousse in the round tin on top of the brownie base and then arrange the cut strawberries around the edge. This thin layer of mousse will help stop the strawberries from making the base too soft.
Pour the remaining mousse mixture over the strawberries making sure it gets into all the crevices between the strawberries. An alternative is to pipe the mousse on, but I found if the mousse is a bit runnier, it is easier to just pour and then tap the tin on the bench to help the mousse fill the spaces.
Chill in the fridge until set, about 30 mins.

Ganache
Chop the chocolate finely and place into a bowl. Heat the solids and a dribble of the liquid from the tin of coconut milk, in a small saucepan until simmering but not boiling. Pour over the chopped chocolate, stir slightly and then leave to melt. After a few minutes, stir until smooth and glossy.
Pour half over the top of the mousse so it is smooth and then return to the fridge to set, about 30 minutes. The rest can be kept in an airtight container to reuse.
(You could, of course, also use the remaining ganache like a fondue and dip in marshmallows, strawberries, raspberries etc). We may or may not have done that last night!

Top with strawberries.

Remove it all from the fridge for about an 45 mins before serving to allow the mousse to soften slightly.


Enjoy!


Sunday, 20 March 2016

Easter Bunny Cake


I love Easter and the baking possibilities. As you will have seen, when it comes to seasonal baking I rarely have any sophistication, instead going for the cute and fun. This cake is no exception. I got the idea from the Stork website and have added my own twist with the surprise inside.

The first time I made this recipe, I then split the mixture into 4 tins and they came out very thin. I decided to use them to make the mini bunnies - I got two!


I then made the cakes again, this time doubling the recipe to get 4 decent sized layers as you can see above and below.

To add even more interest I also coloured each layer a slightly different shade of pink to create the ombre effect. 

With a cute marshmallow tail and nose, fondant eyes and chocolate ears and mouth, here you have a gorgeous Easter Bunny cake!
All of this was made for my son and his friends for their Easter craft session this morning.

If you would like a video and original recipe, click here to go to the Stork site. For the sake of having the cake recipe easily accessible, I will post it here as well. For all the extra details, it's worth heading to their site.

Easter Bunny Cake
 (Note: I doubled this recipe to get these 4 thick layers)

CAKE:
  • 225 g butter, softened
  • 185g caster sugar
  • 4 eggs, large
  • 1 tsp vanilla extract
  • 225g self raising flour ( or 220g plain flour and 1tsp baking powder)


VANILLA FROSTING:
  • 175 butter, softened
  • 500g icing sugar (powdered sugar)
  • 1 tsp vanilla extract
  • 1 tbsp cooled boiled water
* you may need more than this if filling all the layers as well.


TO DECORATE:

  • 100g white chocolate
  • pink sprinkles (or I used a few drops of pink colouring in a bag with some sugar and massaged the colour in and used that)
  • white ready to roll icing
  • pink and white marshmallows
  • 10g dark chocolate, melted - for the eyes, mouth and nose
  • 80g dark chocolate, melted - for the ears.


METHOD:

  1. Grease and line 4 x 20cm (8 inch) sandwich tins with baking paper on the base.
  2. Preheat the oven to 180 c/160 c fan/Gas mark 4.
  3. Cream together the butter and sugar until pale and fluffy.
  4. Add in eggs, one at a time, mixing fully after each one. Add vanilla.
  5. Fold in the flour.
  6. Divide the mixture into 4 equal amounts - I use a large ice cream scoop to ensure even quantities.
  7. Add a small amount of colour to each bowl, increasing the amount of colour each time until you achieve the desired colour.
  8. Bake two cakes at a time, for 25 mins. test and leave for a couple more mins if needed. 
  9. Remove from oven and turn out on to a cooling rack until cool.

For the rest of the decorating, follow the instructions (& the ear template is also available) on the Stork site.


Don't forget the tail!


Happy Easter everyone!


Tuesday, 8 March 2016

Easter Vanilla Cupcakes and Doughnuts


On the subject of baking up a storm, these were the other bakes I did today, preparing for the school charity bake sale. I actually rarely make cupcakes as I find it so hard to find a reliable and delicious recipes. But this time, I sought help from the home baking experts on a baking facebook page I am a member of. One member, Teresa came back with her favourite so I gave it a go....and it was DELICIOUS! The mixture was substantial, so I made a dozen cupcakes and the rest I used to make baked mini doughnuts.


Vanilla Cupcakes

Makes 2 dozen

Ingredients:
  • 200g butter, softened
  • 1 3/4 c caster sugar
  • 2 tsp vanilla bean paste
  • 2 3/4 c self raising flour
  • 1 c milk
  • 2 eggs
Method:
  1. Preheat oven to 180 deg C and line muffin tray with cases.
  2. Cream butter, sugar and vanilla bean paste with an electric mixer until pale and fluffy.
  3. Add the eggs one at a time, beating each one until well combined.
  4. Add flour and milk in alternate batches, mixing with a wooden spoon until well combined.
  5. Spoon mixture into the cases and bake for 15-20 minutes or until cooked through.
  6. Remove from oven and set aside to cool completely.
  7. Decorate with buttercream and Easter themes marshmallows and sprinkles.
Note: this will make 2 dozen cupcakes, or you can make 1 dozen and use the rest to make the doughnuts below.


Vanilla Doughnuts

Using the same recipe as above, put the mixture into a large piping bag and snip off the end. Pipe the mixture into a doughnut pan that has been greased with cake release spray. This is important or they will stick.

Bake in the oven for about 12-15 minutes, but do check them after 10 mins.

Once cooled, remove from the pan and dip into a basic glaze to coat. Add sprinkles and decorations.

Glaze:
Add sifted icing sugar to a bowl (approx 2 cups), pour in about a tablespoon of water to start with. Stir to combine, adding more water as necessary to produce a fairly runny glaze. If it is too thick the doughnuts will fall apart while you dip them.
Dip the rounded side of the doughnut into the glaze to coat. Decorate.


Creme Egg Bundt Cake


I baked up a storm in the kitchen today, making goodies to sell at the Year 6 Bake Sale tomorrow. We do one annually to raise money for charity and as I organise it, it's only fair that I contribute. This year I was tossing up what to make, but in the end I went for an Easter theme. You can see the other Easter bakes here.

Last year I made this same cake, it's my 'go to' chocolate bundt cake; my absolute favourite! This year I made the icing white (yellow last year and I just couldn't get past the brown/yellow combo which I have always disliked!) and it is soooo much nicer. A simple icing sugar/water glaze, a few chopped Cadbury's Creme Eggs on top and away we go!


I won't write out the whole recipe again, but if you want it, you can find the cake recipe here.

I let it cool in the tin for about 20 mins before inverting onto a rack and allowing to cool. Once cool, I sliced the uneven top off to give a flat bottom.

I didn't measure the icing, I simple sifted an amount of icing sugar, added some water, slowly so it doesn't get too runny and then poured it over the top. I used 3 large creme eggs, cut in half, and dotted a few of the smaller ones in between. It was really so simple.


I love the filling oozing out......


This cake keeps fresh in an airtight container for at least a week (if it lasts that long!)

Notes:
  • I always use a cake release spray when using bundt tins, and the cakes come out perfectly, ever single time.
  • When cutting the creme eggs, don't worry if they are uneven, broken and oozing filling, it all adds to the charm.


Happy Easter!


Monday, 7 March 2016

Easter Bunny Bark


I love Easter baking, perhaps even more than Christmas. Last year I made a white chocolate bark, but I wanted to try dark chocolate this year. My first attempt, with 70% chocolate didn't really work. It was my first attempt at tempering chocolate and I think I melted it too fast and it bloomed. This is where the cocoa butter separates and has a 'white' appearance. In addition, I think the chocolate was just too dark for children to eat. So, this time I went back to my favourite baking chocolate, it's Sainsburys Belgium Dark Cooking Chocolate. It's so nice to work with, and appeals to all tastes when eating.

I have been collecting all the Easter chocs; Cadbury's mini eggs, Smarties mini eggs, Sainsbury's micro mini eggs, Cadbury's Hoppy Bunny bar, Maltesers Bunnies and the Wilton Easter sprinkles, ready for this project. It's sooo tempting to sneak a few!


It's pretty simple to make bark. You melt the chocolate, slowly, trust me, pour it onto a tray lined with parchment paper, add the decorations and then refrigerate to set. After it had hardened, break it up and package it into bags to give as gifts.

If you would like to temper the chocolate to give it that 'crack' as you break it, the BBC Good Food guide to tempering chocolate is really good.


Good luck and happy 'barking'!


Thursday, 28 January 2016

Chocolate Orange Mousse Cake


This cake, or pie if you like, is AMAZING. It is so light and lovely....and best of all, it is dairy, egg and nut free. It could also be made gluten and soya free too. I can't claim credit for the recipe as it was shared by another allergy mum on a forum I am on. But it's by far one of the most popular posts on that site.

You could make so many variations to this too...swap the orange essence for mint, or add a few drops of a favourite liqueur for an adult version. To make it taste EXACTLY like a bounty bar, use milk chocolate instead!
For us though, it's perfect the way it is!

Oh and the best bit, it takes about 5 mins to make! (well the base needs to chill, but apart from that...)

What are you waiting for? Dive in!


Chocolate Orange Mousse Cake
Ingredients:
For the mousse:

  • 1 x 400ml tin full fat coconut milk, chilled in fridge ( check the label for the highest coconut content - 70%+ is ideal)
  • 200g suitable dark chocolate (I used Sainsbury's dark cooking choc as it's dairy free and yummy)
  • 2 tbsp icing sugar
  • 2 tsp orange flavouring (use vanilla if you want plain)
For the crust:

  • Approx 10-15 bourbon biscuits - or Oreos will work too. To make it gluten free, substitute for a suitable biscuit.
  • 2-3 tbsp of dairy free butter, melted. (I use Vitalite)
Method:

Blitz the biscuits in a food processor until good and crushed. Add melted ‘butter’ and blitz again until you get to a mouldable consistency. Press the mixture into the base of a loose bottomed cake tin and refrigerate.
Whip the solids from the can of coconut milk (if you use a brand with a high percentage of coconut extract [70%+] and chill first in fridge overnight, it should be fairly thick and you shouldn't need to drain any water off after chilling). I used a brand from the world food section - much higher coconut %, so had very little, if any, liquid to drain off.
Melt the chocolate in the microwave, being careful not to burn it. Add the melted choc, orange flavouring and icing sugar to the whipped coconut milk and whip again until well incorporated.
While still silky, pour over the chilled crust and refrigerate for a couple hours or overnight to set.
Should last 5 days in the fridge - if you can resist!
You can make mini ones in ramekins too. And the mousse makes a great dessert on its own; just pour it into ramekins and chill.

Notes: 

  • I often add raspberries to the top as they add a fresh element to this dish - delicious!
  • If you overmix the mixture and it appears to set in the bowl, put it in the microwave for a few seconds to warm it up ever so slightly and use as normal.

Friday, 1 January 2016

Gluten Free Chocolate Cake


This is my first foray into making gluten free cakes, and I must say I was a little daunted. We have some friends staying from Australia, and two of their children have recently had to change to a gluten free diet. And it was their father's birthday today so to ensure everyone could eat the cake, I plunged in and made one!

Well, the verdict was....delicious! It was so light and fluffy, didn't taste 'gluten free' and most people went back for seconds! I topped it with my favourite coconut milk and dark chocolate ganache. I'm going to keep this short and sweet and go straight onto the recipe.


Gluten Free Chocolate Cake

Ingredients:
  • 3/4 c (150g) butter , softened
  • 2 cups (450g) caster sugar
  • 3 large eggs
  • 2 tsp GF vanilla extract
  • 2 cups (325g)  GF plain flour (all purpose) - I used Doves Farm
  • 3/4 cup (80g) GF cocoa powder
  • 1 tsp GF bi-carb soda (baking soda)
  • 3/4 tsp baking powder
  • 1 cup (250ml) milk (I used coconut milk to suit my son's milk allergy)
Ganache
  • 200g dark chocolate, chopped
  • 3/4 c tinned coconut milk - the solids and some of the liquid


Method:

  1. Heat the oven to 180 deg C (350F). Grease the pan and set aside. I love my Nordic Ware bundt tins and I use cake release spray; it works a dream every time.
  2. Cream butter and sugar until light and fluffy. Add the vanilla and then eggs one at a time, mixing after each one.
  3. In a large bowl sift and combine the dry ingredients together. With the mixer on low, slowly add the dry ingredients and then add the milk and mix for 2 minutes.
  4. Spoon/pour into the prepared pan and bake for 45-50 mins. Check it is ready by inserting a skewer onto the cake. Leave the cake in the tin for about 10 mins and then invert onto a wire rack to cool.
  5. To make the ganache, heat the coconut milk in a small saucepan until it is hot, then pour over the chocolate, stir and let sit for a few minutes until the chocolate has melted. After a few minutes, stir until smooth. Pour over the cake and serve.
( We added sparklers to the cake for the wow factor, instead of candles, although they took so long to light that one was finished before the others started!)

Enjoy this delicious cake!!

Friday, 25 December 2015

Rudolph Chocolate Bundt Cake


I love the novelty of this cake, and so did my son. We first saw it at my friend, Sandrine's house, where she had made a fab version, piping on buttercream to create a fur - like look. I decided to go for a chocolate bundt base, as we like this recipe a LOT, with a coconut milk and dark choc ganache as it's not as sweet, and a lot less time consuming. (I like shortcuts!!)

Anyway it went down well with my family...and I may have just had a second slice while I type this...

It's worth noting, this is not a sickly sweet cake. That's one of the appeals of this recipe and why we make it so often.


Oh and did you notice my red and white plate? I made it using American Starlight peppermint sweets. They are placed on a non stick silicon mat and placed into a moderate oven (approx 170 deg C) for 7-8 mins, or until softened and spread slightly. Cool on the mat until hard.

It can be crushed afterwards and used instead of candy canes on biscuits, or just crack pieces off to enjoy - they are sooo yummy!

You can find the cake recipe here and see below for the ganache recipe.

Coconut Milk Ganache
(Dairy free, but without a strong coconut flavour)

200g dark chocolate
1/3 c coconut milk - mainly solid, and a touch of the liquid.

Chop the chocolate into small pieces and place in an heatproof bowl. Gently heat the milk until it is hot but not quite boiling and pour over the chocolate. Mix and then leave until the chocolate has melted.
Mix until it is smooth and silky. Cool and pour onto the cake and use a offset spatula to spread and drip off the edges of the cake.

Any left over ganache is DELICIOUS on top of vanilla icecream.


To make the antlers, I drew an outline on parchment paper, folded it over and the drew it again in symmetry. I then melted 100g chocolate (or candy melts) and using a piping bag, I piped an outline around each antler, filled it in and left it to set - putting it in the fridge helps. Once set, place a skewer or cake pop stick on each antler and cover it with another layer of chocolate. Chill in the fridge to set.

The eyes and nose were made with pre-coloured fondant icing - chocolate chips for the pupils. I anchored them into the cake using skewers.


Wednesday, 23 December 2015

Christmas Gingerbread House


This is our third year making a gingerbread house of our own, and I think I have finally found a fantastic gingerbread biscuit recipe. This was a dream to work with, from the dough through to cooking it. It does spread quite a lot even with loads of dough chilling time, but I'm yet to find one that doesn't.

This recipe is from Mima Sinclair in the December 2015 edition of Delicious magazine. Due to our inability to use royal icing because of allergies, this year I again used caramel 'glue' to stick the house together. It's so quick to try and bond the sides together. I did use regular icing for the rest, but it needs to be quite thick to hold everything in place.

This dough makes the MOST delicious biscuits - I cooked the trees (and holly leaves/presents I made for the teacher's gifts) for 10 mins and then iced once cool. This made the biscuits soft-ish in the centre, and no word of a lie, they were absolutely amazing!
For the gingerbread house I cooked longer for a crisper biscuit.

We love adding extras like the trees and the marshmallow snowman. I managed to use the Easter carrot sprinkles yet again for the nose...oh and we even added some 'seasonal' mushrooms to the scene this year too!


My son's favourite part (besides the sweeties) is putting the snow on top. 

Gingerbread dough

Ingredients:
  • 140g golden syrup
  • 200g soft light brown sugar
  • 200g unsalted butter
  • 4 tsp ground ginger
  • 2 tsp ground cinnamon
  • 1/2 tsp nutmeg
  • 1/2 tsp bicarb of soda (baking soda)
  • 500g plain flour
  • 1tsp salt
  • 1 medium free-range egg, lightly beaten

1. Pour the golden syrup into a large saucepan with the sugar, butter and spices, then heat over a low-medium heat until the sugar has dissolved.
2. Increase the heat to bring mixture to boiling point, then take off the heat and beat in the bi-carb of soda. The mixture will froth and bubble at this point as the bicarb reacts - mix briefly until combined and leave to cool for 15 mins, then pour into a large mixing bowl (I used my stand mixer bowl),
3. Sift the flour and salt, then fold into the spiced sugar mixture in batches, using a wooden spoon or stand mixer. Beat in the egg until just combined. Don't over work the mixture of the biscuits will spread too much during baking (they spread anyway, but this may stop it going too far!)
4. The dough can be quite sticky to begin with but don't add any extra flour unless you absolutely have to, and even then use just a sprinkling - the minimum you can to get it less sticky and usable. Scrape out the bowl onto a clean surface and knead together until just smooth.
At this stage you can wrap in cling film and chill in the fridge for an hour or until cool. But I prefer to roll the dough out between sheets of baking/parchment paper to the thickness I want the biscuits to be. I then chill the ready rolled dough on trays ready to cut afterwards. It's much easier than rolling out fridge-hardened dough.
5. Cut out the house pieces using the template and place them on the parchment paper straight onto a baking tray. Don't try and lift it off the paper, as it will go out of shape. It will  spread slightly when cooked so to help avoid this, put the tray back into the fridge or freezer for 10 mins before baking. See instructions below for more detail.
6. Bake each tray for around 15-20 mins (depending on the size of the pieces) on 160 degrees C, or until slightly browned on the edges.  Remove from the oven and cool on a wire rack ready for decorating.

Caramel 'glue'

Ingredients:
  • 200g caster sugar
  • 60ml cold water
  • a few drops of lemon juice (optional but I found this stops the sugar syrup crystallising)
  • sugar thermometer (optional)
1. Put the sugar and water and lemon juice if using, in a large, lowsided frying pan over a medium to high heat. Without stirring, bring to 160deg C on a sugar thermometer. If you don;t have one, the syrup is ready when the sugar has dissolved and it turns a light golden colour.
2. Swirl the syrup gently in the pan to even out the colour. Take the pan off the heat and leave to cool for a few moments to thicken slightly to the consistency of honey.
3. If the syrup begins to harden, put it back over a gentle heat until it has returned to the required consistency.

Royal Icing (basic)
  • 500g royal icing sugar, sifted
  • 80ml water
1. Sift the icing sugar into a bowl, adding the water andmix until a thick paste forms. Add more water as required but only a drop or two at a time. If you make it too runny, you can add more icing sugar to thicken it up.
2. Put into a piping bag ready to use on the house.

Royal Icing (egg free)
  • 90ml (1/3c) aquafaba
  • 1 tsp vanilla
  • 4c icing/powdered sugar
1. Pour aquafaba into a mixing bowl and mix with electric beater until it starts to foam.
2. Add vanilla and sugar and whisk for about 5 mins until the mixture is thick and very white.
3. Add a very small amount of water ( a few drops) if the icing is too stiff. You need it to be thick icing though, as it is used as glue to stick the house together.
4. Put into a piping bag ready to use on the house.


To Make the House

  • 2 quantities of the gingerbread dough. You won't need all of it, but you will need more than one. The rest can be used to make biscuits.
  • 1 quantity of the caramel glue or royal icing mix
  • jelly beans, dolly mix, mini candy canes, marshmallows or any other sweets you like, to decorate
  • piping bag
  • gingerbread house template
  • pizza wheel or sharp knife
  • star/heart shaped cookie cutter
  • boiled sweets, whole, for the windows

1. Print and cut out the template onto baking paper. Heat the oven to 160 deg C. Cut out two large sheets of baking paper and roll the dough out in batches to 5mm thick. 
2. Place the template onto the dough and cut out the first shape. It's easiest to use a pizza wheel for this, otherwise a sharp knife. Leave the piece of cut dough on the paper and transfer to a baking sheet - this avoids it losing its shape while being transferred. 
3. Place into the freezer for 10 mins while you do the next piece. If adding sweets to the windows, place the colour you want, then bake for 20 mins until golden at the edges.
4. As soon as it comes out of the oven, place the template back onto the shape and re-cut, as it will have spread. This is REALLY important so it fits together properly. Leave to cool for 5 mins and then transfer paper and biscuit to a wire rack to cool completely.
5. Using the icing, add detail to the windows, around the star/heart and around the door. It's easier to do this before you stick it together.
6. While that icing sets, make the caramel glue if using to stick the house together. Once it is ready, dip the ends of one side of the house into the caramel and glue the front and back to the side. Repeat for the other side.
7. To attach the roof, I find it useful to add the tips of toothpicks to help anchor it into the base. I put two per side. Add the caramel/icing to the base and then lay the roof on, pushing it firmly into the base and the toothpicks. Remember to remove them when eating.
8. The caramel glue sets almost instantly, so you can decorate virtually straight away.
9. I like to add a couple of trees, the marshmallow snowman (he has a toothpick in the middle to attach the marshmallows together). The sky is the limit really, be creative!
10. Oh and then add your snow with a fine sieve and icing sugar!


Monday, 14 December 2015

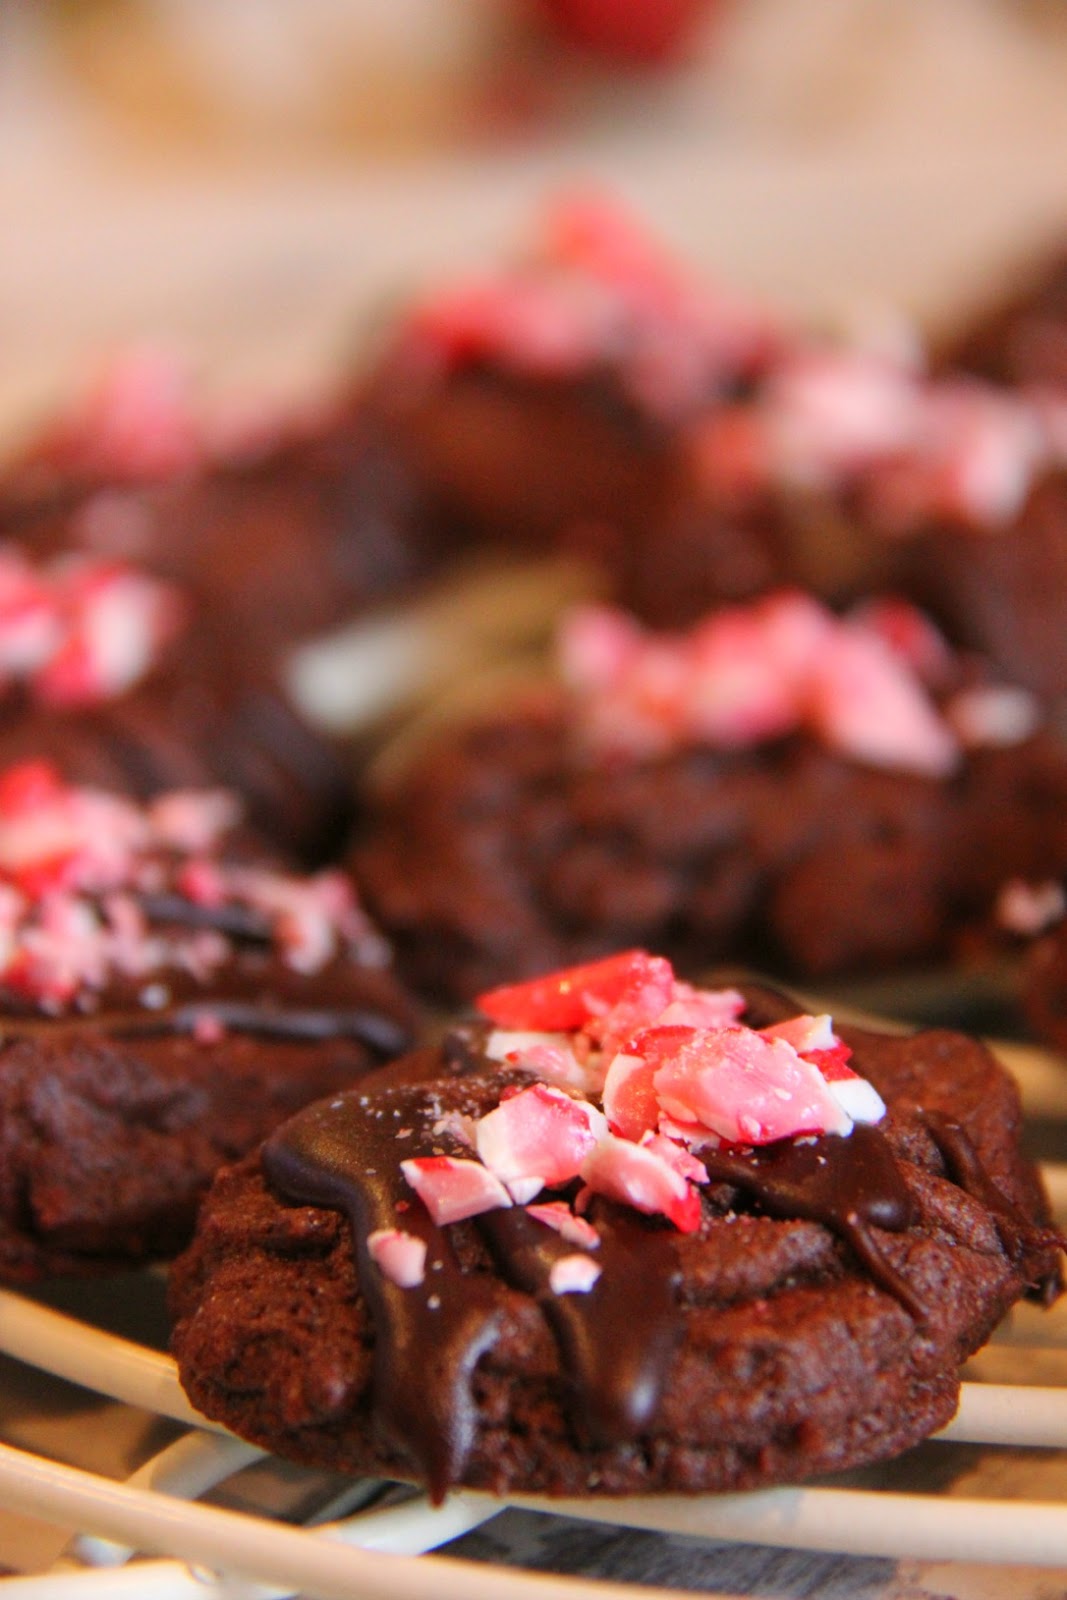
Chocolate Peppermint Biscuits


The candy cane biscuits (cookies) are a festive twist on my standard ones. When I say 'mine' I really mean Nigella's as it's her base recipe, but you know, I made them, so these particular one are mine!

This month I am part of a Christmas cookie swap, so I need to make two x a dozen biscuits to send to two other ladies who I am matched up with. One of my partners is gluten free, so I have made some cranberry and pistachio biscuits for her and for my other ones, I am sending these. I absolutely love them. I love anything with chocolate and mint, and the addition of the candy cane on top is perfection in my world!


I doubled the recipe and tripled the glaze this time, and managed to get 67 biscuits and some left over glaze, but I was generous with it. Usually I'm scrapping the bottom of the pan to get it all out.
Just a little hint, if the glaze starts to thicken, just put it back on a low heat for a few seconds and it will go runny again.

Chocolate Peppermint Cookies

Ingredients:
100g soft butter
150g light brown sugar
1 t vanilla extract
1 egg
150g plain flour (all purpose)
35g cocoa powder
1/2 t baking powder
200g dark chocolate chips

For the Glaze
75g icing sugar
1 x 15ml T cocoa, sieved
1.5 x 15ml T boiling water
1/4 t peppermint extract
Crushed candy canes

Method:
1.Preheat oven for 180 degrees.
2. Cream butter and sugar (I use my freestanding mixer), then beat in the vanilla extract and egg.
3. Mix the flour, cocoa and baking powder in a bowl and gradually beat in to the creamed mixture. Finally, fold in the chocolate chips.
4. Using a rounded 15ml tablespoon measure, spoon out scoops of cookie dough (I actually use a small icecream scoop) and place on a  lined baking sheet, leaving a little space between each one.
5. Bake in the oven for 13 mins and then let them sit on the baking sheet for a couple of minutes before moving them to a cooling rack, with some baking paper underneath to catch escaping glaze later.
6. Put the glaze ingredients into a saucepan and heat until combined.
7. Using a teaspoon, zigzag the glaze over each cooling cookie and sprinkle with crush candy cane.

Makes 30+
+.