I love Halloween! We didn't celebrate it at all as kids in Australia, and I think even now it's pretty low key, but here in the UK it's bigger and I am loving it. To be honest, we didn't do much for it before we had our son, but for me, having kids is a good excuse to get into it!
Each year now, we hold a party at our place for the kids in our street (and sometimes a few extra friends). It's so much fun, a few games, some fun food and then out trick or treating! The kids get super excited, all dressed up and gorging on sweeties and chocolate.
I love all the baking for the party, with my cake always a centre piece. So, this year I decided to make this Oreo Spider Cake - I had found the idea on Pinterest and adapted it to suit my recipes.

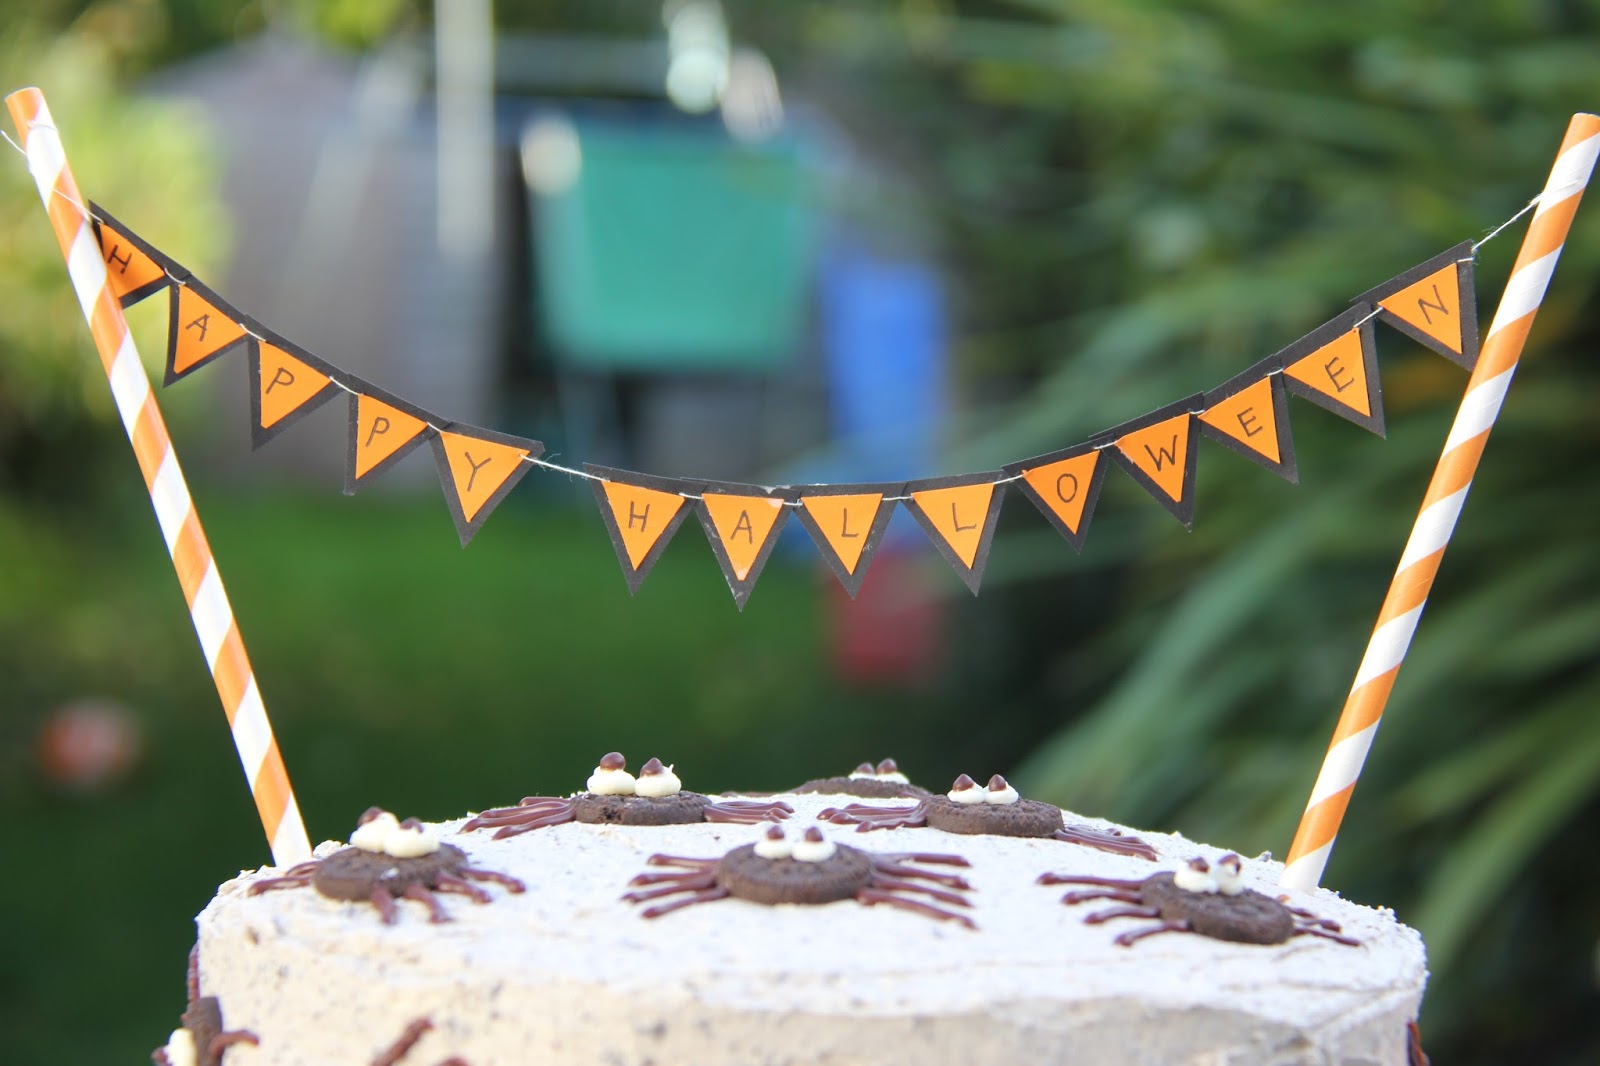

The cake itself is not overly sweet, but be warned, the oreo and buttercream combo more than makes up for it...good though!
- Servings: 15-20
For the Cake:
1 1/4 cups water
3/4 cup cocoa powder
2 1/4 cups sugar
1 teaspoons salt
2 1/2 teaspoons bi carb soda (baking soda)
2 whole eggs
1 egg yolk
1 1/4 cups buttermilk
1 cup sunflower oil - or a similar neutral oil
1 1/2 teaspoons vanilla extract
2 3/4 cups plain (all-purpose) flour, sifted
1. Place an oven rack in the centre of the oven and preheat to 180 degrees C.
2. Line 4 x 20cm pans with baking parchment on the bottoms only.
3. Whisk water and cocoa powder in a small saucepan and bring to a boil, whisking frequently. Remove from heat and let come to room temperature.
4. In the bowl of a stand mixer with a whisk attachment, mix together sugar, salt, baking soda, eggs and egg yolk on low for just one minute. Add the milk, oil and vanilla extract and mix on low again for another minute.
5. Add the flour and mix on medium speed for 2 minutes more. Add the cooled cocoa mixture and mix on medium speed for 3 minutes. The batter will seem quite loose and liquid. Pour evenly into the prepared cake pans and cook for 25 mins , or until a cake tester or toothpick inserted in the cake comes out clean.
4. In the bowl of a stand mixer with a whisk attachment, mix together sugar, salt, baking soda, eggs and egg yolk on low for just one minute. Add the milk, oil and vanilla extract and mix on low again for another minute.
5. Add the flour and mix on medium speed for 2 minutes more. Add the cooled cocoa mixture and mix on medium speed for 3 minutes. The batter will seem quite loose and liquid. Pour evenly into the prepared cake pans and cook for 25 mins , or until a cake tester or toothpick inserted in the cake comes out clean.
6. Let the cake cool for about 10 mins in the pan and then invert onto a cooling rack. Once cooled you can trim off any uneven tops to make it level, or just leave it as I did this time.
For the Oreo Buttercream:
I have to now admit I cheated here, and used tubs of Betty Crocker ready made vanilla buttercream. (Shocking, I know! LOL) I almost always use this, as my son is allergic to cow's milk and these tubs are dairy free, and I am yet to find a dairy free 'butter' that makes a buttercream as nice as the real thing. Anyway we like this buttercream and it's easy to use. But it is an expensive way to do it.
(You can, of course, use your usual buttercream recipe, but do keep some aside for the eyes and crumb coat before you add the oreos).
3.5 tubs of vanilla buttercream style frosting
1 x packet of oreo biscuits, crushed
I crushed the biscuits and then mixed them with 3 tubs of buttercream (although I didn't quite use all of it).
The remaining tub I kept plain to use as the spider eyes and for the crumb coat.
Use half the oreo buttercream in between the layers of the cake. Then use the plain buttercream to make a crumb coat. If you have never crumb coated before, check out this video for a quick tutorial.
Chill your coated cake in the fridge for at least 30 mins. I left mine in overnight as I was working in the evening.
Use the remaining oreo buttercream to cover the cake completely.
For the Dark Chocolate Ganache:
200g best quality dark chocolate, chopped (I used Sainsbury's dark cooking chocolate as it is dairy free and I simply like it)
1/cup (125ml) coconut milk (from the tin)
To make the ganache, heat the coconut milk in a heavy pot, just until it begins to simmer. Remove from the heat and add it to the chopped chocolate. Let the chocolate melt for a a few minutes or so, then mix to combine.
Leave the ganache to cool down and thicken.
For the Spiders
10-12 mini oreos
Ganache (see above)
buttercream eyes (see above)
Separate the mini oreos and scrape out the filling. Pipe on the eyes and leave to dry overnight.
Stick the spiders onto the cake and then pipe the ganache legs on each spider.
Store in an airtight container - this will stay fresh for about 10 days, if you can resist it for that long!
Notes:
The ganache recipe makes FAR more than you will need, so you can reduce it all, but it is such an utterly delicious recipe (and no strong coconut flavour really) so we use to dip fruit in, over icecream etc, so it's worth having a bigger batch! And dairy free- so a real bonus!
For the Spiders
10-12 mini oreos
Ganache (see above)
buttercream eyes (see above)
Separate the mini oreos and scrape out the filling. Pipe on the eyes and leave to dry overnight.
Stick the spiders onto the cake and then pipe the ganache legs on each spider.
Store in an airtight container - this will stay fresh for about 10 days, if you can resist it for that long!
Notes:
The ganache recipe makes FAR more than you will need, so you can reduce it all, but it is such an utterly delicious recipe (and no strong coconut flavour really) so we use to dip fruit in, over icecream etc, so it's worth having a bigger batch! And dairy free- so a real bonus!