Showing posts with label chocolate cake. Show all posts

Friday, 20 December 2019

Chocolate Christmas Cake


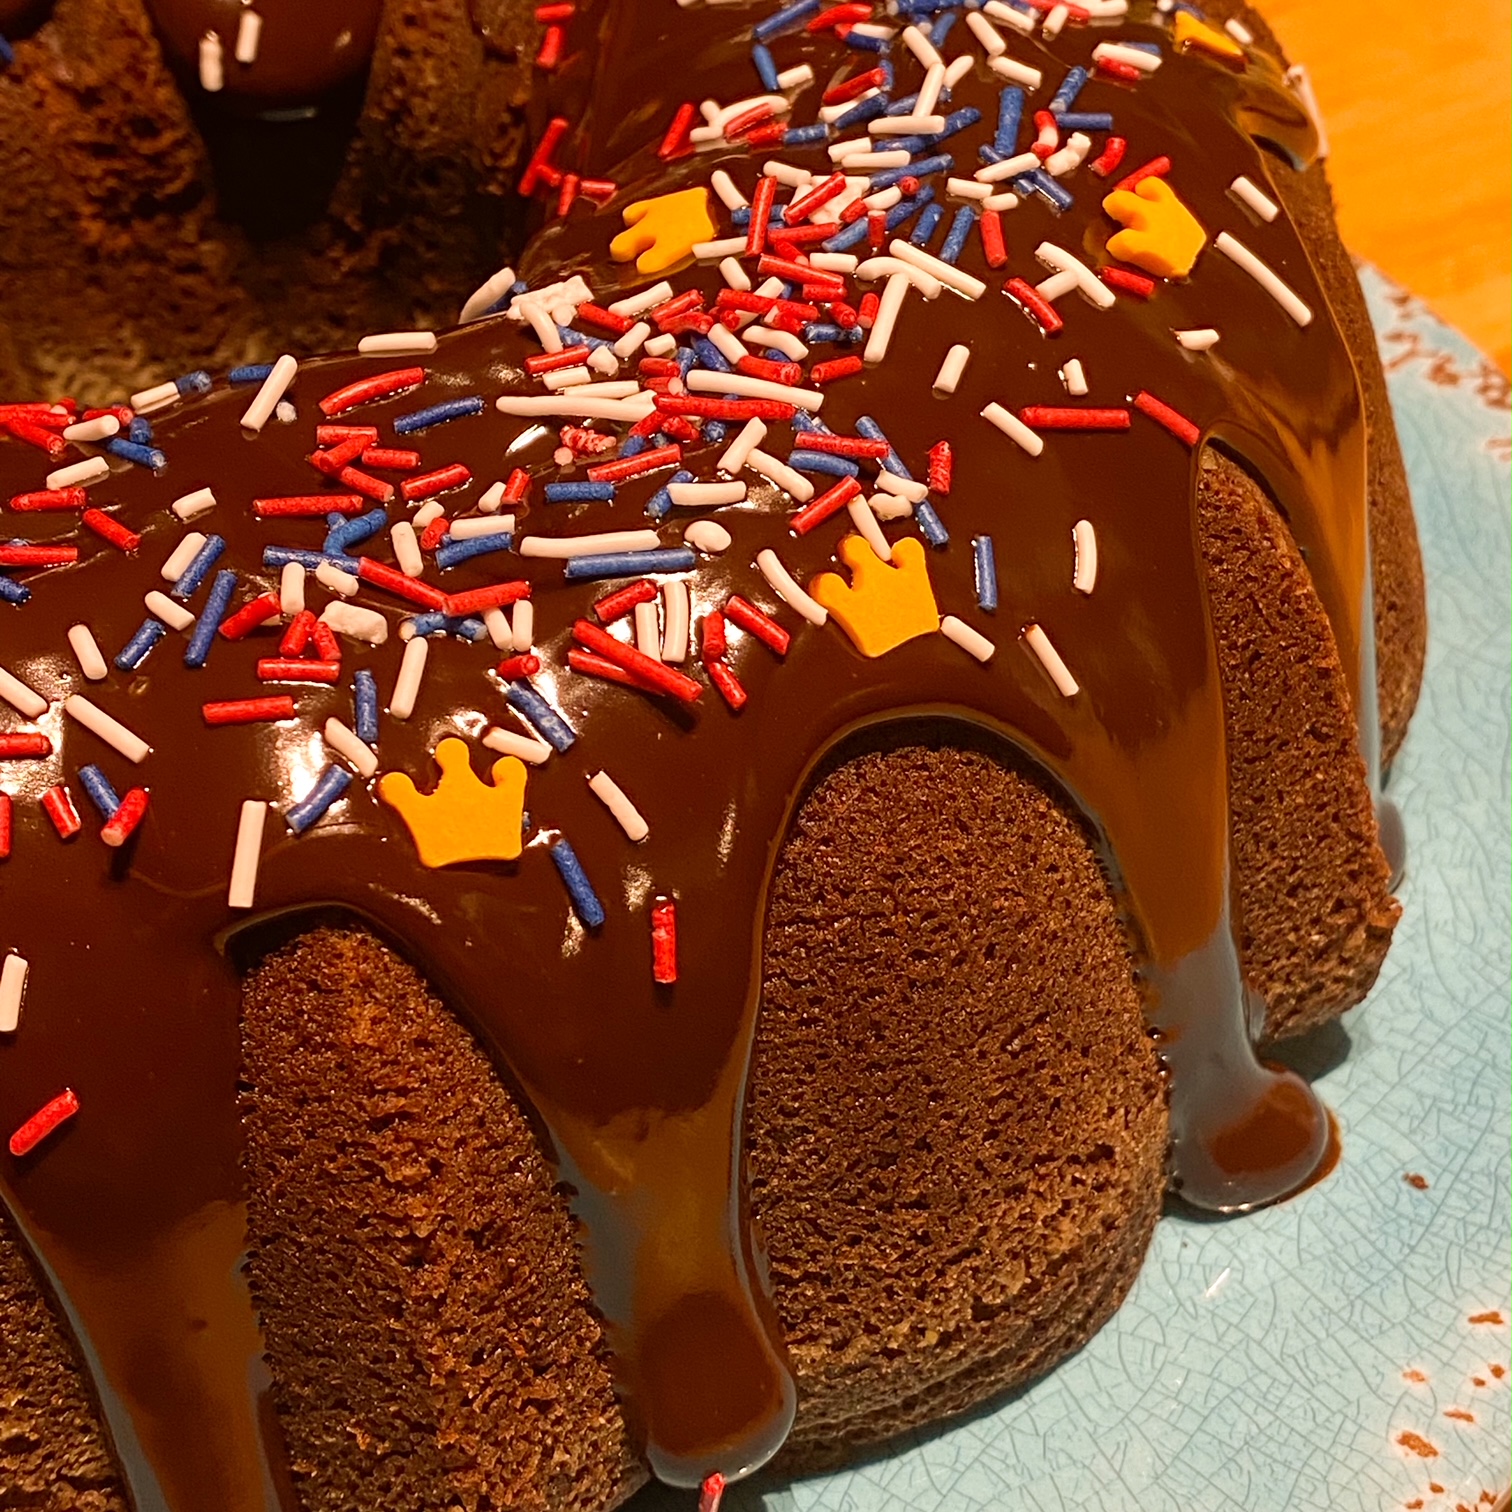
This Christmas I have made two special Christmas cakes using this recipe below. It has quickly become our family favourite. The one above, I made for the teachers at my son's school, as a thank you and well done for getting through a very long Autumn term.  The other one, I made for my own school's Festive Fair, for a 'Guess the Weight of the Cake' competition. (It was 3.7kg in case you were wondering!)

The same recipe for both cakes, but presented very differently. The bundt cake is topped with a simple icing sugar and water glaze, and then vanilla cookies on top (recipe for those here) and the triple layer has vanilla buttercream inside and around and a chocolate ganache drip on top. The biscuits on that are gingerbread (recipe found here).

In my opinion, it's worth making the biscuits too, as they are sooo delicious, and can be kept in airtight containers for a couple of weeks.

Chocolate Indulgence Cake

Ingredients:

For the cake:
2 cups self raising flour (300g)
2 cups caster sugar (460g)
3/4 cup cocoa (90g)
1 teaspoon bi-carb soda (baking soda)
1/2 teaspoon salt
1 teaspoon coffee powder
1 cup milk (250ml)
1/2 cup sunflower oil (125ml)
2 eggs
2 teaspoons vanilla extract (10ml)
1 cup boiling water (250ml)

For the frosting:
250 g softened butter
500g icing sugar
2 Tablespoons milk (30ml)
1 teaspoon vanilla extract

Method:

For the cake:
1. Preheat the oven to 170C fan (350F) and line the base and sides of two 20cm (8 inch) cake tins, or one bundt tin.
2. Add flour, sugar, cocoa, bi-carb soda, coffee powder and salt and mix together in a large bowl or the bowl of a stand mixer.
3. Whisk together to combine fully.
4. Add milk, vegetable oil, eggs, and vanilla to the flour mixture. Mix on a medium speed until fully combined. Carefully add the boiling water, and mix on high speed for 1 minute to add air to the mixture.
5. Split the mixture evenly between the two cake tins and bake for 35-40 mins or until a skewer comes out clean. Bake for 45 mins in the bundt tin.
6. Leave the cakes in the tins for 15 mins and then turn out into wire racks to cool fully.
7. To get a flat top on the cake, once it is out of the oven, using your whole palm, press very gently on a clean tea towel on the top of the cake, and this slowly flattens it and saves you having to trim.

For the frosting:
1. Mix the butter, vanilla and icing sugar in a large bowl until the buttercream is silky. Add the milk to loosen it up.
2. Use some of the buttercream between the cake layers and then do a layer to crumb coat the cake. Chill in the fridge for 30 mins or until set.
3. Add another layer of the buttercream to the cake, smoothing the sides.
4. Decorate as you wish. I added a ganache drip and then put the biscuits on top.

It's a very indulgent cake, but for a chocolate lover, perfect!


Wednesday, 30 August 2017

Happy 3rd Birthday Passion for Baking UK

A delicious chocolately cake with an oreo buttercream.
Passion for Baking (UK) is 3 years old this month. To celebrate, I made one of our favourite chocolate cakes, added a lovely oreo buttercream, ganache, and to make it 'healthy' some fresh strawberries on top!

We enjoyed it with my oldest friend, Sharon, who is visiting here from Australia - a wonderful way to celebrate the blog's 3rd birthday.

Thank you to everyone who has followed, commented and made any of my recipes. Your support is very much appreciated.
Enjoy a huge slice of this chocolate indulgence cake.

If you would like to make this cake (& I highly recommend it), the recipe is below:

Chocolate Indulgence Cake

Ingredients:

For the cake:
2 cups self raising flour (300g)
2 cups caster sugar (460g)
3/4 cup cocoa (90g)
1 teaspoon bi-carb soda (baking soda)
1/2 teaspoon salt
1 teaspoon coffee powder
1 cup milk (250ml)
1/2 cup sunflower oil (125ml)
2 eggs
2 teaspoons vanilla extract (10ml)
1 cup boiling water (250ml)

For the frosting:
250 g softened butter
500g icing sugar
1 pack oreo biscuits - crushed in a food processor
2 Tablespoons milk (30ml)
1 teaspoon vanilla extract

Method:

For the cake:
1. Preheat the oven to 180C (350F) and line the base of two 20cm (8 inch) loose bottomed cake tins.
2. Add flour, sugar, cocoa, bi-carb soda, coffee powder and salt and mix together in a large bowl or the bowl of a stand mixer.
3. Whisk together to combine fully.
4. Add milk, vegetable oil, eggs, and vanilla to the flour mixture. Mix on a medium speed until fully combined. Carefully add the boiling water, and mix on high speed for 1 minute to add air to the mixture.
5. Split the mixture evenly between the two cake tins and bake for 35-40 mins or until a skewer comes out clean.
6. Leave the cakes in the tins for 20 mins and then turn out into wire racks to cool fully.
7. Trim the tops of the cakes to even them up (if necessary).

For the frosting:
1. Mix the butter, vanilla and icing sugar in a large bowl until the buttercream is silky. Add the milk to loosen it up. Mix in the crushed oreos.
2. Use some of the buttercream between the cake layers and then do a layer to crumb coat the cake. Chill in the fridge for 30 mins or until set.
3. Add another layer of the oreo buttercream to the cake, smoothing the sides.
4. Decorate as you wish. I added a ganache drip and then put fresh strawberries on top.

It's a very indulgent cake, but for a chocolate lover, perfect!

Strawberries and chocolate are a lovely combination

This delicious chocolate indulgence cake is rich, with an oreo buttercream and fresh strawberries.


Monday, 17 October 2016

Chocolate Indulgence Cake


I have loved making this cake. It's an 18th Birthday cake for our neighbour, my son's babysitter, and one of the loveliest boys ...ahem, men, we know!

His mum asked me to make something chocolately, so this is a double layer chocolate cake, with oreo buttercream in between the layers and on the outside, with a chocolate ganache drip and loaded with maltesers and crispy m&ms.


Chocolate Indulgence Cake

Ingredients:

For the cake:
2 cups self raising flour (300g)
2 cups caster sugar (460g)
3/4 cup cocoa (90g)
1 teaspoon bi-carb soda (baking soda)
1/2 teaspoon salt
1 teaspoon coffee powder
1 cup milk (250ml)
1/2 cup sunflower oil (125ml)
2 eggs
2 teaspoons vanilla extract (10ml)
1 cup boiling water (250ml)

For the frosting:
250 g softened butter
500g icing sugar
1 pack oreo biscuits - crushed in a food processor
2 Tablespoons milk (30ml)
1 teaspoon vanilla extract

Method:

For the cake:
1. Preheat the oven to 180C (350F) and line the base of two 20cm (8 inch) loose bottomed cake tins.
2. Add flour, sugar, cocoa, bi-carb soda, coffee powder and salt and mix together in a large bowl or the bowl of a stand mixer.
3. Whisk together to combine fully.
4. Add milk, vegetable oil, eggs, and vanilla to the flour mixture. Mix on a medium speed until fully combined. Carefully add the boiling water, and mix on high speed for 1 minute to add air to the mixture.
5. Split the mixture evenly between the two cake tins and bake for 35-40 mins or until a skewer comes out clean.
6. Leave the cakes in the tins for 20 mins and then turn out into wire racks to cool fully.
7. Trim the tops of the cakes to even them up (if necessary).

For the frosting:
1. Mix the butter, vanilla and icing sugar in a large bowl until the buttercream is silky. Add the milk to loosen it up. Mix in the crushed oreos.
2. Use some of the buttercream between the cake layers and then do a layer to crumb coat the cake. Chill in the fridge for 30 mins or until set.
3. Add another layer of the oreo buttercream to the cake, smoothing the sides.
4. Decorate as you wish. I added a ganache drip and then layered maltesers and crispy M&Ms on top and around the bottom.

It's a very indulgent cake, but for a chocolate lover, perfect!

Oh, and HAPPY BIRTHDAY BEN!


Thursday, 28 January 2016

Chocolate Orange Mousse Cake


This cake, or pie if you like, is AMAZING. It is so light and lovely....and best of all, it is dairy, egg and nut free. It could also be made gluten and soya free too. I can't claim credit for the recipe as it was shared by another allergy mum on a forum I am on. But it's by far one of the most popular posts on that site.

You could make so many variations to this too...swap the orange essence for mint, or add a few drops of a favourite liqueur for an adult version. To make it taste EXACTLY like a bounty bar, use milk chocolate instead!
For us though, it's perfect the way it is!

Oh and the best bit, it takes about 5 mins to make! (well the base needs to chill, but apart from that...)

What are you waiting for? Dive in!


Chocolate Orange Mousse Cake
Ingredients:
For the mousse:

  • 1 x 400ml tin full fat coconut milk, chilled in fridge ( check the label for the highest coconut content - 70%+ is ideal)
  • 200g suitable dark chocolate (I used Sainsbury's dark cooking choc as it's dairy free and yummy)
  • 2 tbsp icing sugar
  • 2 tsp orange flavouring (use vanilla if you want plain)
For the crust:

  • Approx 10-15 bourbon biscuits - or Oreos will work too. To make it gluten free, substitute for a suitable biscuit.
  • 2-3 tbsp of dairy free butter, melted. (I use Vitalite)
Method:

Blitz the biscuits in a food processor until good and crushed. Add melted ‘butter’ and blitz again until you get to a mouldable consistency. Press the mixture into the base of a loose bottomed cake tin and refrigerate.
Whip the solids from the can of coconut milk (if you use a brand with a high percentage of coconut extract [70%+] and chill first in fridge overnight, it should be fairly thick and you shouldn't need to drain any water off after chilling). I used a brand from the world food section - much higher coconut %, so had very little, if any, liquid to drain off.
Melt the chocolate in the microwave, being careful not to burn it. Add the melted choc, orange flavouring and icing sugar to the whipped coconut milk and whip again until well incorporated.
While still silky, pour over the chilled crust and refrigerate for a couple hours or overnight to set.
Should last 5 days in the fridge - if you can resist!
You can make mini ones in ramekins too. And the mousse makes a great dessert on its own; just pour it into ramekins and chill.

Notes: 

  • I often add raspberries to the top as they add a fresh element to this dish - delicious!
  • If you overmix the mixture and it appears to set in the bowl, put it in the microwave for a few seconds to warm it up ever so slightly and use as normal.

Friday, 1 January 2016

Gluten Free Chocolate Cake


This is my first foray into making gluten free cakes, and I must say I was a little daunted. We have some friends staying from Australia, and two of their children have recently had to change to a gluten free diet. And it was their father's birthday today so to ensure everyone could eat the cake, I plunged in and made one!

Well, the verdict was....delicious! It was so light and fluffy, didn't taste 'gluten free' and most people went back for seconds! I topped it with my favourite coconut milk and dark chocolate ganache. I'm going to keep this short and sweet and go straight onto the recipe.


Gluten Free Chocolate Cake

Ingredients:
  • 3/4 c (150g) butter , softened
  • 2 cups (450g) caster sugar
  • 3 large eggs
  • 2 tsp GF vanilla extract
  • 2 cups (325g)  GF plain flour (all purpose) - I used Doves Farm
  • 3/4 cup (80g) GF cocoa powder
  • 1 tsp GF bi-carb soda (baking soda)
  • 3/4 tsp baking powder
  • 1 cup (250ml) milk (I used coconut milk to suit my son's milk allergy)
Ganache
  • 200g dark chocolate, chopped
  • 3/4 c tinned coconut milk - the solids and some of the liquid


Method:

  1. Heat the oven to 180 deg C (350F). Grease the pan and set aside. I love my Nordic Ware bundt tins and I use cake release spray; it works a dream every time.
  2. Cream butter and sugar until light and fluffy. Add the vanilla and then eggs one at a time, mixing after each one.
  3. In a large bowl sift and combine the dry ingredients together. With the mixer on low, slowly add the dry ingredients and then add the milk and mix for 2 minutes.
  4. Spoon/pour into the prepared pan and bake for 45-50 mins. Check it is ready by inserting a skewer onto the cake. Leave the cake in the tin for about 10 mins and then invert onto a wire rack to cool.
  5. To make the ganache, heat the coconut milk in a small saucepan until it is hot, then pour over the chocolate, stir and let sit for a few minutes until the chocolate has melted. After a few minutes, stir until smooth. Pour over the cake and serve.
( We added sparklers to the cake for the wow factor, instead of candles, although they took so long to light that one was finished before the others started!)

Enjoy this delicious cake!!

Saturday, 18 July 2015

Triple Layer Chocolate Cake


I was looking for a good chocolate cupcake recipe recently, and asked out on my facebook page if anyone could recommend one. I had quite a few choices but decided to go with one from my sister-in-law, Bec. It's one she uses all the time. I read through the recipe and decided to go for a whole cake rather than cupcakes - this recipe has a tag line saying it's 'the best chocolate cake recipe ever'. Okay. We shall see.


It was super easy to make, using normal ingredients you'll find in your cupboard and it's even DAIRY FREE!


I made some slight changes to it:

  • I used coconut milk from the carton (not can) instead of cow's milk - this was to cater to my allergic son (there is no coconut taste at all in the cake)
  • I left out the coffee - I'm one of those odd people who doesn't like coffee.
  • I put raspberry jam between the layers as I don't like too much buttercream.
  • And I cheated and used a tub of Betty Crocker's Chocolate Fudge buttercream, as it is dairy-free, really tasty and much nicer than making buttercream with dairy free 'butter'.
  • So, if dairy is not a problem for you, then follow the recipe as it is (It will probably be even nicer!)
  • I used 3 x 8 inch (20cm) pans, rather than the 2 x 9 inch in the recipe.
Is it the best chocolate cake ever, I'm not sure, but it is really, really nice. The texture is moist and soft, and it feels really luxurious.


You want the recipe, don't you?

Okay well, it's not mine, so I will send you directly over to the site. You'll also find at the bottom of the page a link to her cupcake recipe, but it looks to me like it is pretty much half of this recipe.

From: Add a Pinch:   Best Chocolate Cake (ever)


Enjoy! Kris x


Monday, 25 May 2015

Chocolate Cake with Marshmallow Frosting


This long weekend I wanted to make a special cake from one of my new cookbooks, but I ran out of time to do the extra special effort I wanted. So I reverted back to an old favourite cake, my chocolate bundt cake, without the orange added. I did, however, want to make Sweetapolita's marshmallow frosting to go on top as something different to a ganache, glaze or buttercream.

The marshmallow frosting is so dreamy. It adds a lightness to the cake and a sweetness that is offset by the relatively un-sweetness of the cake.


I was surprised at how much frosting this recipe made - I had made two cakes and was going to make a different colour for the second, but there was so much frosting it covered both cakes so I left them both a pale blue. If you just had one cake, you could also fill layers, or top cupcakes as well from this one batch of frosting. I ended up having to quickly fill the bowl with water and detergent to stop myself licking every left over morsel from inside it!


Chocolate Bundt Cake with Marshmallow Frosting
For the Cake:

1 1/4 cups water
3/4 cup cocoa powder
2 1/4 cups sugar
1 teaspoons salt
2 1/2 teaspoons bi carb soda (baking soda)
2 whole eggs
1 egg yolk
1 1/4 cups buttermilk
1 cup sunflower oil - or a similar neutral oil
1 1/2 teaspoons vanilla extract
2 3/4 cups plain (all-purpose) flour, sifted


For the Frosting:

4 large egg whites (180g)
1 3/4 c caster sugar
2 tablespoons (45g) glucose syrup (light corn syrup)
1/4 teaspoon cream of tartar
pinch of salt
1 teaspoon vanilla bean paste or pure vanilla extract
a few drops of coloured food gel
sprinkles to top


Instructions:

For the cake:

1. Place an oven rack in the centre of the oven and preheat to 180 degrees C.
2. Liberally butter a 10 to 12 cup Bundt pan and set aside. I actually use cake release spray and it works a dream every time. Today I had run out of this, so brushed on melted butter.
3. Whisk water and cocoa powder in a small saucepan and bring to a boil, whisking frequently. Remove from heat and let come to room temperature.
4. In the bowl of a stand mixer with a whisk attachment, mix together sugar, salt, baking soda, eggs and egg yolk on low for just one minute. Add the milk, oil and vanilla extract and mix on low again for another minute.
5. Add the flour and mix on medium speed for 2 minutes more.  Add the cooled cocoa mixture and mix on medium speed for 3 minutes. The batter will seem quite loose and liquid.  Pour into the prepared cake pan no more than three quarters full and bake for 55-65, or until a cake tester or toothpick inserted in the cake comes out clean. If you have extra mixture because your tin is smaller, then pour into another cake tin and cook it as an extra bit of cake.
6. Let the cake cool completely in the pan and then invert onto a cooling rack. Once cooled you can trim off the uneven top to make it level, or just leave it as I did this time.

For the frosting:

1. Wipe the bowl and the whisk attachment with paper towel and a little lemon juice to remove any traces of grease. Add egg whites, sugar, glucose syrup, cream of tartar and salt to the bowl and simmer over a pot of water (not boiling), whisking constantly but gently until it reaches 130˚F (54˚C) on a candy thermometer.
2. Return the bowl to the stand mixer, and beat on low speed for 2 mins, then increase the speed to medium for 2 minutes. Increase the speed to high and mix until thick and glossy - about 5 mins. During this time  add the vanilla and colour and whisk until combined and even.
3. This is best used right away (and tastes best of the day it is made). But it can be kept covered for an hour - this gave me enough time to col my second cake and frost it.
4. To cover the cake, work from the top down, using an offset spatula and swirl with that or the back of a spoon.
5. Sprinkle your choice of decorations on top, dive in and enjoy!


Monday, 16 March 2015

Creme Egg Chocolate Bundt Cake


I really love Cadbury's Creme eggs and with the invention of the mini ones, life is even better. Everyone seems to be making creme egg themed bakes at the moment and so I thought I'd do one too. It's not overly creme-eggy, only on the top, but combined with a really light, but stable chocolate bundt recipe, it was a winner.

I made this for a charity bake sale last week at my school. I'm pleased to say every single slice sold very quickly. Kids love things like this!

Anyway I have used a favourite cake recipe, added a simple icing sugar/water icing and the eggs on top. Very simple!

You're probably tired of me banging on about my Nordic Ware tins over the last few months. I just love them. Such high quality tins (wonder if they want to sponsor me!?) and produce the most beautiful looking cakes.


Chocolate Bundt Cake

Ingredients:
  • 1 cup (220g) unsalted butter      
  • 2 1/4 cups plain (all purpose) flour
  • 3/4 cup unsweetened cocoa powder
  • 1 teaspoon bi-carb soda
  • 1 teaspoon salt
  • 1/2 cup milk
  • 1/2 cup sour cream    
  • 1 1/2 cups sugar
  • 4 large eggs
  • 1 teaspoon vanilla extract
Method:                 
  1. Make the cake: Preheat oven to 180 degrees C. Butter and flour a 12-cup Bundt pan, or I use a cake release spray - it works perfectly every single time. I usually find this makes a bit too much for the Heritage tin I have, as you should fill no more than 3/4 full, so I put the extra into another smaller tin (mini) as a little extra treat cake!
  2. In a large bowl, whisk together flour, cocoa, bi-carb soda, and salt. Mix milk and sour cream in a glass measuring cup.
  3. With an electric mixer on medium-high speed, beat butter and sugar until pale and fluffy, 3 to 5 minutes. Add eggs, 1 at a time, beating well after each addition; add vanilla. If the egg mixture looks like it is having trouble combining properly, you can add a tablespoon of the flour mix to help it come together.
  4. Reduce speed to low; add flour mixture in 2 batches, alternating with the milk mixture and beginning and ending with the flour; beat until just combined.
  5. Transfer batter to prepared pan; smooth top with an offset spatula.
  6. Bake until a cake tester comes out clean, about 55 minutes. (40 mins is using the smaller 6 cup tin).
  7. Transfer pan to a wire rack to cool completely. 
  8. Make the icing: Mix together 1 1/2 cups of icing sugar with a tablespoon or two of water - add the water slowly to gauge how much you need. You want it runny enough to drip down the sides, but not so thin that it all runs off. Add yellow food colouring, again a tiny bit at a time.
  9. Add cut up mini creme eggs on the top.
  10. Cake can be stored at room temperature, in an airtight container for 2-3 days - if it lasts that long!


Sunday, 16 November 2014

Chocolate Bundt Cake


It's been a while since I blogged some of my recipes properly, so you my be inundated as I have been doing a lot of baking lately. This cake is one I made for my son's 6th birthday yesterday. I wanted something simple, but fun, that I could transport to a restaurant in London (on the train!) So it needed to be robust, but tasty.

This is the second time I have made this cake now, the first being for Halloween last month.


My bundt tins are new, my first from the Nordic Ware range and I've really enjoyed using them. For this type of tin, I think you need a fairly stable cake. This recipe, I have to say, is just delicious. It's a Martha Stewart one, and I know I will use it again and again.


Just a few notes for when you are using this recipe and this style of tin. For the Halloween 'pumpkin' cake, I made two cakes separately, trimmed the tops on both to make them flat and the 'sandwiched' them together with a simple orange buttercream in between. I topped that one with some passionfruit icing. The green 'stalk' is just an icecream cone painted with slightly watered down food colouring - I popped it back into a low temp oven to dry out. This is the 12 cup sized tin.

For the blue birthday cake, I used the smaller tin so I also had spare mixture which I used to make some cupcakes with. I didn't trim the top on this one, just turned it over and let it cool. The icing is just very simple, icing sugar and water and I tried out my new gel colours from ProGel. This was turquoise, although looks sky blue really. Still, it's nice to use the tubes to control the amount you use. You let it dry for a few minutes before sprinkling on the 100s & 1000s. This is the 6 cup sized tin.

This really is a delicious chocolate cake, not too sweet and if making it for a more grown up occasion, drizzling chocolate ganache over the top would be perfect.


Chocolate Bundt Cake

Ingredients:
  •  1 cup (220g) unsalted butter, plus more for pan      
  • 2 1/4 cups (320g) self-raising flour
  • 3/4 cup (75g) unsweetened cocoa powder
  • 1/2 teaspoon salt
  • 1  1/2c (375mls)  milk (or milk alternative)
  • 1 1/2 cups (350g) caster sugar
  • 4 large eggs
  • 1 teaspoon vanilla extract
Method:                 
  1. Make the cake: Preheat oven to 180degrees C. Butter and flour (or use a cake release) a 12-cup Bundt pan.
  2. In a large bowl, sift together flour, cocoa, and salt. 
  3. With an electric mixer on medium-high speed, beat butter and sugar until pale and fluffy, 3 to 5 minutes. Add eggs, 1 at a time, beating well after each addition; add vanilla. If the egg mixture looks like it is having trouble combining properly, you can add a tablespoon of the flour mix to help it come together.
  4. Reduce speed to low; add flour mixture in 2 batches, alternating with the milk and beginning and ending with the flour; beat until just combined.
  5. Transfer batter to prepared pan; smooth top with an offset spatula.
  6. Bake until a cake tester comes out clean, about 50-55 minutes. (40 mins is using the smaller 6 cup tin).
  7. Transfer pan to a wire rack to cool for about 10 mins in the tin, before tipping the cake onto the cooling rack. (Cake can be stored at room temperature, in an air tight container up to 7 days).
Give it a try and let me know if you make the cake!
Kris

UPDATE - May 2023: I quickly make this with King Charles III Coronation sprinkles tonight. Covered in a delicious chocolate ganache made with dark chocolate and Emlie Plant cream. This is just for my family.


Saturday, 16 August 2014

Double Chocolate Muffins

I know most people have their favourite chocolate muffin recipe already, but in case you're looking for a new one to try, I highly recommend this one. Taken from 'Call Me Cupcake' it's utterly delicious and very chocolately.

I was watching the catch up to The Great British Bake Off this week, having missed the first show as we were away camping, and I was craving some chocolate muffins. Not sure why, since they were doing other cakes, but anyway.....

I have made these twice this week, the first time following the recipe and using chopped up chocolate throughout and on top.....and the second time I used chocolate chips. Both were lovely, with the chopped up chocolate melting more, but I do like the choc bits!

I substituted the buttermilk for soya milk, but only so my son can eat them. I'm sure it's a lovey richer flavour with the buttermilk.

Oh and in the second batch, I also added about half a cup of desiccated coconut, mainly because I love coconut in everything and I especially liked it in these.


I've also started using the baking cups which I buy from Iced Jems. You can buy here and this link will answer and questions you have about them. I love them!

Double Chocolate Muffins
Makes 12-18 in standard muffin tins, but makes 15-20 in the baking cups.

 Ingredients:
300 g plain  flour
80 g cocoa powder
1 tbsp baking powder
1/2 tsp bi-carb of soda
1/4 tsp salt
250 g granulated sugar
100 g butter, melted
250 ml buttermilk (about 1 cup or 8.45 US fluid ounces)
2 large eggs
150 g dark chocolate (70%), coarsely chopped (or chocolate chips)


Method:

1. Heat oven to 170°c (340F). Prepare a cupcake pan with 12 muffin liners or if using the baking cups, set them up on a baking tray.

2. Mix flour, cocoa powder, baking powder, baking soda, sugar and salt in bowl. Set aside.
3. Mix butter, buttermilk and eggs in a large bowl.
4. Add wet ingredients to dry ingredients and mix until just combined. Stir in chocolate, but save 1/4 of the chocolate to put on top of muffins.
5. Divide batter between 12 liners, filling them completely full or 3/4 full for the baking cups.
6. Sprinkle with remaining chocolate pieces.
7. Bake for 16-18 minutes or until a cake tester comes out almost clean - slightly less time for the baking cups, as they are smaller.