Tuesday 18 November 2014

Passionfruit Macarons


Basic macaron with passionfruit curd buttercream filling
I hosted a lovely lunch for some good friends last week, for my friend Jen's birthday. It was a good chance for me to do some baking, something I find very relaxing. I wanted to try and avoid chocolate for a change, so decided to go for a little tropical touch.

I whipped up a batch of passionfruit curd, and then made these basic macaron shells using plain icing sugar. I like this macaron recipe so much, it always seems to work for me. I filled them with some curd flavoured buttercream. I had to add LOADS of passionfruit curd to the buttercream to get the flavour and even then it was very subtle, but they were so delicate.

Ready for lunch

Passionfruit Curd

The finished product when I originally made these for my son's teachers.
Here's is a the recipe for the Passionfruit Curd I made last week. I used it in a victoria sponge with a layer of whipped cream on top and also as the filling in some macarons.

And of course there was some left over, so I have had that tonight drizzled over vanilla icecream. Oh my goodness, the MOST delicious dessert. Simple, but goooood.

Passionfruit Curd
 
Ingredients:
  • ⅔ cups (160ml) passionfruit pulp
  • 1 tablespoon lemon juice
  • 165g butter, chopped
  • ¾ cup (200g) caster (superfine) sugar
  • 3 eggs
  • 2 egg yolks
Method:
  1. Place the passionfruit pulp, lemon juice, butter and sugar in a medium saucepan over medium heat and stir until butter is melted and sugar dissolved.
  2. Place eggs and egg yolks in a bowl and whisk until combined. Gradually add the passionfruit mixture, whisking continuously.
  3. Return curd mixture to pan and cook, stirring, over low heat, for 6–7 minutes or until thickened (mine took about 15 mins) and mixture coats the back of a spoon.
  4. Allow to cool and store in the fridge, covered with plastic wrap. Makes 2½ cups.
  5. Store in the refrigerator for up to one week.


Sterilizing the jars and melting the butter, pulp and sugar
 
Thickening up


Getting into the jars prior to working on presentation.

Sunday 16 November 2014

Chocolate Bundt Cake


It's been a while since I blogged some of my recipes properly, so you my be inundated as I have been doing a lot of baking lately. This cake is one I made for my son's 6th birthday yesterday. I wanted something simple, but fun, that I could transport to a restaurant in London (on the train!) So it needed to be robust, but tasty.

This is the second time I have made this cake now, the first being for Halloween last month.


My bundt tins are new, my first from the Nordic Ware range and I've really enjoyed using them. For this type of tin, I think you need a fairly stable cake. This recipe, I have to say, is just delicious. It's a Martha Stewart one, and I know I will use it again and again.


Just a few notes for when you are using this recipe and this style of tin. For the Halloween 'pumpkin' cake, I made two cakes separately, trimmed the tops on both to make them flat and the 'sandwiched' them together with a simple orange buttercream in between. I topped that one with some passionfruit icing. The green 'stalk' is just an icecream cone painted with slightly watered down food colouring - I popped it back into a low temp oven to dry out. This is the 12 cup sized tin.

For the blue birthday cake, I used the smaller tin so I also had spare mixture which I used to make some cupcakes with. I didn't trim the top on this one, just turned it over and let it cool. The icing is just very simple, icing sugar and water and I tried out my new gel colours from ProGel. This was turquoise, although looks sky blue really. Still, it's nice to use the tubes to control the amount you use. You let it dry for a few minutes before sprinkling on the 100s & 1000s. This is the 6 cup sized tin.

This really is a delicious chocolate cake, not too sweet and if making it for a more grown up occasion, drizzling chocolate ganache over the top would be perfect.


Chocolate Bundt Cake

Ingredients:
  •  1 cup (220g) unsalted butter, plus more for pan      
  • 2 1/4 cups (320g) self-raising flour
  • 3/4 cup (75g) unsweetened cocoa powder
  • 1/2 teaspoon salt
  • 1  1/2c (375mls)  milk (or milk alternative)
  • 1 1/2 cups (350g) caster sugar
  • 4 large eggs
  • 1 teaspoon vanilla extract
Method:                 
  1. Make the cake: Preheat oven to 180degrees C. Butter and flour (or use a cake release) a 12-cup Bundt pan.
  2. In a large bowl, sift together flour, cocoa, and salt. 
  3. With an electric mixer on medium-high speed, beat butter and sugar until pale and fluffy, 3 to 5 minutes. Add eggs, 1 at a time, beating well after each addition; add vanilla. If the egg mixture looks like it is having trouble combining properly, you can add a tablespoon of the flour mix to help it come together.
  4. Reduce speed to low; add flour mixture in 2 batches, alternating with the milk and beginning and ending with the flour; beat until just combined.
  5. Transfer batter to prepared pan; smooth top with an offset spatula.
  6. Bake until a cake tester comes out clean, about 50-55 minutes. (40 mins is using the smaller 6 cup tin).
  7. Transfer pan to a wire rack to cool for about 10 mins in the tin, before tipping the cake onto the cooling rack. (Cake can be stored at room temperature, in an air tight container up to 7 days).
Give it a try and let me know if you make the cake!
Kris

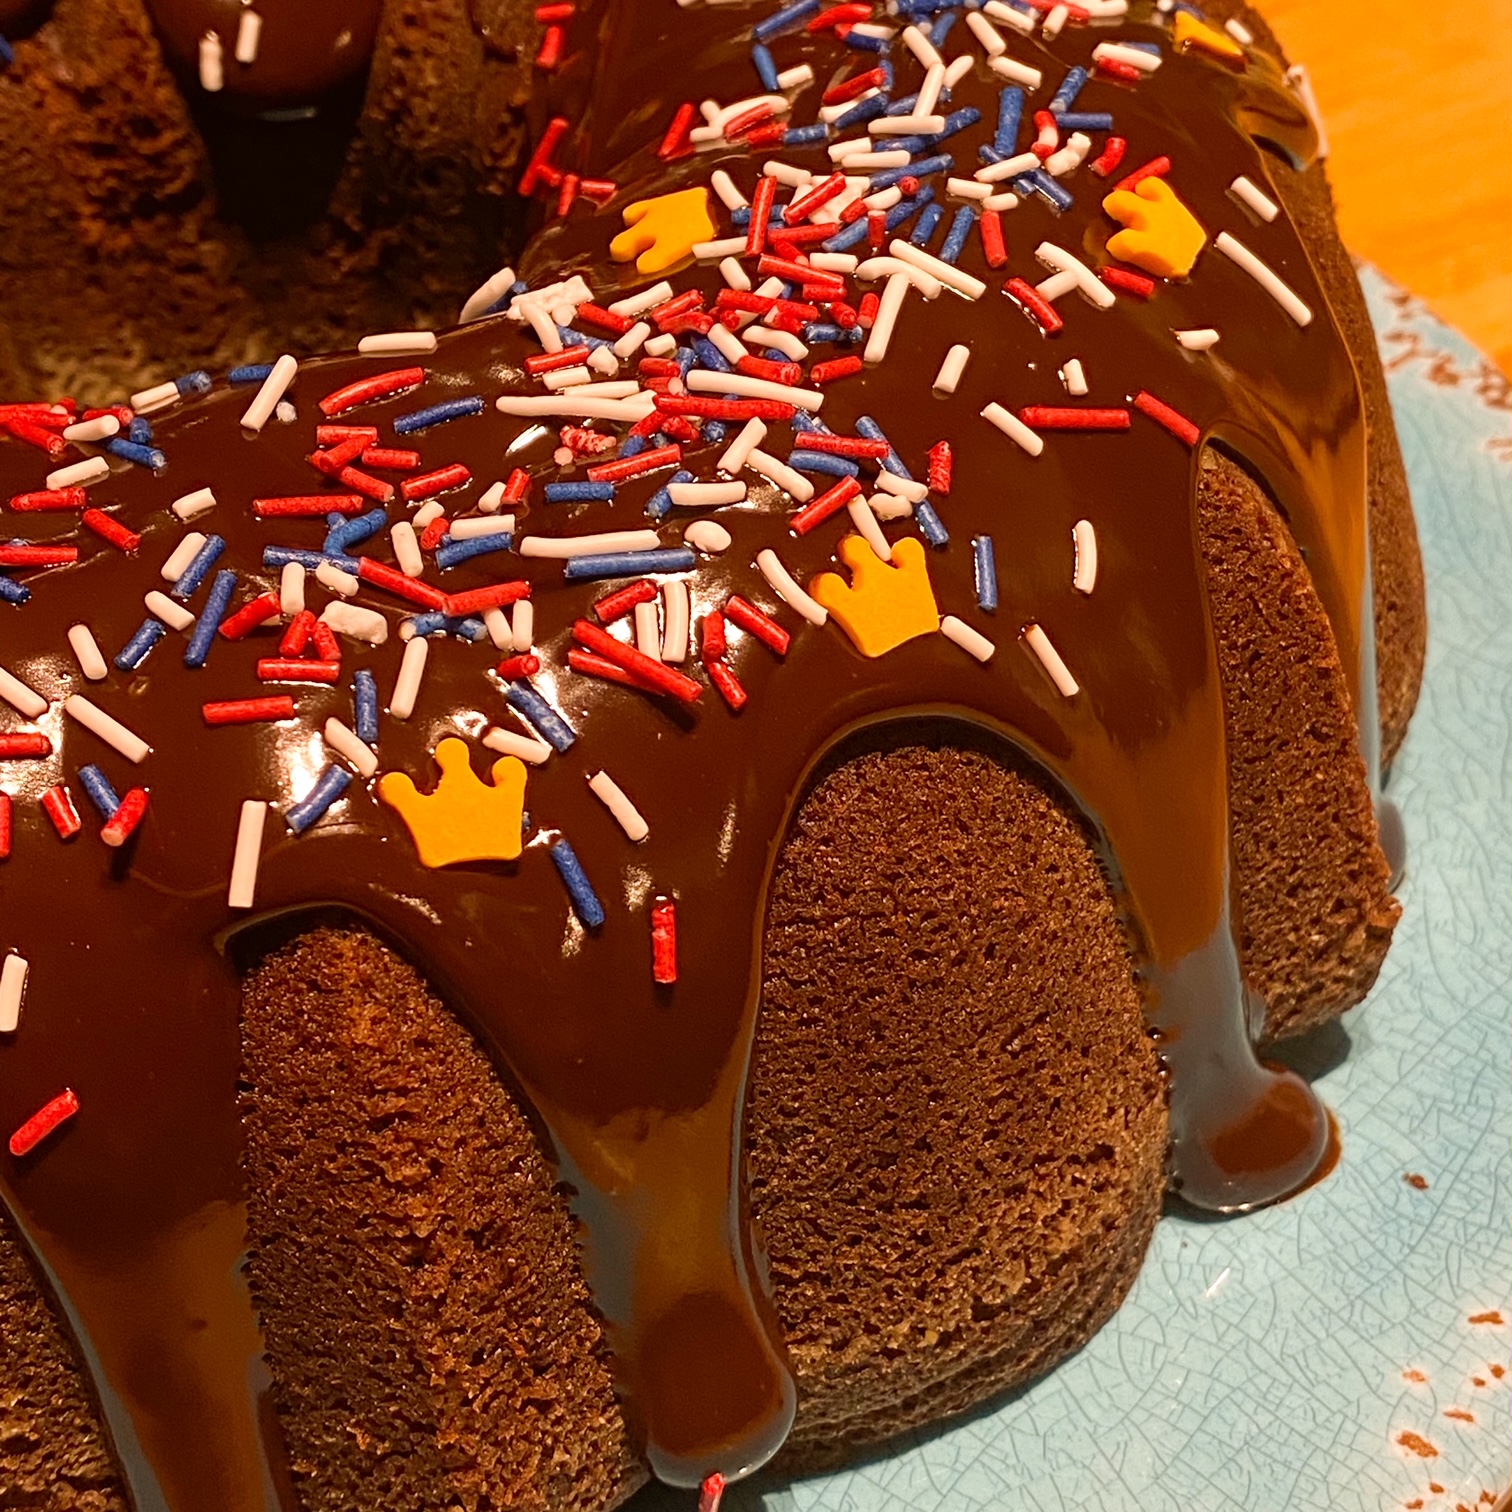
UPDATE - May 2023: I quickly make this with King Charles III Coronation sprinkles tonight. Covered in a delicious chocolate ganache made with dark chocolate and Emlie Plant cream. This is just for my family.