Showing posts with label strawberries. Show all posts

Wednesday, 30 August 2017

Happy 3rd Birthday Passion for Baking UK

A delicious chocolately cake with an oreo buttercream.
Passion for Baking (UK) is 3 years old this month. To celebrate, I made one of our favourite chocolate cakes, added a lovely oreo buttercream, ganache, and to make it 'healthy' some fresh strawberries on top!

We enjoyed it with my oldest friend, Sharon, who is visiting here from Australia - a wonderful way to celebrate the blog's 3rd birthday.

Thank you to everyone who has followed, commented and made any of my recipes. Your support is very much appreciated.
Enjoy a huge slice of this chocolate indulgence cake.

If you would like to make this cake (& I highly recommend it), the recipe is below:

Chocolate Indulgence Cake

Ingredients:

For the cake:
2 cups self raising flour (300g)
2 cups caster sugar (460g)
3/4 cup cocoa (90g)
1 teaspoon bi-carb soda (baking soda)
1/2 teaspoon salt
1 teaspoon coffee powder
1 cup milk (250ml)
1/2 cup sunflower oil (125ml)
2 eggs
2 teaspoons vanilla extract (10ml)
1 cup boiling water (250ml)

For the frosting:
250 g softened butter
500g icing sugar
1 pack oreo biscuits - crushed in a food processor
2 Tablespoons milk (30ml)
1 teaspoon vanilla extract

Method:

For the cake:
1. Preheat the oven to 180C (350F) and line the base of two 20cm (8 inch) loose bottomed cake tins.
2. Add flour, sugar, cocoa, bi-carb soda, coffee powder and salt and mix together in a large bowl or the bowl of a stand mixer.
3. Whisk together to combine fully.
4. Add milk, vegetable oil, eggs, and vanilla to the flour mixture. Mix on a medium speed until fully combined. Carefully add the boiling water, and mix on high speed for 1 minute to add air to the mixture.
5. Split the mixture evenly between the two cake tins and bake for 35-40 mins or until a skewer comes out clean.
6. Leave the cakes in the tins for 20 mins and then turn out into wire racks to cool fully.
7. Trim the tops of the cakes to even them up (if necessary).

For the frosting:
1. Mix the butter, vanilla and icing sugar in a large bowl until the buttercream is silky. Add the milk to loosen it up. Mix in the crushed oreos.
2. Use some of the buttercream between the cake layers and then do a layer to crumb coat the cake. Chill in the fridge for 30 mins or until set.
3. Add another layer of the oreo buttercream to the cake, smoothing the sides.
4. Decorate as you wish. I added a ganache drip and then put fresh strawberries on top.

It's a very indulgent cake, but for a chocolate lover, perfect!

Strawberries and chocolate are a lovely combination

This delicious chocolate indulgence cake is rich, with an oreo buttercream and fresh strawberries.


Monday, 30 May 2016

Chocolate Mousse and Strawberry Cake


I saw a similar cake to this recently and wanted to give it a go, but adapted to suit the dietary needs in our family. So I have used all my own recipes to make it suitable. It's actually very easy to make, there's just a few steps to it, but none of it is difficult.
There is a brownie base, filled with strawberries and chocolate mousse, topped with chocolate ganache and strawberries.


Of course, if you have your own normal mousse recipe, you could substitute it in here, but for this one, I have made it dairy free. It's a recipe I have made often, usually in this recipe here.


Chocolate Mousse and Strawberry Cake

Ingredients:

Brownie Base
*(this makes enough for this base, and an extra tin of brownies)
200g butter
200g dark chocolate
3 eggs
250g light brown or caster sugar
100g self raising flour
25g cocoa
125g dark chocolate chips

500g strawberries

Chocolate Mousse
400g dark chocolate
2 x tin coconut milk - chilled in the fridge, use the solids only
1 tablespoon icing sugar

Ganache
200g dark chocolate
1 x tin coconut milk - solids only

Method:
Brownie base
Preheat the oven to 180 degrees C and grease and line a 20 cm springform tin (base only) and a small square tin for the extra mixture.
Melt the butter and chocolate over a pan of simmering water. Take off the heat once melted and stir until smooth. Whisk the sugar and eggs together and add the chocolate. Stir in the flour, cocoa and chocolate chips.
Pour half the mixture into the round tin, and the remaining into the square tin.
Bake in the oven for 35 mins (round tin) and 40 mins (square tin).
Remove from the oven and allow to cool in the tin.

Strawberries
Slice the tops off the strawberries to make a flat top. Slice enough in half to line the outside edge of the brownie base. The rest will stay whole to fill the tin.

Chocolate Mousse
Chop the chocolate into small pieces and melt in the microwave, in 30 sec bursts, stirring until smooth.
Remove the solids only from the tins of coconut milk and place into a bowl with the icing sugar. Using a hand held electric mixer, whip until light and fluffy. Pour in the melted chocolate and mix gently until all combined. If you over mix, you will cool it too much and it will start to set. This can be easily fixed by putting the bowl in the microwave for 10 secs to melt it slightly. Mix again by hand.
Place a few spoonfuls of the mousse in the round tin on top of the brownie base and then arrange the cut strawberries around the edge. This thin layer of mousse will help stop the strawberries from making the base too soft.
Pour the remaining mousse mixture over the strawberries making sure it gets into all the crevices between the strawberries. An alternative is to pipe the mousse on, but I found if the mousse is a bit runnier, it is easier to just pour and then tap the tin on the bench to help the mousse fill the spaces.
Chill in the fridge until set, about 30 mins.

Ganache
Chop the chocolate finely and place into a bowl. Heat the solids and a dribble of the liquid from the tin of coconut milk, in a small saucepan until simmering but not boiling. Pour over the chopped chocolate, stir slightly and then leave to melt. After a few minutes, stir until smooth and glossy.
Pour half over the top of the mousse so it is smooth and then return to the fridge to set, about 30 minutes. The rest can be kept in an airtight container to reuse.
(You could, of course, also use the remaining ganache like a fondue and dip in marshmallows, strawberries, raspberries etc). We may or may not have done that last night!

Top with strawberries.

Remove it all from the fridge for about an 45 mins before serving to allow the mousse to soften slightly.


Enjoy!


Thursday, 20 August 2015

Strawberry Jam - the easy way


The last time I made jam was about 18 years ago, when one summer in Australia, my lovely friend Liz and I realised we both had a glut of fruit - she had a heaving plum tree and my Dad had an apricot tree dripping with ripe fruit. So we picked and halved and both made some plum and some apricot jam. One of my lovely Grandads was in Canberra visiting at the time and I will always remember how complimentary he was about the jam; he was so supportive, and the jam did taste delicious, it just wasn't as set as it should have been.

So this holidays I wanted to have another go with strawberries. We have a local Pick you Own (PYO) farm near us called Garson's Farm, and it is full of all kinds of seasonal fruit and vegetables to pick. So, yesterday on impulse, my son and I went over to get strawberries. We were fairly late in the day so all the best and easy to find were almost gone, but we managed to find a decent batch of shiny red ones.

For this jam, I took the easy way out and used Jam Sugar. It comes with pectin already included. It's probably not that much easier than buying pectin separately, but for a novice like me it make the whole jump into jamming again easy and motivating!


This morning I couldn't wait to try some on my toast - it was so delicious, although very sweet....I would normally put less on my toast but for my first batch I lathered it on!


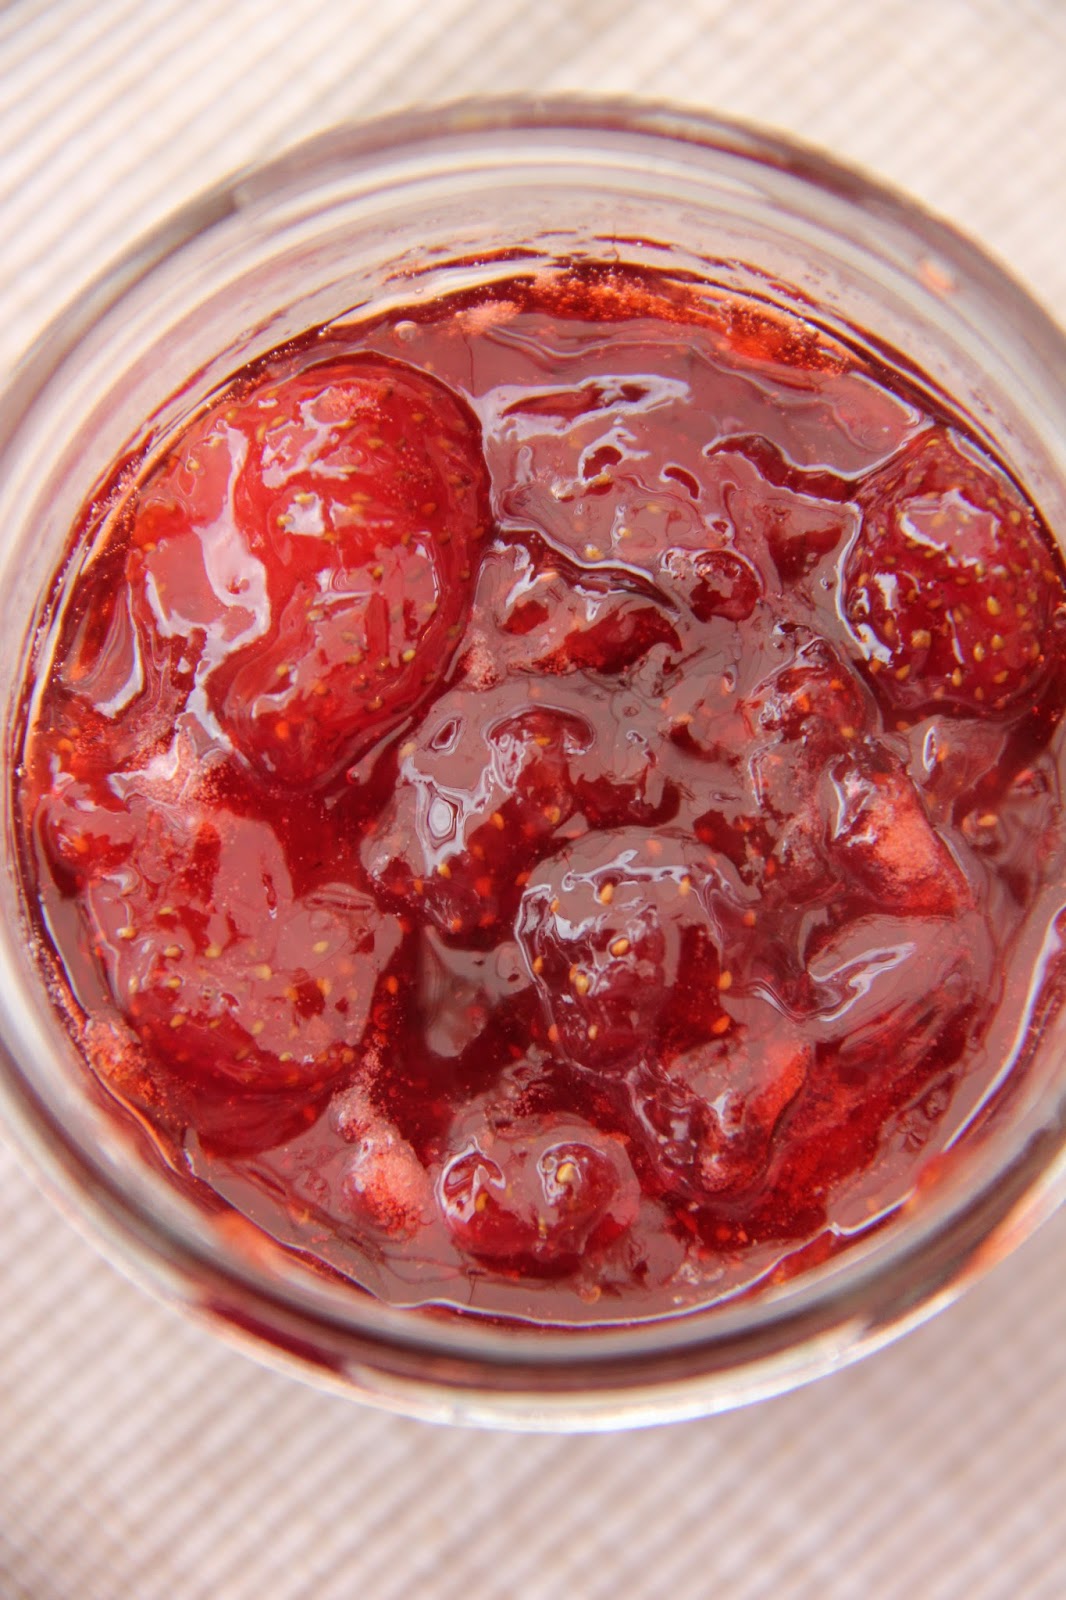
I love all the chunks of strawberry - I've always liked my jam with bits in it, seeds, pieces; somehow it feels more real.


Strawberry Jam

Ingredients:

1 kg fresh strawberries, washed, drained and hulled
1 kg jam sugar
Juice of 1 lemon

Method:

1. Put the strawberries and lemon juice in a very large, heavy bottomed saucepan and heat for a few minutes to soften.
2. Add the jam sugar and stir until dissolved and then boil steadily for about 15 minutes, or until setting point is reached. I added my candy thermometer to the pan and could see it boiling consistently at 105C/220F.
3. To test for the setting point, place a teaspoon of jam onto a cold plate, leave for a few seconds, push the jam with a finger, if the surface wrinkles, setting point has been reached. I did this quite a few times from about the 6 min mark. I took it off only because it was starting to stick to the bottom on the saucepan. It could have done with a bit more cooking I think. Perhaps I should have stirred the mix more as it boiled to avoid the sticking.
4. Remove the foam from the top with a slotted spoon while it is hot. Allow to stand for a few minutes and then spoon into sterilised jars. Seal and allow to cool on the bench.
5. Once opened, store in the fridge.


Notes:
To sterilise the jars, I washed them and then put them into an oven at 110C for 15 minutes. I dipped the orange seals into boiling water.
When putting into the jars, it really helps to have a metal, wide opening funnel - you can buy them easily at this time of year.
I will admit to using my potato masher to break the strawberries up a bit as they boiled!


Enjoy! x