Showing posts with label Easter. Show all posts

Saturday, 27 March 2021

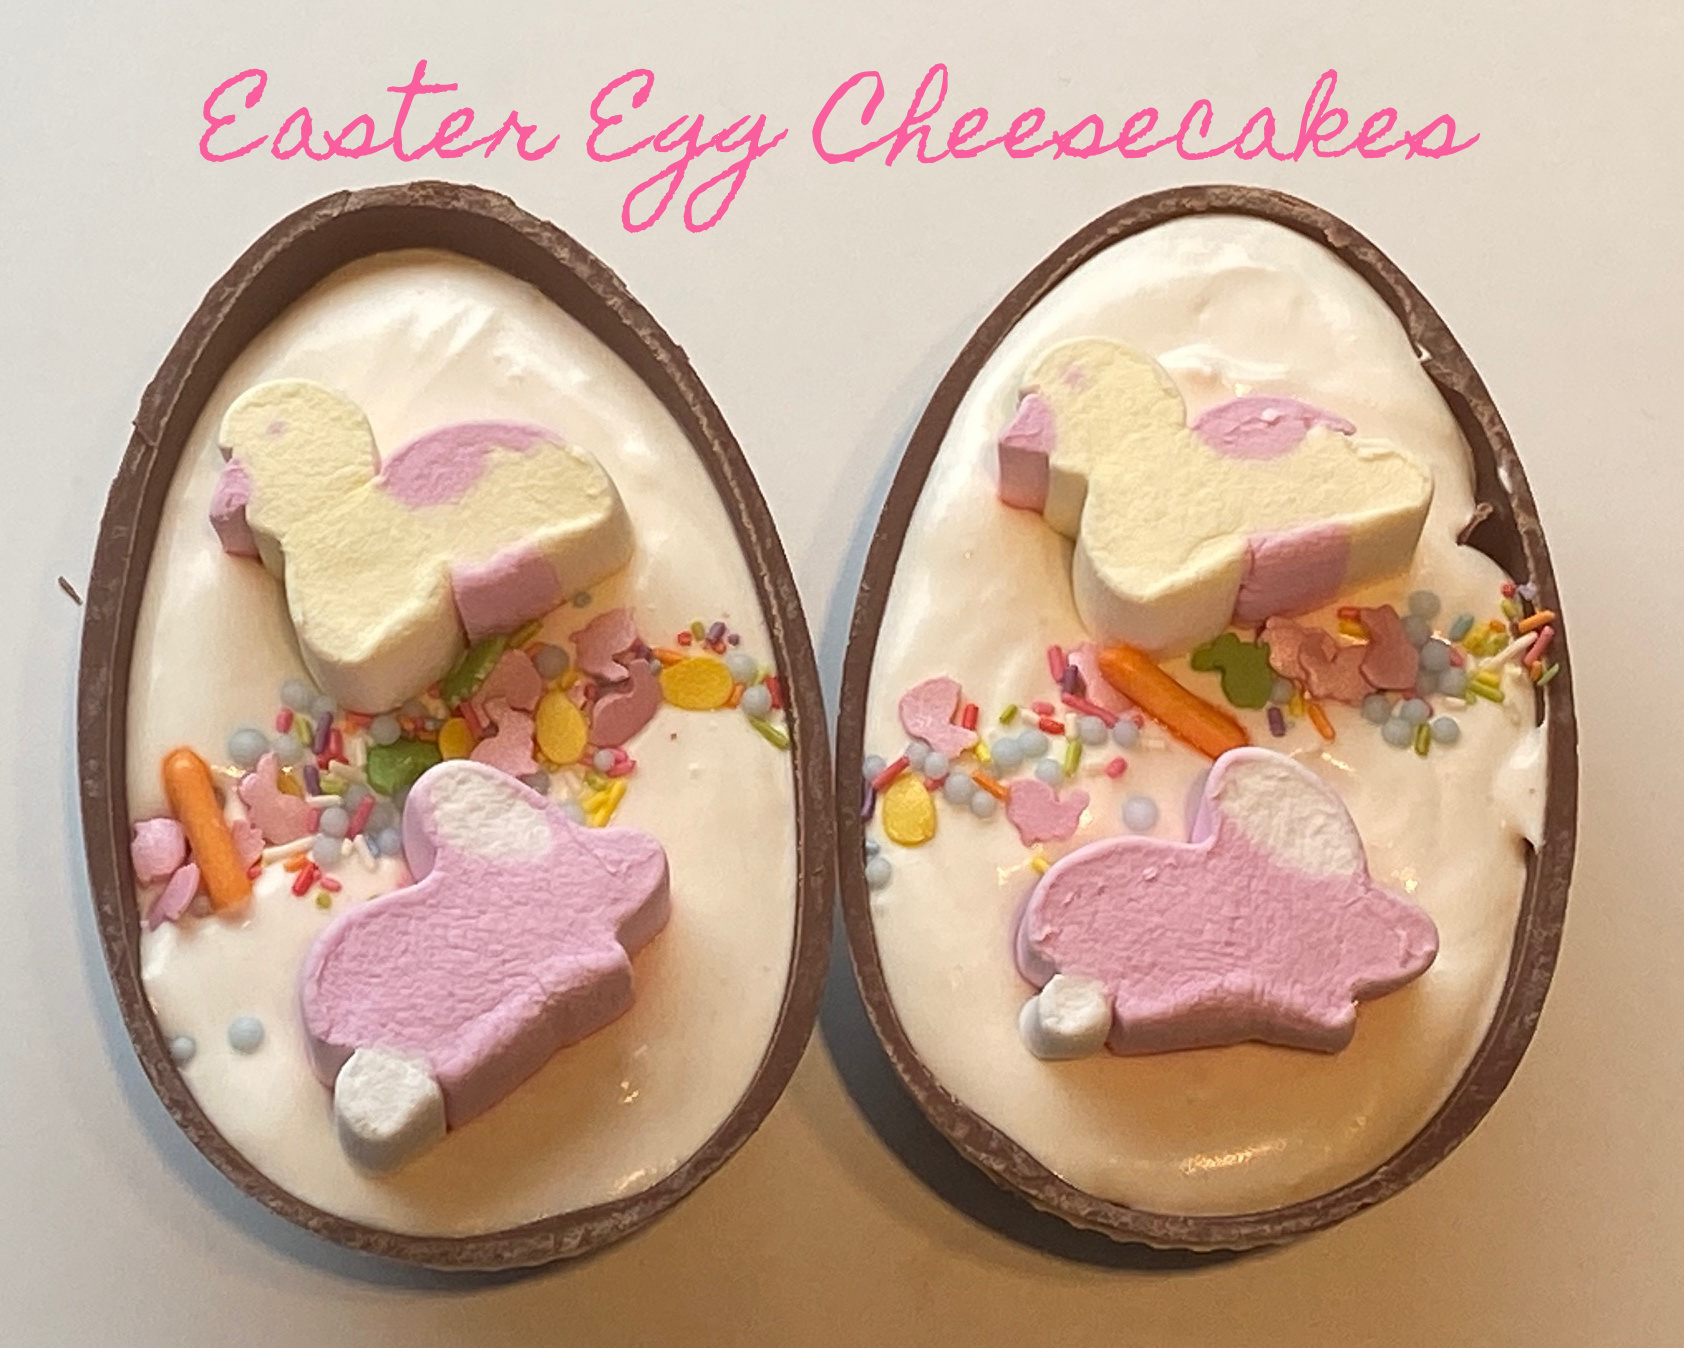
Chocolate Easter Egg Cheesecakes


This is a fun way to present a lemon vanilla cheesecake at Easter time. I have left out the traditional biscuit base, but you could always add that in if you wanted to, and add a layer of it in the bottom of the Easter egg.

I have made this filling dairy free but I will add both versions below so you have a choice. For my son's (the dairy free version) I also made  the chocolate egg as well using a mold I had at home anyway. I melted dairy free chocolate and  built up layers of the melted chocolate, chilling between layers. This recipe is so easily made dairy free and it tastes delicious!

Chocolate Easter Egg Cheesecakes

Serves 3 medium sized half-eggs (double the recipe for more)

Ingredients:

  • 170g cream cheese (or dairy free version)
  • 100ml double cream (or Elmlea plant double cream)
  • 40g icing sugar, sifted
  • 1t vanilla
  • juice of 1/4 lemon
  • 3 x half easter eggs
  • decorations - such as marshmallows, mini eggs, mini creme eggs, sprinkles - whatever you have or would like to use.
Method:
  1. Combine the cream cheese, sugar, lemon and vanilla in a bowl, whisking until it is smooth and well combined.
  2. In a different bowl, whip the cream until it is thick with soft peaks and then fold it carefully into the cream cheese mixture until it is fully combined (you can whisk it briefly too).
  3. Spoon into the chocolate Easter eggs, decorate and set in the fridge for 2-3 hours but preferably overnight.


Friday, 26 March 2021

Rocky Road (Easter edition)


A well-loved family favourite has been given an Easter makeover this year. You can, of course, adapt your decorations to suit what you have available, such as mini eggs, mini creme eggs etc.
I would normally make this into one batch in a 20cm x 20cm lined tin, but today I decided to split it between 3 trays to give as gifts to friends (we kept one for our family). It's always lovely to share the goodies!

If making these outside a celebration time, finish the batch off with a sprinkling of icing sugar over the top to decorate.

ROCKY ROAD

Serves 16
Ingredients:
  • 200g rich tea biscuits 
  • 300g dark chocolate
  • 45mls golden syrup (3 x 15ml spoons)
  • 125g butter
  • 100g mini marshmallows

Method:
1.  Place the biscuits onto a ziplock bag and use a rolling pin to crush them into a combination of crumbs and small pieces. Tip the biscuits into a large bowl. 
2.  In a saucepan, combine the chocolate, butter and golden syrup and melt over a low heat. Take out 125ml of the melted mixture and set aside.
3. Pour the larger chocolate mixture into the biscuits and mix to combine. Add the marshmallows and mix until almost all coated and then pour this mixture into the lined pan (20cm x 20cm if making one batch). Spread evenly and smooth the top with a spoon.
4. Pour the remaining chocolate mixture over the top and spread it out to create a smoother layer. Add any decorations and then refrigerate for 2 hours or overnight.  If adding icing sugar on top, do so once it has set in the fridge.
5. Remove from the pan and slice up into 16 pieces. Store in an airtight container, preferably in the fridge.


Tuesday, 16 April 2019

Easter Biscuits


Easter Biscuits
I just love Easter baking; I think it's my favourite time of the year for baking (Christmas comes a close second). I especially love when I have the time to make biscuits and to decorate them properly. I've done them many times over the years, and I never tire of them.

This year, my son, once again, wanted to join in. I must say his piping skills, and the care he took really paid off. You can see his first bunny with the blue ribbon, and then his second the next day, with the pink ribbon. What a difference! He loved learning the technique of putting spots wet on wet, then dragging the skewer through to create the heart and feathered effects (his top two bunnies).


Anyway the key to making these biscuits and having them keep their shape, it to chill and freeze between stages. It really helps if you have multiple baking trays/cookie sheets, but it's not essential.

Also, ideally you would use proper royal icing to decorate as it sets faster and harder than what I used, but because Thomas is allergic to egg whites, he can't have that. So, I have again used aquafaba (chickpea juice) to make this version. Honestly you cannot tell the difference in taste.

When rolling out the dough I use this roller, from Joseph Joseph as it has the graduated ended so you can roll your dough out to the desired thickness evenly. This is a bit of a luxury, but before I had this, I would sometimes put out two wooden spoons or you can buy and cut dowelling to have the same effect. Consistency of thickness though, is important. (I use the red level)


One final comment, this makes a large batch of biscuits - I made 75 Easter ones. If you want fewer, you can halve the recipe.


Now, off we go!

Ingredients:
  • 750 g plain (all purpose) flour
  • 450 g butter, softened
  • 400 g caster sugar
  • 2 large eggs
  • 1 Tablespoon (15 mls) vanilla extract

Method:

1. In a large bowl, sift the flour. Pre-heat the oven to 160 degrees C
2. Using the paddle attachment on your mixer, cream the softened butter and sugar together for about 5 mins until pale and fluffy. Add the vanilla and beat in the eggs, one at a time.
3. Add flour mixture and mix on low speed until combined.
4. At this stage, I start rolling out about a fifth of the mixture at a time. I cut two pieces of parchment paper to fit my baking trays, and I roll out enough dough for that tray, between the paper. This avoid it sticking to the rolling pin. I then put the tray of rolled out dough into the fridge to chill for 15 mins. I continue with the remaining dough. If you run out of trays, roll it put anyway and put it flat into the fridge. You can put it on top of each other. (Keep it between the two layers of parchment). Many recipes will tell you to split the dough in half and refrigerate, but then it is MUCH harder to roll out. This step saves you a lot of work!
5. Take a chilled tray from the fridge, cut out the shapes you want, place onto the baking tray, slightly apart, and then place into the freezer for 15 mins. I work on a rotation from now one. One tray in the freezer, the next cut out in the fridge, and then as one goes to the oven, the next to the freezer, the next being cut out and chilled. Get it??
6. From the freezer, put the tray into the oven and cook for 10-13 mins, depending on your oven. Mine is fast and hot so cooked them for 11, until they were slightly golden around the edges.
7. Remove from the oven and allow to cool slightly, then carefully transfer to a wire rack to cool completely.

Egg free Icing:

90 ml aquafaba (the liquid from a can of chickpeas)
600 g icing sugar
1 teaspoon vanilla extract

Place all the ingredients into a mixing bowl and mix on medium speed until it is combined fully. You may need to add a tiny more aquafaba (or water) to loosen it slightly.

At this stage it is the right consistency for the outlining of the shapes. To then make it runny enough to flood (fill in) you need to add very small amounts of water to get the right consistency. Don't let it get too runny!
Add colour as required. I ended up with two piping bags per colour, one to outline and one to flood.

Any questions, do let me know and I'll help however I can!


Saturday, 15 April 2017

Chocolate Orange Hot Cross Buns


I love making hot cross buns! This year I made a batch of my lovely Cranberry and Orange buns but I wanted to also make some that my allergic son could also eat. So I used that as my basic recipe, and changed it to make it dairy free.
Needless to say my son LOVED them, and I must admit I did too!
If you've never made hot cross buns before, honestly they are quite easy, but they just take a bit of time due to the two lots of proving that are necessary for a light, fluffy bun.

Anyway, do have a go!


Chocolate Orange Hot Cross Buns


For the Buns:
300 ml milk - I used soya for my son
500 g strong white flour
75 g caster sugar
1 tsp salt
7g sachet fast-action yeast
50 g butter - melted - I used Stork block - non dairy
1 free range egg, beaten
100 g dark chocolate chips - dairy free
2 oranges, zest of both 
1 tsp mixed spice
sunflower oil for greasing the bowl

For the Cross:
75 g plain flour
5 tbsp water

For the Glaze:
1 tbsp caster sugar
1 tbsp boiling water

METHOD:
1. Bring the milk to the boil and then take it off the heat, transfer to a bowl and leave to cool down until it reaches hand temperature.
2. Zest the oranges into a small bowl. 
3. Mix the flour, spices, salt, sugar, yeast, butter and egg together in a bowl and then slowly add the warm milk, mixing until it forms a soft, sticky dough.
4. Knead the dough for about 5 mins or until is is smooth and elastic. I used the dough hook on my Kenwood mixer for this stage.
5. Put the dough into a lightly oiled bowl, cover with oiled cling film and leave to rise in a warm place for about an hour or until doubled in size. 
6. Tip the dough out of the bowl onto the bench top and knead it to remove any air bubbles. Flatten it out into a rectangular shape and sprinkle the chocolate chips and orange zest onto the dough. Fold the dough over to incorporate the toppings, and knead so they are well combined.
7. Divide the dough into 12 even sized pieces, and roll each piece into a smooth ball on a lightly floured surface - you shouldn't need much flour at this stage. Also, it's okay to knead these pieces a bit more to shape them. Arrange them onto a tray lined with baking parchment, leaving enough room so that they just touch when they expand and rise (about 1-2cm apart depending on their size).
8. Heat the oven to 180 degrees Celsius.
9. Set aside to prove for another hour. At this stage I placed the tray into a clean plastic shopping bag rather than covering in cling film.
10. For the cross, mix the flour with 5 tablespoons of water in a small bowl. Add the water a tablespoon at a time, so that you get the right consistency for a thick paste. Spoon the paste into a disposable piping bag (or ziplock bag) and trim off the bottom of the bag - a small opening is all you need. Pipe along each row of buns in one direction only, then come back and do the opposite direction to make crosses, all in one go. Don't do individual buns, it will look messy and take so much longer.
10. Bake for 20-25 mins on the middle shelf in the oven, or until golden brown.
11. Mix the caster sugar and water together until the sugar dissolves, and then when they buns are straight out of the oven brush them liberally with the glaze so the tops are all covered.
12. Gently rip the buns apart to eat and enjoy!

Ready for the oven!


Glazed with the sugar syrup straight out of the oven.

Sunday, 20 March 2016

Easter Bunny Cake


I love Easter and the baking possibilities. As you will have seen, when it comes to seasonal baking I rarely have any sophistication, instead going for the cute and fun. This cake is no exception. I got the idea from the Stork website and have added my own twist with the surprise inside.

The first time I made this recipe, I then split the mixture into 4 tins and they came out very thin. I decided to use them to make the mini bunnies - I got two!


I then made the cakes again, this time doubling the recipe to get 4 decent sized layers as you can see above and below.

To add even more interest I also coloured each layer a slightly different shade of pink to create the ombre effect. 

With a cute marshmallow tail and nose, fondant eyes and chocolate ears and mouth, here you have a gorgeous Easter Bunny cake!
All of this was made for my son and his friends for their Easter craft session this morning.

If you would like a video and original recipe, click here to go to the Stork site. For the sake of having the cake recipe easily accessible, I will post it here as well. For all the extra details, it's worth heading to their site.

Easter Bunny Cake
 (Note: I doubled this recipe to get these 4 thick layers)

CAKE:
  • 225 g butter, softened
  • 185g caster sugar
  • 4 eggs, large
  • 1 tsp vanilla extract
  • 225g self raising flour ( or 220g plain flour and 1tsp baking powder)


VANILLA FROSTING:
  • 175 butter, softened
  • 500g icing sugar (powdered sugar)
  • 1 tsp vanilla extract
  • 1 tbsp cooled boiled water
* you may need more than this if filling all the layers as well.


TO DECORATE:

  • 100g white chocolate
  • pink sprinkles (or I used a few drops of pink colouring in a bag with some sugar and massaged the colour in and used that)
  • white ready to roll icing
  • pink and white marshmallows
  • 10g dark chocolate, melted - for the eyes, mouth and nose
  • 80g dark chocolate, melted - for the ears.


METHOD:

  1. Grease and line 4 x 20cm (8 inch) sandwich tins with baking paper on the base.
  2. Preheat the oven to 180 c/160 c fan/Gas mark 4.
  3. Cream together the butter and sugar until pale and fluffy.
  4. Add in eggs, one at a time, mixing fully after each one. Add vanilla.
  5. Fold in the flour.
  6. Divide the mixture into 4 equal amounts - I use a large ice cream scoop to ensure even quantities.
  7. Add a small amount of colour to each bowl, increasing the amount of colour each time until you achieve the desired colour.
  8. Bake two cakes at a time, for 25 mins. test and leave for a couple more mins if needed. 
  9. Remove from oven and turn out on to a cooling rack until cool.

For the rest of the decorating, follow the instructions (& the ear template is also available) on the Stork site.


Don't forget the tail!


Happy Easter everyone!


Tuesday, 8 March 2016

Easter Vanilla Cupcakes and Doughnuts


On the subject of baking up a storm, these were the other bakes I did today, preparing for the school charity bake sale. I actually rarely make cupcakes as I find it so hard to find a reliable and delicious recipes. But this time, I sought help from the home baking experts on a baking facebook page I am a member of. One member, Teresa came back with her favourite so I gave it a go....and it was DELICIOUS! The mixture was substantial, so I made a dozen cupcakes and the rest I used to make baked mini doughnuts.


Vanilla Cupcakes

Makes 2 dozen

Ingredients:
  • 200g butter, softened
  • 1 3/4 c caster sugar
  • 2 tsp vanilla bean paste
  • 2 3/4 c self raising flour
  • 1 c milk
  • 2 eggs
Method:
  1. Preheat oven to 180 deg C and line muffin tray with cases.
  2. Cream butter, sugar and vanilla bean paste with an electric mixer until pale and fluffy.
  3. Add the eggs one at a time, beating each one until well combined.
  4. Add flour and milk in alternate batches, mixing with a wooden spoon until well combined.
  5. Spoon mixture into the cases and bake for 15-20 minutes or until cooked through.
  6. Remove from oven and set aside to cool completely.
  7. Decorate with buttercream and Easter themes marshmallows and sprinkles.
Note: this will make 2 dozen cupcakes, or you can make 1 dozen and use the rest to make the doughnuts below.


Vanilla Doughnuts

Using the same recipe as above, put the mixture into a large piping bag and snip off the end. Pipe the mixture into a doughnut pan that has been greased with cake release spray. This is important or they will stick.

Bake in the oven for about 12-15 minutes, but do check them after 10 mins.

Once cooled, remove from the pan and dip into a basic glaze to coat. Add sprinkles and decorations.

Glaze:
Add sifted icing sugar to a bowl (approx 2 cups), pour in about a tablespoon of water to start with. Stir to combine, adding more water as necessary to produce a fairly runny glaze. If it is too thick the doughnuts will fall apart while you dip them.
Dip the rounded side of the doughnut into the glaze to coat. Decorate.


Creme Egg Bundt Cake


I baked up a storm in the kitchen today, making goodies to sell at the Year 6 Bake Sale tomorrow. We do one annually to raise money for charity and as I organise it, it's only fair that I contribute. This year I was tossing up what to make, but in the end I went for an Easter theme. You can see the other Easter bakes here.

Last year I made this same cake, it's my 'go to' chocolate bundt cake; my absolute favourite! This year I made the icing white (yellow last year and I just couldn't get past the brown/yellow combo which I have always disliked!) and it is soooo much nicer. A simple icing sugar/water glaze, a few chopped Cadbury's Creme Eggs on top and away we go!


I won't write out the whole recipe again, but if you want it, you can find the cake recipe here.

I let it cool in the tin for about 20 mins before inverting onto a rack and allowing to cool. Once cool, I sliced the uneven top off to give a flat bottom.

I didn't measure the icing, I simple sifted an amount of icing sugar, added some water, slowly so it doesn't get too runny and then poured it over the top. I used 3 large creme eggs, cut in half, and dotted a few of the smaller ones in between. It was really so simple.


I love the filling oozing out......


This cake keeps fresh in an airtight container for at least a week (if it lasts that long!)

Notes:
  • I always use a cake release spray when using bundt tins, and the cakes come out perfectly, ever single time.
  • When cutting the creme eggs, don't worry if they are uneven, broken and oozing filling, it all adds to the charm.


Happy Easter!


Monday, 7 March 2016

Easter Bunny Bark


I love Easter baking, perhaps even more than Christmas. Last year I made a white chocolate bark, but I wanted to try dark chocolate this year. My first attempt, with 70% chocolate didn't really work. It was my first attempt at tempering chocolate and I think I melted it too fast and it bloomed. This is where the cocoa butter separates and has a 'white' appearance. In addition, I think the chocolate was just too dark for children to eat. So, this time I went back to my favourite baking chocolate, it's Sainsburys Belgium Dark Cooking Chocolate. It's so nice to work with, and appeals to all tastes when eating.

I have been collecting all the Easter chocs; Cadbury's mini eggs, Smarties mini eggs, Sainsbury's micro mini eggs, Cadbury's Hoppy Bunny bar, Maltesers Bunnies and the Wilton Easter sprinkles, ready for this project. It's sooo tempting to sneak a few!


It's pretty simple to make bark. You melt the chocolate, slowly, trust me, pour it onto a tray lined with parchment paper, add the decorations and then refrigerate to set. After it had hardened, break it up and package it into bags to give as gifts.

If you would like to temper the chocolate to give it that 'crack' as you break it, the BBC Good Food guide to tempering chocolate is really good.


Good luck and happy 'barking'!


Monday, 6 April 2015

Marshmallow Bunnies


This is my final Easter bake for this year - sadly, as I love Easter baking. This is a recipe we have made for the last few years, and my son and I love making it together. This marshmallow recipe doesn't require any boiling sugar, so it's much simpler and safer with children. The resulting marshmallow is really light and fluffy - YUM!

I have had the large mold for years, but I had to source the small baby bunnies through eBay Australia - they weren't available anywhere else!

The marshmallow stores well for quite a while, so no pressure to eat this in one day!

Marshmallow Bunnies

Ingredients:
2 cups caster sugar
1 cup water - boiling
2 tbsp Gelatine
1 tsp Vanilla Extract
2 cups desiccated coconut (unsweetened)
pinch of salt
Green food colouring

Method:
1. Dissolve the gelatine in the boiling cup of water.
2. In an electric mixer - add the sugar to a clean bowl, and pour in the gelatin mixture.
Beat on the highest setting for approximately 10 - 15 minutes or until the marshmallow is really thick and white.
3. Add the vanilla and the pinch of salt to the mixture while it is still beating.
4. Meanwhile use a spray oil to grease your bunny molds and a lamington tray (square or rectangular tray about 20cm x 20cm or similar). I would line the tray with parchment paper and oil that.
5. Spoon the mixture into the bunny molds, make sure you try and press the marshmallow into all the nooks and crannies.
6. With a smooth knife make the marshmallow flat on top and place the molds in the fridge for about an hour.
7.  To do the grass, add a small amount of green food colouring to the remaining marshmallow, and beat it in until it is evenly coloured. Scrape into the tray and flatten the top with an offset spatula to make the top flat and even. Chill in the fridge for an hour.
8. While the marshmallow sets, take half the coconut and place into a ziplock bag. Add a couple of drops of green food coloring and massage the coconut so that it becomes green too. It happens easily, and will be a little patchy but I think that adds to the charm.
9. Cut the set marshmallow into squares using a hot knife, and toss into the green coconut to coat all sides.
10. Gently remove the marshmallow bunnies from the moulds, cover in plain coconut and place gently on the grass. the coconut will adhere to the bunnies easily, just pat it on.
11. Using a cotton bud or end of a match/toothpick, dip in food colouring and colour the ears, eyes and nose. If you prefer, you can do they face/ears before adding the coconut - I haven't done it this way but it may be easier than colouring the coconut as well.
12. Keep covered until ready to eat.


An alternate bunny from another year


Wednesday, 1 April 2015

Orange and Cranberry Hot Cross buns


After my first attempt at these earlier in the week, I have been thinking about, researching and contemplating how to improve them. I am so incredibly happy with these today and I honestly think they are the best ones I have ever eaten!

To top it all off, I knew I was having some Moose Maple Butter delivered this morning, so I wanted them out of the oven so I could slather it on them. This butter is absolutely delicious.....butter mixed with maple syrup and a touch of sea salt and it simply is the perfect accompaniment to the buns. For fairness I did also have a half with normal butter; it was good too, but the Moose Maple butter elevated it to another level.


For this recipe, I based it on Paul Hollywood's classic hot cross buns (from the BBC website - the one in his book is quite different), but made my own adjustments, so I will add my recipe below.

If you have time before Easter, do give these a go. Be aware though, they do take a few hours as they need to prove twice for an hour each time.


In my mind these are the best thing I have made this week!

Orange and Cranberry Hot Cross Buns

For the Buns:
300 ml milk
500 g strong white flour
75 g caster sugar
1 tsp salt
7g sachet fast-action yeast
50 g butter - melted
1 free range egg, beaten
150 g dried cranberries (not fresh ones)
2 oranges, zest of both and juice of one.
1 tsp mixed spice
sunflower oil for greasing the bowl

For the Cross:
75 g plain flour
5 tbsp water

For the Glaze:
1 tbsp caster sugar
1 tbsp boiling water

METHOD:
1. Bring the milk to the boil and then take it off the heat, transfer to a bowl and leave to cool down until it reaches hand temperature. This is very important. Hot milk will kill the yeast, so make sure you let it cool to a just warm temperature.
2. Zest the oranges into a small bowl. In another bowl add the cranberries and the juice of one orange, leave them to soak until step 6.
3. Mix the flour, spices, salt, sugar, yeast, butter and egg together in a bowl and then slowly add the warm milk, mixing until it forms a soft, sticky dough.
4. Tip out the bowl onto a lightly floured surface. Knead the dough for about 5 mins or until is is smooth and elastic. You can of course use the dough hook on an electric mixer, but do the final part out on the bench so it becomes less sticky.
5. Put the dough into a lightly oiled bowl, cover with oiled cling film and leave to rise in a warm place for about an hour or until doubled in size. 
6. Tip the dough out of the bowl onto the bench top and knead it to remove any air bubbles. Flatten it out into a rectangular shape and sprinkle the drained (and patted dry) cranberries and orange zest onto the dough. Fold the dough over to incorporate the toppings, and knead so they are well combined.  If you add the fruit into the first knead and prove, I have found it stops the dough rising so well. So adding it in just before the second prove seems to work better.
7. Divide the dough into 12 even sized pieces, and roll each piece into a smooth ball on a lightly floured surface - you shouldn't need much flour at this stage. Also, it's okay to knead these pieces a bit more to shape them. Arrange them onto a tray lined with baking parchment, leaving enough room so that they just touch when they expand and rise (about 1-2cm apart depending on their size).
8. Set aside to prove for another hour. At this stage I placed the tray into a clean plastic shopping bag rather than covering in cling film.
9. Heat the oven to 180 degrees Celsius.
10. For the cross, mix the flour with 5 tablespoons of water in a small bowl. Add the water a tablespoon at a time, so that you get the right consistency for a thick paste. Spoon the paste into a disposable piping bag (or ziplock bag) and trim off the bottom of the bag - a small opening is all you need. Pipe along each row of buns in one direction only, then come back and do the opposite direction to make crosses, all in one go. Don't do individual buns, it will look messy and take so much longer.
11. Bake for 20-25 mins on the middle shelf in the oven, or until golden brown.
12. Mix the caster sugar and water together until the sugar dissolves, and then when they buns are straight out of the oven brush them liberally with the glaze so the tops are all covered.
13. Gently rip the buns apart to eat and enjoy!


Utter, utter deliciousness!
Happy Easter everyone!
Monday, 30 March 2015

Creme Egg Cookies


Easter Week! I love it. I love Easter baking and finding new things to make each year. This year I have used Cadbury's Creme Eggs more than usual and this recipe is one of the best I have ever had. I can't take any credit for this recipe, I got it from the Queen of Creme Egg baking, Kerry at Kerry Cooks. Go and check out her whole site, there's some fabulous bakes on there.

I'm not going to add the recipe here, instead go straight to her page for it - click here.

Preparing to go in the oven.


Mine look a little different and I can only reason it being that my dough was quite wet - not sure why as I followed he recipe precisely, but it did firm up in the fridge. Oh, I did cook mine for an extra 2 mins too,The final cookie is light yet gooey in the middle, and utterly delicious! 


Go out and make these today...or tomorrow! Satisfaction guaranteed!

Kris x