Showing posts with label marshmallows. Show all posts

Saturday, 27 March 2021

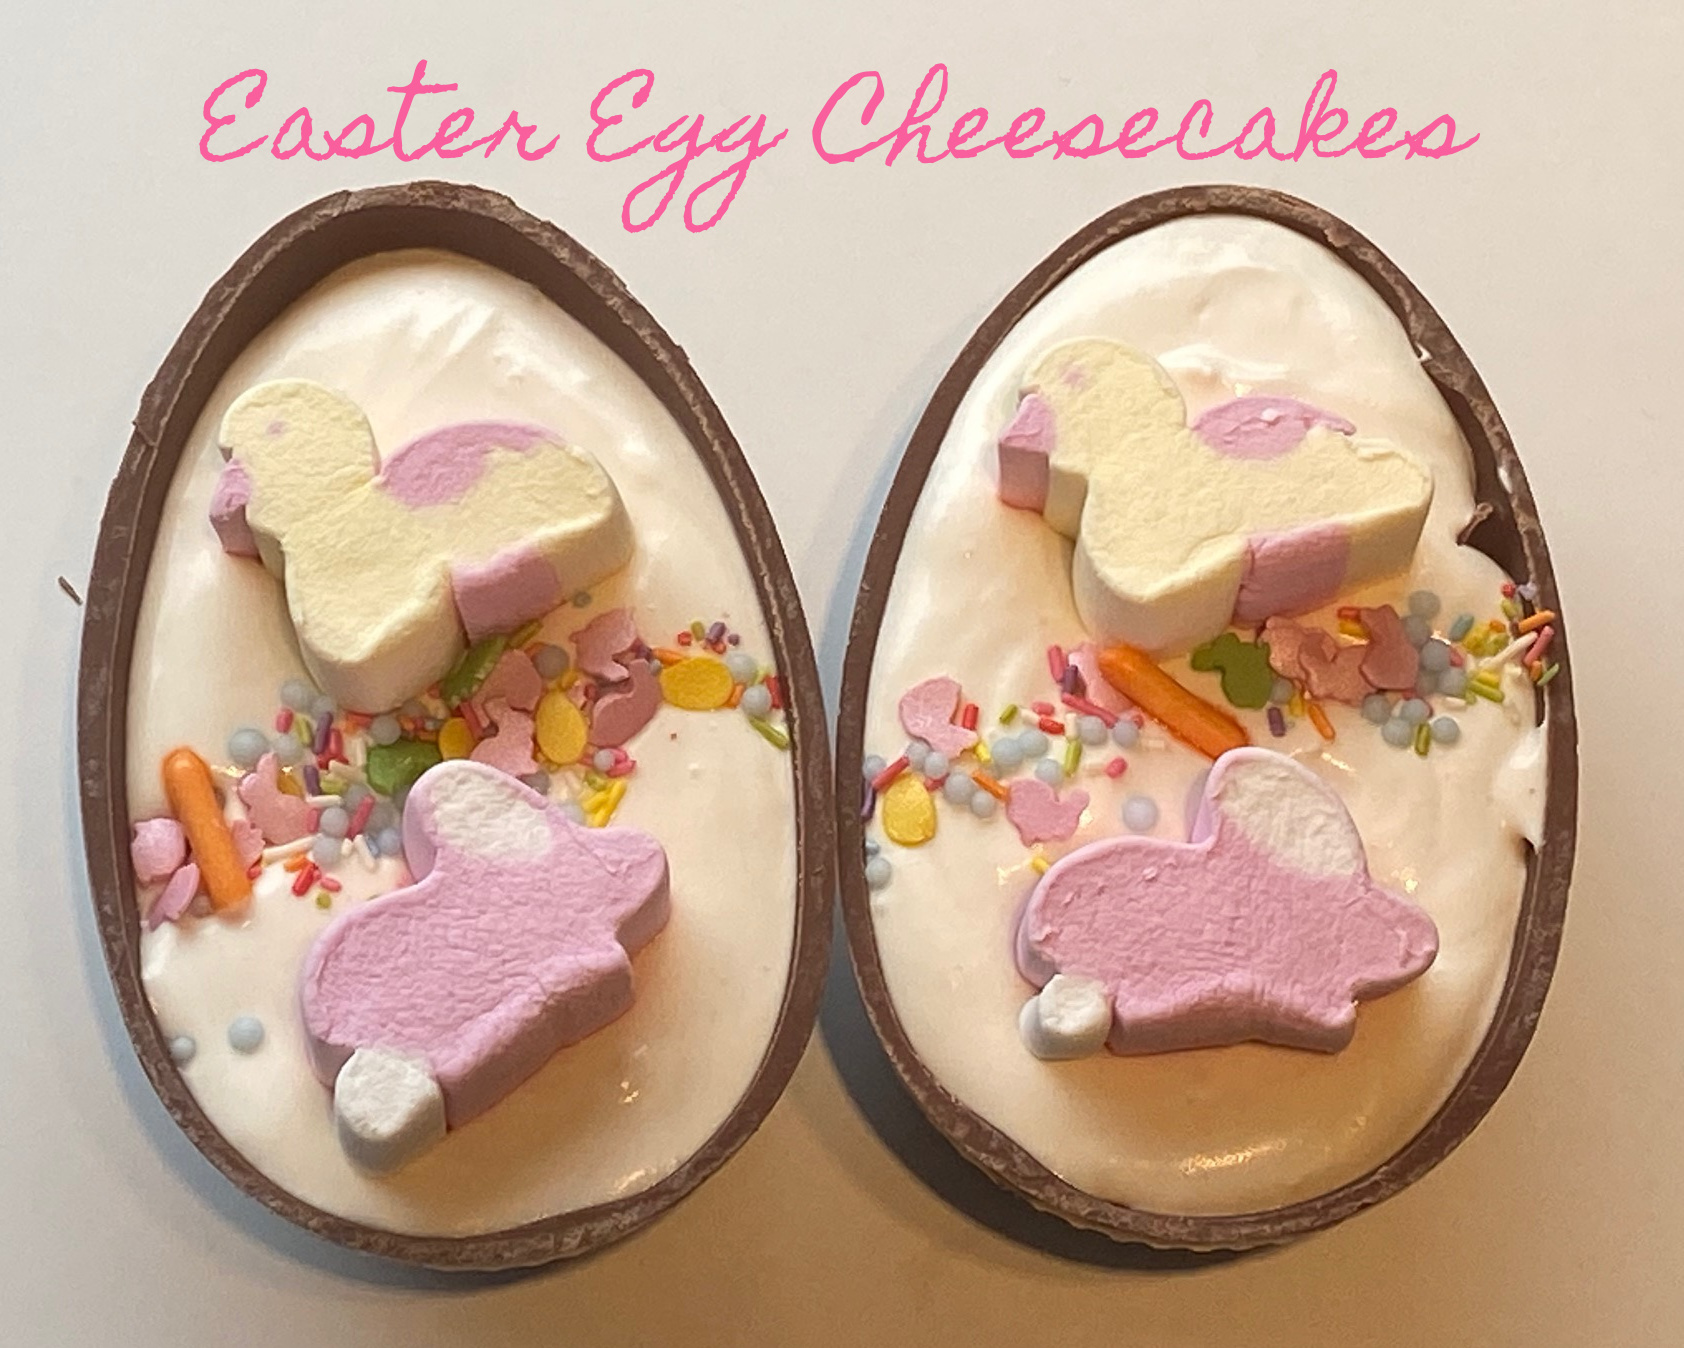
Chocolate Easter Egg Cheesecakes


This is a fun way to present a lemon vanilla cheesecake at Easter time. I have left out the traditional biscuit base, but you could always add that in if you wanted to, and add a layer of it in the bottom of the Easter egg.

I have made this filling dairy free but I will add both versions below so you have a choice. For my son's (the dairy free version) I also made  the chocolate egg as well using a mold I had at home anyway. I melted dairy free chocolate and  built up layers of the melted chocolate, chilling between layers. This recipe is so easily made dairy free and it tastes delicious!

Chocolate Easter Egg Cheesecakes

Serves 3 medium sized half-eggs (double the recipe for more)

Ingredients:

  • 170g cream cheese (or dairy free version)
  • 100ml double cream (or Elmlea plant double cream)
  • 40g icing sugar, sifted
  • 1t vanilla
  • juice of 1/4 lemon
  • 3 x half easter eggs
  • decorations - such as marshmallows, mini eggs, mini creme eggs, sprinkles - whatever you have or would like to use.
Method:
  1. Combine the cream cheese, sugar, lemon and vanilla in a bowl, whisking until it is smooth and well combined.
  2. In a different bowl, whip the cream until it is thick with soft peaks and then fold it carefully into the cream cheese mixture until it is fully combined (you can whisk it briefly too).
  3. Spoon into the chocolate Easter eggs, decorate and set in the fridge for 2-3 hours but preferably overnight.


Friday, 26 March 2021

Rocky Road (Easter edition)


A well-loved family favourite has been given an Easter makeover this year. You can, of course, adapt your decorations to suit what you have available, such as mini eggs, mini creme eggs etc.
I would normally make this into one batch in a 20cm x 20cm lined tin, but today I decided to split it between 3 trays to give as gifts to friends (we kept one for our family). It's always lovely to share the goodies!

If making these outside a celebration time, finish the batch off with a sprinkling of icing sugar over the top to decorate.

ROCKY ROAD

Serves 16
Ingredients:
  • 200g rich tea biscuits 
  • 300g dark chocolate
  • 45mls golden syrup (3 x 15ml spoons)
  • 125g butter
  • 100g mini marshmallows

Method:
1.  Place the biscuits onto a ziplock bag and use a rolling pin to crush them into a combination of crumbs and small pieces. Tip the biscuits into a large bowl. 
2.  In a saucepan, combine the chocolate, butter and golden syrup and melt over a low heat. Take out 125ml of the melted mixture and set aside.
3. Pour the larger chocolate mixture into the biscuits and mix to combine. Add the marshmallows and mix until almost all coated and then pour this mixture into the lined pan (20cm x 20cm if making one batch). Spread evenly and smooth the top with a spoon.
4. Pour the remaining chocolate mixture over the top and spread it out to create a smoother layer. Add any decorations and then refrigerate for 2 hours or overnight.  If adding icing sugar on top, do so once it has set in the fridge.
5. Remove from the pan and slice up into 16 pieces. Store in an airtight container, preferably in the fridge.


Sunday, 8 November 2015

Star Wars themed 7th Birthday


This week, is my son's 7th birthday. He is Star Wars mad...and I mean mad for it! My husband thinks he could enter the TV show 'Mastermind', and he's probably correct. Anyway, it was a simple choice for the theme for his party. I knew I had to keep it all simple, as it's also a busy time for me, work wise this month.

Anyway I found some ideas on Pinterest, most completely unachievable for me, some do-able. I love the idea of the Storm Trooper marshmallows, and after making ghosts for Halloween, I knew I could this easily. It just took white marshmallows, cake pop sticks and an edible black pen - all of which I had!


We had bought some Star Wars cookie cutters from Lakeland, and I used the Darth Vader & Storm Trooper ones to make some chocolate biscuits for the take home 'party bag'. I also put in the marshmallow pop, for a tasty goodie bag.

I use Sweetopolita's Dark Chocolate Sugar Cookie recipe for my biscuits. It's a really delicious biscuit, although quite a soft dough, so it needs a lot of chilling, between every stage.


I also used some cupcake wrappers, also from Lakeland, and instead of cupcakes, I made some chocolate crackles for the party.


Chocolate Crackles
Makes about 24

4-5 cups of rice krispies (rice bubbles)
1/2 cup desiccated coconut
1 c mini marshmallows
200g melted chocolate - I like to use Sainsbury's dark chocolate cooking chocolate

Mix all together until coated by the melted chocolate and then spoon into the wrappers. Chill in the fridge for 20 minutes.

Can be stored at room temperature in an airtight container for up to a week.


And now for the cake. These stress me out as I am NOT a good cake decorator and I am nervous and pretty hopeless with fondant covered cakes. I tried to come up with simple ideas and even bought some black and white fondant, but in the end I went for buttercream and ganache and used small Star Wars figures as decorations. They looked like they were playing 'Stuck in the Mud' (cake), and the bonus was my son had some new toys to play with afterwards! I thought the cake looked great.

I've made this cake recipe before, but in a Bundt tin, so this time I split the mixture into 3 x 8 inch tins and cooked them each for 23 minutes on 180deg C and layered them with homemade raspberry jam in the middle. I much prefer this to buttercream between the layers.

The ganache on top is my favourite kind - dark chocolate and coconut milk instead of normal cow's cream.

Coconut Milk Ganache
(Dairy free, but without a strong coconut flavour)

200g dark chocolate
1/3 c coconut milk - mainly solid, and a touch of the liquid.

Chop the chocolate into small pieces and place in an heatproof bowl. Gently heat the milk until it is hot but not quite boiling and pour over the chocolate. Mix and then leave until the chocolate has melted.
Mix until it is smooth and silky. Cool and pour onto the cake and use a offset spatula to spread and drip off the edges of the cake.

Any left over ganache is DELICIOUS on top of vanilla icecream.


Good luck and May the Force be with You!


Thursday, 11 December 2014

Christmas Candy Cane Marshmallows


I've just made these tonight to put in the goodie bags for the children in my class tomorrow as they finish for the Christmas holidays. I wanted something super easy, but also something that looked impressive and tasted delicious. These fit the bill.
I bought the cutest mini candy canes from Iced Jems, one of my favourite suppliers. But I crushed normal sized candy canes for the bits. Bits That's a technical term, by the way! One day I'd like to try these with homemade marshmallow but I simply didn't have time tonight.
 
Mini Candy Cane Marshmallows
 
Ingredients:
Store bought marshmallows
mini candy canes
chocolate - melted
crushed candy canes
 
Method:
1. Crush the larger candy canes using a food processor or in a tall glass using the end of a rolling pin like I did.
2. Poke a mini candy cane into each marshmallow.
3. Dip the marshmallow half way into the melted chocolate. Tap off excess.
4. Dip and roll into the crushed candy cane so the chocolate is covered. Place on a plate to set.
 
It's as simple as that!


Tuesday, 5 August 2014

Campfire Cones

I came across this fab idea for a camping cookout treat this afternoon. Since we are off camping tomorrow I thought I should test it out, and if successful, take some with us.
They were so simple to make - I followed the idea found on this site - and they worked a treat.


I filled the waffle cones with chocolate chips and mini marshmallows, then wrapped in tin foil and I 'cooked' them on the BBQ. Once melted the cones were also quite soft, but they hardened very quickly once I unwrapped the foil and they cooled down.

These were delicious, the tester agreed as you can see below - but can be a bit sickly, so next time I might add some banana or strawberry to the cone for a little bit of something different.

Overall, a success! I'll be pre-making them and taking them camping for the kids - all 15 of them!!