Tuesday, 6 January 2015
Chocolate Marshmallow Slice
This is one of my all time favourite recipes and one I can make quickly. I got the original recipe from my very dear, dear Aunt, who was my most favourite person in the whole world, and more like a mother to me than an aunt. I have tweaked it slightly, but the basics are the same. I think of her every single time I make this, when I refer to the recipe I typed up about at her house about 24 years ago.
It's a such a popular slice and I urge you to have a go and make it.
Chocolate and Marshmallow Slice
Ingredients:
Base
1/c caster sugar
1 c desiccated coconut
1 c self raising flour
2 dessert spoons cocoa
125g butter, melted - by the way I used Stork block and made it dairy free for my son.
Topping
1 large bag of marshmallows (I use Sainsbury's family sized bag)
Extra coconut to sprinkle of top
(Note: you could use homemade marshmallow which would be even nicer, but not as fast)
Method:
1. Pre-heat the oven to 180deg C, and grease and line a 20cmx20cm tray with baking parchment.
2. Combine the dry ingredients in a medium bowl.
3. Add the melted butter and mix to combine all ingredients - the mix will be like wet sand.
4. Press this into the tray - I roll over the mix with small glass tuned on its side to compact it.
5. Bake for 15 mins. Remove from oven and roll the glass over it again to flatten the base as it does rise slightly.
6. Once the base is out of the oven, put all the marshmallows into a bowl and melt in the microwave in 30 second increments. Check after each 30 seconds. Once melted, move quickly to pour on top of the warm chocolate base. The marshmallow starts to set quickly, so work fast. Using an oiled spatula will help. Don't worry if you don't use every bit of marshmallow - just use as much as will come out quickly.
7. Quickly sprinkle with coconut then cover and refrigerate for an hour or more to set.
8. When cutting this up, move it on to a board and peel the sides away. I have a bag of icing sugar/cornflour mix that I use for coating marshmallows, and I dip my knife into this, which helps to cut without sticking, but before I had this, I used to dip the knife in a glass of water and then cut - it helped.
This can be stored in an airtight container in or out of the fridge for up to a week - if it lasts that long.
Variations:
You can also top this with chocolate icing and coconut, a traditional Australian slice.
Thursday, 1 January 2015
Snowman Marshmallow
So the other thing I took to my NYE party was this snowman marshmallow for the kids to enjoy. I love making marshmallow and this is something I want to work more on this year and experiment with various flavours and styles etc. I've never made one like this before but I had bought the snowman mould from Sainsburys the other week in their after Christmas sale. It was pretty simple once I'd worked out how to add the details.
I used my basic marshmallow recipe which you can find here.
I prepared the mould first, greasing it up with spray oil - this is essential so the marshmallow can release at the end.
I then added the details. I used candy melts, and went with the colours I had. If you don't have colours you could ether colour white chocolate or just use normal chocolate to do it. Let the chocolate set before you do any of the marshmallow.
Once the marshmallow is made you must move quickly to get it into the mould before it sets. Smooth the top and then cover with greased baking paper and set in the fridge for an hour or two.
Once you remove it from the fridge, generously sprinkle with the icing sugar/cornflour mix and tip it onto a board. Sprinkle the top and sides with the power too. I used a (clean) paintbrush to them dust the sugar off the coloured bits.
I had some left over marshmallow, which I had anticipated, so I just put that into a greased and lined square tin, and I have cut that into squares and rolled in desiccated coconut. I absolutely love the marshmallow/coconut combination - one of my favourite flavours ever!
Ginger Snap and Caramel Tartlets - NO BAKING NEEDED
Welcome to 2015 and my first post for the new year. Today I'll post how to make some of the little bite sized tartlets I took to my friend's NYE party last night.
These are so simple to make and take literally about 6 minutes. They are perfect for a last minute dish to take and really yummy as a party dessert. I was reminded of this recipe from my friend Chrissie in Australia, she whipped them up after lunch one day while we were visiting and it took me back to many years ago when I used to make them, well before I had my baking 'bug'.
Gingersnap and Caramel Tartlets
Ingredients:
1 x packet of gingersnap biscuits (ginger nut in Australia)
1 x tin of Condensed Milk Caramel
whipped double cream
chocolate shavings
Method:
1. Preheat the oven to about 150 deg C. Place the biscuits into a fairy cake tin - one per hole. (Muffin tins are too big for this, making the smaller cupcake/fairy cake tins ideal).
2. Put the tray into the oven for 4 mins. Be careful, These will burn very quickly if left - set a timer and stay close!
3. Remove from oven and quickly use the back of a dessert spoon to make an indent in the middle, pushing down and rounding if off to make it into a bowl shape. Put them all onto a cooling rack to cool and harden.
4. Once cooled, put a teaspoon of caramel mix into each tartlet, top with whipped cream and chocolate shavings. I piped the cream as it looks a big nicer, but otherwise spoon it on. I also made the chocolate shavings using a vegetable peeler on the side of the block. Very easy.
Enjoy!
So simple.
Thursday, 25 December 2014
A Dairy Free Christmas
Merry Christmas to all my loyal followers. It's been fun setting up this blog and I'm happy that I am slowly gaining more followers each week. I've only been doing this since August, so feel free to spread the word!
Well, what a lovely Christmas Day we have had. Very relaxed, good food and good company. Today's blog post is for my Chocolate and Coconut Bundt Cake, which I served as our Christmas pudding, since none of us are fans of the traditional mixed fruit pudding.
I took this recipe from Brooklyn Homemaker's Chocolate Peppermint Bundt cake, but since my son doesn't like peppermint, I altered it to a coconut flavour instead. I will admit, I loved the sound of the original, but I love all things mint, so it's to be expected.
Anyway, I made some slight adaptions to the recipe to make it dairy free, so I will post it below, but you can click the link above to see the original.
Today I used my new NordicWare Heritage Bundt Pan, which I only bought last week. I was so very pleased that the cake came out so cleanly. I just love it!
Chocolate Bundt Cake with Dark Chocolate and Coconut Ganache
- Servings: 12
- adapted from Brooklyn Homemaker
For the Cake:
1 1/4 cups water
3/4 cup cocoa powder
2 1/4 cups sugar
1 1/4 teaspoons salt
2 1/2 teaspoons baking powder(or bi carb soda if using buttermilk)
2 whole eggs
1 egg yolk
1 1/4 cups soya milk (or buttermilk if you can have dairy)
1 cup sunflower oil
1 1/2 teaspoons vanilla extract
2 3/4 cups plain (all-purpose) flour, sifted
For the Coconut and Dark Chocolate Ganache:
200g best quality dark chocolate, chopped (I used Sainsbury's dark cooking chocolate as it is dairy free)
3/4 cup coconut milk
Desiccated coconut to sprinkle on top
1. Place an oven rack in the centre of the oven and preheat to 180 degrees C.
2. Liberally butter and flour a 10 to 12 cup Bundt pan and set aside.
3. Whisk water and cocoa powder in a small saucepan and bring to a boil, whisking frequently. Remove from heat and let come to room temperature.
4. In the bowl of a stand mixer with a whisk attachment, mix together sugar, salt, baking soda, eggs and egg yolk on low for just one minute. Add the milk, oil and vanilla extract and mix on low again for another minute.
5. Add the flour and mix on medium speed for 2 minutes more. Add the cooled cocoa mixture and mix on medium speed for 3 minutes. The batter will seem quite loose and liquid. Pour into the prepared cake pan and bake for 55-65, or until a cake tester or toothpick inserted in the cake comes out clean.
4. In the bowl of a stand mixer with a whisk attachment, mix together sugar, salt, baking soda, eggs and egg yolk on low for just one minute. Add the milk, oil and vanilla extract and mix on low again for another minute.
5. Add the flour and mix on medium speed for 2 minutes more. Add the cooled cocoa mixture and mix on medium speed for 3 minutes. The batter will seem quite loose and liquid. Pour into the prepared cake pan and bake for 55-65, or until a cake tester or toothpick inserted in the cake comes out clean.
6. Let the cake cool completely in the pan and then invert onto a cooling rack. Once cooled I trimmed off the top to make it level once inverted.
7. To make the ganache, heat the coconut milk in a heavy pot, just until it begins to simmer. Remove from the heat and add the chocolate. Let the chocolate melt for a minute or so, then whisk to combine.
8. Drizzle ganache over the cake while it’s still warm and liquid. Sprinkle desiccated coconut over the ganache.
9. Let the ganache set for at least 30 minutes before slicing.
10. We served with hot custard....soooo good!
Thursday, 18 December 2014
Candy Cane Crush Marshmallows
I have been wanting to try these for about twelve months now after seeing them in a Donna Hay Christmas magazine. Anyway this year I took the plunge! I have made marshmallow a number of times before so I was quite confident, but I must say these were the best I have ever done, texture wise.
However, a word of warning, they looked great the day I made them and rolled them in the candy canes, but a day later, the candy canes had virtually dissolved, leaving the marshmallows very sticky. I had to do some emergency lathering in the icing sugar/cornflour mix, which was fine, but by the time I gave them to Thomas' teachers, they looked nothing like this!
They still tasted amazing though! I would recommend, making and serving on the same day for the best visual effect.
Candy Cane Crush Marshmallows
Ingredients for Basic Vanilla Marshmallow
1/2 c (125ml) warm water
2 tablespoons gelatine powder
1 1/2 c (330g) caster (superfine) sugar
2/3 c (230g - or 2 tubes if in the UK) liquid glucose
1/2 c (125ml) water, extra
1 vanilla bean, split and seeds scraped (I actually used vanilla bean paste, 1 teaspoon)
Icing Sugar Mixture
1 1/2 c (240g) icing sugar, sifted
1/4 c (35g) cornflour (cornstarch), sifted
10 medium candy canes, roughly chopped.
Method
1. Place the warm water in an electric mixer, sprinkle over the gelatine and stir to combine. Set aside.
2. Place the sugar, glucose and extra water in a medium saucepan over low heat and cook, stirring until the sugar is dissolved.
3. Increase heat to high and bring to the boil. Add a sugar (candy) thermometer and cook, without stirring (for approximately 5-7 minutes), until the temperature reaches 115 degrees C (239deg F) or soft ball stage.
4. With the mixer running on high, gradually add the hot syrup in a thin, steady stream to the gelatine mixture. Add the vanilla seeds and beat for 5-7 minutes or until thick and fluffy.
5. Working quickly, spoon the mixture into a lightly greased 20cm x 30cm tin lined with lightly greased baking parchment (get this ready BEFORE you start making the marshmallow).
6. Using a spatula, smooth the top and cover with lightly greased non-stick baking paper. Refrigerate for 1-2 hours to set.
7. Place the candy canes in a food processor and process until fine crumbs form, set aside.
8. To make the icing sugar mixture, place the icing sugar and cornflour into a bowl and mix to combine. Turn the marshmallow out onto a surface dusted lightly with some icing sugar mixture.. Dust the knife in the icing sugar mixture and cut into squares.
9. Roll the sides of the squares into the candy cane crumbs.
Enjoy these on the day of making if using candy canes. If making plain marshmallows, they will keep in an airtight container dusted with icing sugar mixture, in the fridge for up to a week. Be sure to take your marshmallows out of the fridge just before serving to avoid them going sticky from humidity.
Sunday, 14 December 2014
Cranberry Hazelnut Tartlets
My friend made these last night for our craft club and boy, they were absolutely delicious! And I mean, DELICIOUS! I ate 4 in a row and had to restrain myself from eating them all. They were bite sized, after all.
Anyway I am sharing the recipe.....there's a few elements to make, but I promise you, it's worth the effort.
It's taken from Annie's Eats - apparently a great blog, but this is my first time seeing it. I will spend some time checking it out further.
Click here for the recipe.
A perfect recipe for those Christmas parties coming up!
Try it out.
Kris
These frosted cranberries are simply the most beautiful, Christmassy things I have ever made.
Update - Jan 2016
I made these again yesterday for New Year's Eve, so, so delicious and they were a huge hit at the party we went to. I've added a couple of extra photos from this batch into the post. One batch of this recipe makes about 30 tartlets. and the cranberry curd makes A LOT...be prepared for lots of leftover curd to use on icecream!
Thursday, 11 December 2014
Christmas Candy Cane Marshmallows
I've just made these tonight to put in the goodie bags for the children in my class tomorrow as they finish for the Christmas holidays. I wanted something super easy, but also something that looked impressive and tasted delicious. These fit the bill.
I bought the cutest mini candy canes from Iced Jems, one of my favourite suppliers. But I crushed normal sized candy canes for the bits. Bits That's a technical term, by the way! One day I'd like to try these with homemade marshmallow but I simply didn't have time tonight.
Mini Candy Cane Marshmallows
Ingredients:
Store bought marshmallows
mini candy canes
chocolate - melted
crushed candy canes
Method:
1. Crush the larger candy canes using a food processor or in a tall glass using the end of a rolling pin like I did.
2. Poke a mini candy cane into each marshmallow.
3. Dip the marshmallow half way into the melted chocolate. Tap off excess.
4. Dip and roll into the crushed candy cane so the chocolate is covered. Place on a plate to set.
It's as simple as that!
Tuesday, 18 November 2014
Passionfruit Macarons
| Basic macaron with passionfruit curd buttercream filling |
I whipped up a batch of passionfruit curd, and then made these basic macaron shells using plain icing sugar. I like this macaron recipe so much, it always seems to work for me. I filled them with some curd flavoured buttercream. I had to add LOADS of passionfruit curd to the buttercream to get the flavour and even then it was very subtle, but they were so delicate.
| Ready for lunch |
Passionfruit Curd
| The finished product when I originally made these for my son's teachers. |
And of course there was some left over, so I have had that tonight drizzled over vanilla icecream. Oh my goodness, the MOST delicious dessert. Simple, but goooood.
Passionfruit Curd
Ingredients:
- ⅔ cups (160ml) passionfruit pulp
- 1 tablespoon lemon juice
- 165g butter, chopped
- ¾ cup (200g) caster (superfine) sugar
- 3 eggs
- 2 egg yolks
- Place the passionfruit pulp, lemon juice, butter and sugar in a medium saucepan over medium heat and stir until butter is melted and sugar dissolved.
- Place eggs and egg yolks in a bowl and whisk until combined. Gradually add the passionfruit mixture, whisking continuously.
- Return curd mixture to pan and cook, stirring, over low heat, for 6–7 minutes or until thickened (mine took about 15 mins) and mixture coats the back of a spoon.
- Allow to cool and store in the fridge, covered with plastic wrap. Makes 2½ cups.
- Store in the refrigerator for up to one week.
| Sterilizing the jars and melting the butter, pulp and sugar |
| Thickening up |
Labels:
curd,
eggs,
lemon juice,
passionfruit,
sugar,
teacher gifts
Sunday, 16 November 2014
Chocolate Bundt Cake
It's been a while since I blogged some of my recipes properly, so you my be inundated as I have been doing a lot of baking lately. This cake is one I made for my son's 6th birthday yesterday. I wanted something simple, but fun, that I could transport to a restaurant in London (on the train!) So it needed to be robust, but tasty.
This is the second time I have made this cake now, the first being for Halloween last month.
My bundt tins are new, my first from the Nordic Ware range and I've really enjoyed using them. For this type of tin, I think you need a fairly stable cake. This recipe, I have to say, is just delicious. It's a Martha Stewart one, and I know I will use it again and again.
Just a few notes for when you are using this recipe and this style of tin. For the Halloween 'pumpkin' cake, I made two cakes separately, trimmed the tops on both to make them flat and the 'sandwiched' them together with a simple orange buttercream in between. I topped that one with some passionfruit icing. The green 'stalk' is just an icecream cone painted with slightly watered down food colouring - I popped it back into a low temp oven to dry out. This is the 12 cup sized tin.
For the blue birthday cake, I used the smaller tin so I also had spare mixture which I used to make some cupcakes with. I didn't trim the top on this one, just turned it over and let it cool. The icing is just very simple, icing sugar and water and I tried out my new gel colours from ProGel. This was turquoise, although looks sky blue really. Still, it's nice to use the tubes to control the amount you use. You let it dry for a few minutes before sprinkling on the 100s & 1000s. This is the 6 cup sized tin.
This really is a delicious chocolate cake, not too sweet and if making it for a more grown up occasion, drizzling chocolate ganache over the top would be perfect.
Chocolate Bundt Cake
Ingredients:
- 1 cup (220g) unsalted butter, plus more for pan
- 2 1/4 cups (320g) self-raising flour
- 3/4 cup (75g) unsweetened cocoa powder
- 1/2 teaspoon salt
- 1 1/2c (375mls) milk (or milk alternative)
- 1 1/2 cups (350g) caster sugar
- 4 large eggs
- 1 teaspoon vanilla extract
Method:
- Make the cake: Preheat oven to 180degrees C. Butter and flour (or use a cake release) a 12-cup Bundt pan.
- In a large bowl, sift together flour, cocoa, and salt.
- With an electric mixer on medium-high speed, beat butter and sugar until pale and fluffy, 3 to 5 minutes. Add eggs, 1 at a time, beating well after each addition; add vanilla. If the egg mixture looks like it is having trouble combining properly, you can add a tablespoon of the flour mix to help it come together.
- Reduce speed to low; add flour mixture in 2 batches, alternating with the milk and beginning and ending with the flour; beat until just combined.
- Transfer batter to prepared pan; smooth top with an offset spatula.
- Bake until a cake tester comes out clean, about 50-55 minutes. (40 mins is using the smaller 6 cup tin).
- Transfer pan to a wire rack to cool for about 10 mins in the tin, before tipping the cake onto the cooling rack. (Cake can be stored at room temperature, in an air tight container up to 7 days).
Give it a try and let me know if you make the cake!
Kris
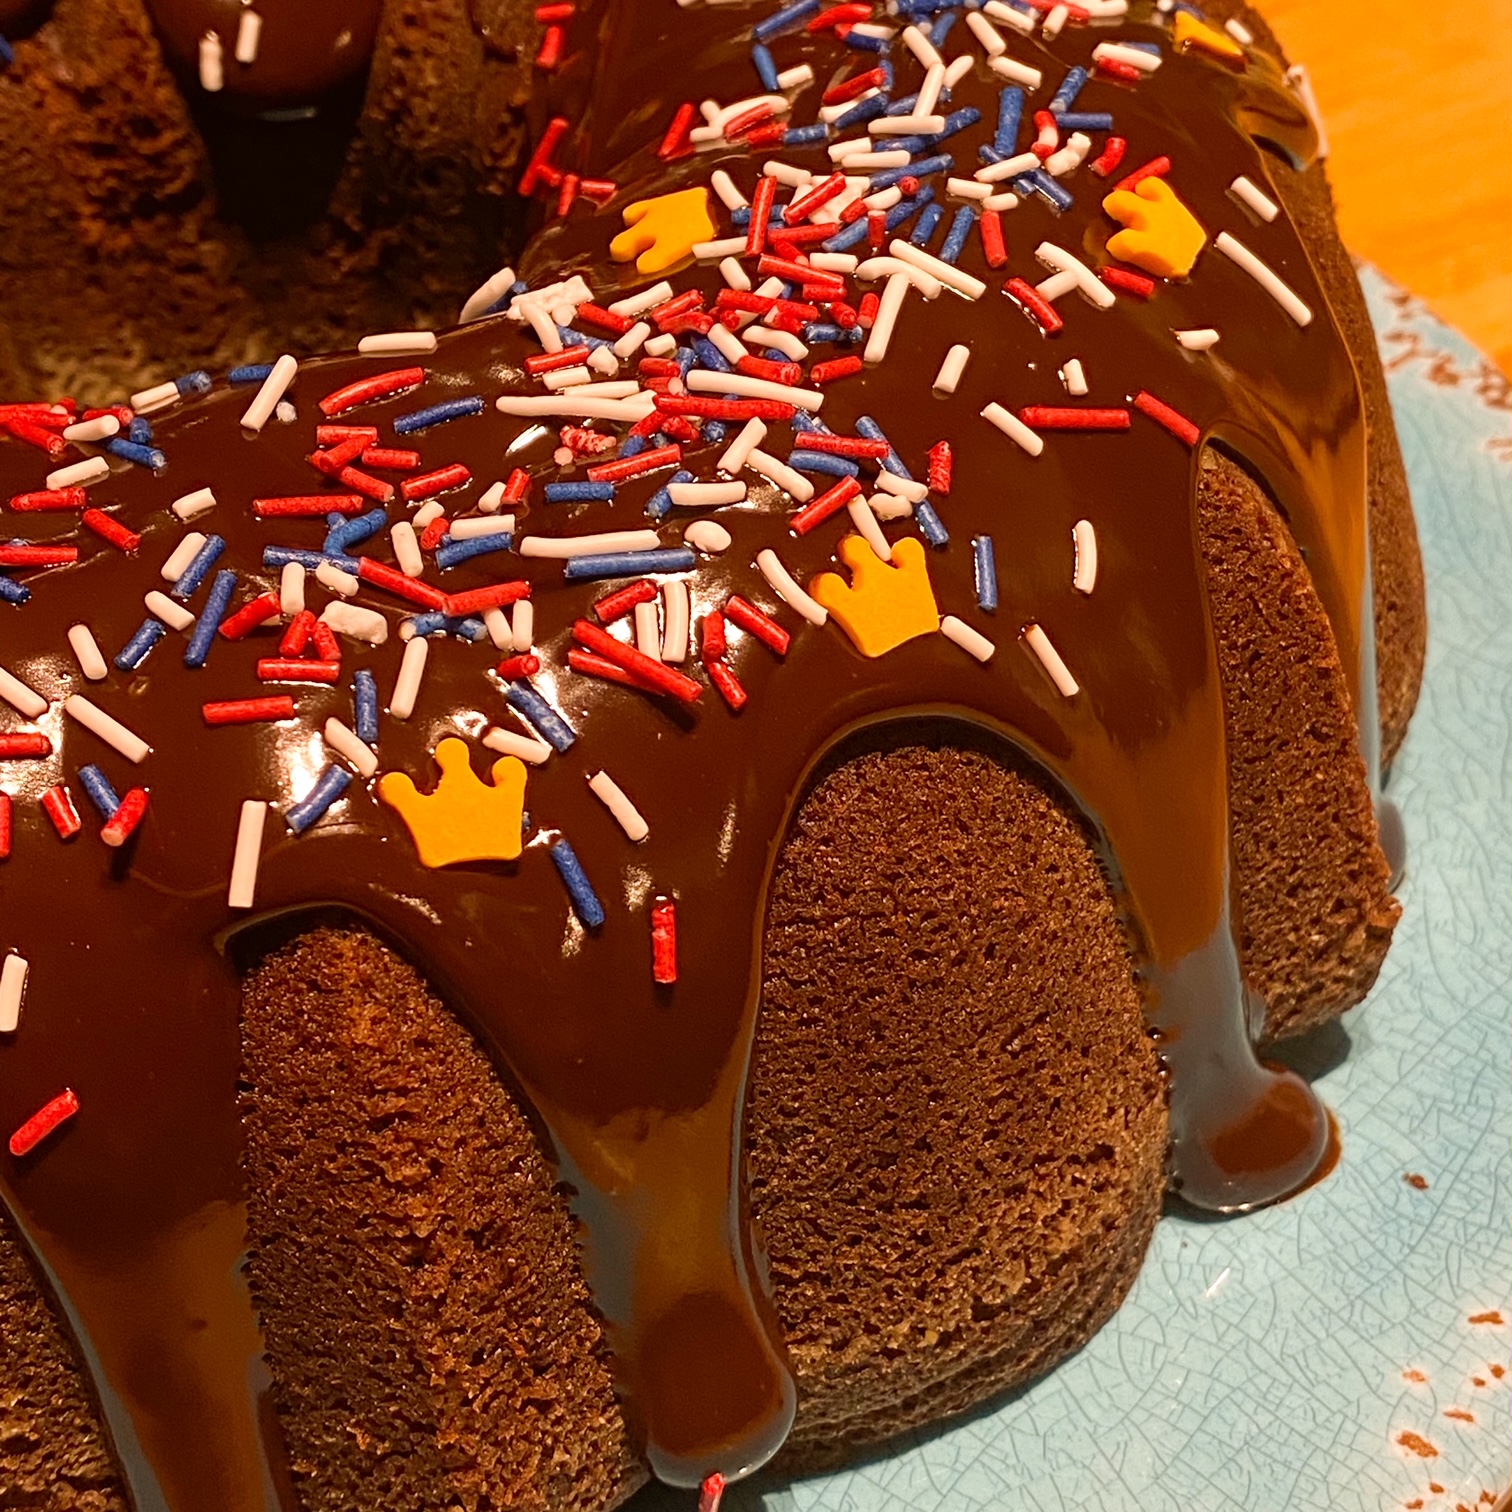
UPDATE - May 2023: I quickly make this with King Charles III Coronation sprinkles tonight. Covered in a delicious chocolate ganache made with dark chocolate and Emlie Plant cream. This is just for my family.
Subscribe to:
Posts (Atom)