Tuesday, 15 September 2015

Wagon Wheel Slice


Wagon Wheels are a favourite biscuit of mine - they remind me of my childhood, although I swear they were much bigger in those days. Over here in the UK, you get a choice of wagon wheels with or without jam in them. In my opinion, what's the point of leaving the jam out? I am 'Team Jammy' all the way!

Anyway I saw this recipe posted on a fab Facebook group I am in, and knew straight away I wanted to give them ago. The original post came from a FB page called Aussie Tucker - The Great Australian Bite.


The biscuit base is quite soft like the original, not crunchy at all. Interestingly enough I didn't have quite enough jam in the house, so I thought that layer would be quite thin, but in reality it is plenty and any more would be too sickly sweet I think.


Wagon Wheel Slice
Ingredients
For the base:
60g (¼ cup) unsalted butter, melted
1/3 cup caster sugar
1 egg, beaten
1 cup + 3 tablespoons plain flour
¼ teaspoon baking powder
Pinch salt


For the jam:
1/3 cup raspberry jam


For the marshmallow:
2 dessertspoons gelatine powder
1 cup water
1 cup caster sugar
1 cup sifted icing sugar
1 teaspoon vanilla essence


For the chocolate layer:
185g dark chocolate, broken into pieces (I used dark choc chips)
1 T sunflower oil


Method
Preheat oven to 180°C/160°C fan-forced. Grease a 3cm-deep, 16cm x 26cm slice pan. Line base and sides with baking paper, extending paper 2cm from edge on all sides.


Melt butter. Set aside to cool slightly. Add sugar and egg and mix well. Add sifted flour, baking powder and salt and stir until dough comes together. Press mixture into prepared pan. Bake for 15 minutes or until golden. 
Spread warm base with jam.
Meanwhile, soak gelatine powder in 1 cup of water (give it at least 10 minutes to soak properly), after 10 mins add 1 cup caster sugar and dissolve gently in a saucepan over a low heat, then raise heat and boil for 8 minutes. Allow to cool slightly and then add 1 cup of sifted icing sugar. 
In a large, deep bowl, beat with an electric mixer until white and thick (should take about 3-4 minutes). Add vanilla essence, and beat until well combined. Spoon almost all (*SEE NOTE BELOW) of the mixture over jam layer and place in refrigerator to set.
Place the chocolate and oil in a small, clean, dry heatproof bowl. Place the bowl over a small saucepan of barely simmering water over low heat (make sure the bowl doesn't touch the water). Use a dry metal spoon to stir gently for 2 minutes or until chocolate melts and is smooth. Pour evenly over marshmallow layer and smooth the surface with a knife.
Refrigerate for 2 hours or until set. Stand at room temperature for 5 minutes (I waited about 30 just to make sure the chocolate wouldn't crack) before cutting into pieces with a hot knife and serving.
*NOTE: I find that this makes a little more than needed, but this isn't a problem! Just lightly grease a small plastic container and pour excess in. I put my excess into some silicon jelly moulds for a bit of fun!
Place in refrigerator for about 20 mins to set; a nice, but sugary treat for the kids!


Enjoy! xx


Monday, 7 September 2015

Grandma Shipway's Apple Pie


My Grandma made the best apple pies. A simple statement, but true. She also made the best pickles...she used a vegetable called choko to make the pickles. I hated choko with a passion, but I loved her pickles.

Now in my garden I have an apple tree that gives us a pretty healthy crop of cooking apples each year. This year they seem ripe earlier than usual so we started picking them yesterday. I had also been out the back of our street to collect what looked like the last of the wild summer blackberries to add to the apples for this pie.


The pastry for this recipe can very easily be made diary free, in fact up until this year, I HAVE made it dairy free for my son - he can now tolerate butter in baked goods so I used real butter within the recipe.

The photos I took this time aren't great - it was night time, we were all eager to eat and it just didn't cut well....so you are going to see the realities of baking and eating for the family, not just for the blog! Let's face it, that's how most people cook anyway, don't you?

Inside...it was jam packed full of apple and blackberries - possibly the highest pie I have ever made!
I'll add some more photos of other ones I have made with the same recipe - in tart tins, cute little individual ones with just plain apple.


Righto, so I'm guessing you want the recipe?

Grandma Shipway's Apple Pie

Ingredients:
Filling
4 - 6 green apples   (cooking apples preferably)
4 cloves
5-6 tablespoons sugar
1 c water
1 c blackberries (optional)

Pastry                                             
1 cup plain flour (150g)
1 c self raising flour (150g)
1/3 c caster sugar (80g)
2/3 c cold butter (150g)
1/3 c water (85ml more if needed)

Method:
      
Apple filling
1. Peel, core, slice and cook the apples with the cloves in 1 c water for 10-15 mins. My apples cooking very fast and in seconds can go from looking underdone, to being mush, so do watch them.
2. Drain and then add sugar, mix through and then remove the cloves. I added the blackberries in at this stage too.
3. Pre-heat oven to 220°c.

Pastry
4. Cube the cold butter and lightly rub in the sugar and sifted flour, both plain and self raising, until the mixture looks like fine bread crumbs. You could do this in the food processor if you have one, which I tend to do these days.
3. Add water and mix to a soft, but not sticky, dough. Wrap in cling film and rest in the fridge for 20 minutes.
4. Roll half the dough between two sheets of grease-proof paper to make it big enough to cover the pie dish.
5. Place the pie dish on top of pastry upside down and lift the paper and pastry (and pie dish) up and over to get the pastry onto the dish without breaking it.
6. Fill with apple mixture and top with the rest of the pastry (rolled out).
7. Trim excess pastry from the edge of the dish and use a fork to press down around the edges. Decorate with extra pastry if you want - I always use cookie cutters to match a theme - this time it was woodland creatures.
8.Brush with beaten egg and sprinkle sugar on top. Use a fork to pierce a couple of steam holes on the top. To avoid the egg (allergies!!), I brushed mine with some soya milk - did the same job equally as well, in my opinion.
9. Cook for about 10 minutes and then reduce the oven to 150°c until brown on top - total of about 35-40 mins.

Enjoy this delicious apple pie fresh from the oven, with custard, cream or ice-cream.

Notes: 

  • I don't ever blind bake the pastry - and I never have a soggy bottom! However, if you'd like to blind bake, then line the raw base with baking parchment and then fill with baking beads or rice - cook for 10 mins, then remove the beads/rice and paper and bake for another 10 mins. Then, add filling and proceed.
  • Add the sugar to the fruit after cooking and draining, or the sweetness (which you really need with cooking apples) will go down the drain too.


Thursday, 20 August 2015

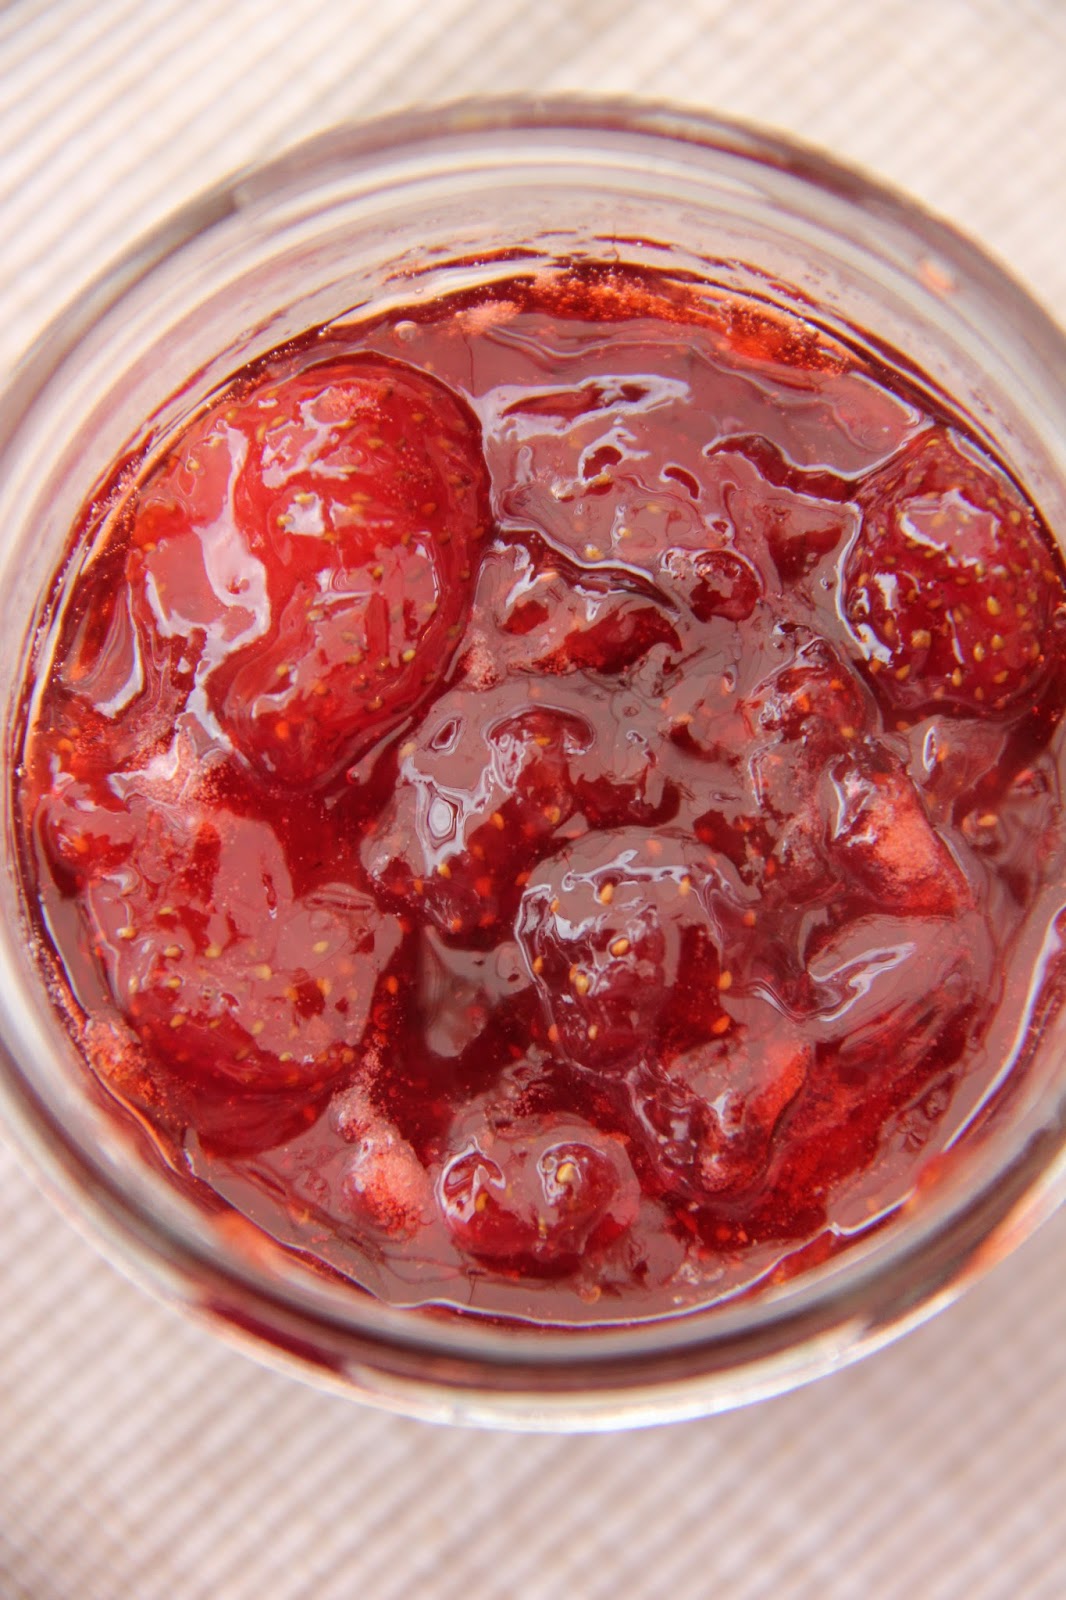
Strawberry Jam - the easy way


The last time I made jam was about 18 years ago, when one summer in Australia, my lovely friend Liz and I realised we both had a glut of fruit - she had a heaving plum tree and my Dad had an apricot tree dripping with ripe fruit. So we picked and halved and both made some plum and some apricot jam. One of my lovely Grandads was in Canberra visiting at the time and I will always remember how complimentary he was about the jam; he was so supportive, and the jam did taste delicious, it just wasn't as set as it should have been.

So this holidays I wanted to have another go with strawberries. We have a local Pick you Own (PYO) farm near us called Garson's Farm, and it is full of all kinds of seasonal fruit and vegetables to pick. So, yesterday on impulse, my son and I went over to get strawberries. We were fairly late in the day so all the best and easy to find were almost gone, but we managed to find a decent batch of shiny red ones.

For this jam, I took the easy way out and used Jam Sugar. It comes with pectin already included. It's probably not that much easier than buying pectin separately, but for a novice like me it make the whole jump into jamming again easy and motivating!


This morning I couldn't wait to try some on my toast - it was so delicious, although very sweet....I would normally put less on my toast but for my first batch I lathered it on!


I love all the chunks of strawberry - I've always liked my jam with bits in it, seeds, pieces; somehow it feels more real.


Strawberry Jam

Ingredients:

1 kg fresh strawberries, washed, drained and hulled
1 kg jam sugar
Juice of 1 lemon

Method:

1. Put the strawberries and lemon juice in a very large, heavy bottomed saucepan and heat for a few minutes to soften.
2. Add the jam sugar and stir until dissolved and then boil steadily for about 15 minutes, or until setting point is reached. I added my candy thermometer to the pan and could see it boiling consistently at 105C/220F.
3. To test for the setting point, place a teaspoon of jam onto a cold plate, leave for a few seconds, push the jam with a finger, if the surface wrinkles, setting point has been reached. I did this quite a few times from about the 6 min mark. I took it off only because it was starting to stick to the bottom on the saucepan. It could have done with a bit more cooking I think. Perhaps I should have stirred the mix more as it boiled to avoid the sticking.
4. Remove the foam from the top with a slotted spoon while it is hot. Allow to stand for a few minutes and then spoon into sterilised jars. Seal and allow to cool on the bench.
5. Once opened, store in the fridge.


Notes:
To sterilise the jars, I washed them and then put them into an oven at 110C for 15 minutes. I dipped the orange seals into boiling water.
When putting into the jars, it really helps to have a metal, wide opening funnel - you can buy them easily at this time of year.
I will admit to using my potato masher to break the strawberries up a bit as they boiled!


Enjoy! x


Wednesday, 5 August 2015

Passion for Baking Turns 1 today!

HAPPY 1st BIRTHDAY TO Passion for Baking!

A year ago today I made the impulse decision to start my own baking page - I named it Baking For Passion because I thought it was fitting, and off I went! I didn't expect to take up so much of my time, but I have loved learning new skills, trying new recipes and having fun in the kitchen. I have loved sharing my bakes with friends and neighbours - someone has to eat it all, it can't just be us!

I want to say a heartfelt thank you to all my readers, followers, friends, family and fellow bloggers for your support and joining me in this baking journey - I am only a little way along the path so far....here's to many more miles!

Anyway, for the occasion, I have made a Chocolate and Raspberry Mousse Cake. You can find the recipe here.


This cake took me HOURS to make (not everything went to plan), but I have really loved making the layers and it is absolutely delicious. Each layer adds its' own flavour (& texture in some cases) but they all compliment each other beautifully.


The bottom layer is chocolate brownie; then chocolate mousse; raspberry mousse, with fresh raspberries inside; vanilla mousse - with a strong honey flavour; and, topped off with a chocolate ganache and fresh raspberries.


Best cut while chilled, but best served after is has been out of the fridge for about 20 mins.


Anyway, Happy 1st Birthday to Passion for Baking!

Monday, 27 July 2015

Chocolate and Zucchini Bread


I've been wanting to bake with zucchini (courgette) for a long time now and have been looking at some recipes, but this week one came up in my fb newsfeed that was just too irresistible to pass up.


Looking back over my recent bakes, I have realised just how much chocolate features and I feel I need to explain myself. Whilst I do love chocolate cakes, I also like a range of other flavours too. But my son has multiple food allergies and part of a desensitisation program he needs to eat cake or biscuit with egg and butter in it three times a week. And because chocolate cake is his favouite and one he is guaranteed to eat, to tend to go for those. I have, however, really enjoyed making a variety of new recipes for him, and the last few have been stunningly delicious. I did substitute soya milk for the sour cream in the recipe, as my son can't have the cream.


This cake, has a whole zucchini in it - I still call it zucchini, as that's what we call it in Australia, but over here in the UK it is called courgette. I made sure to squeeze the excess juice out of it after I grated it. It's a very runny mixture anyway so I'm not sure if it matters that much, but worth doing anyway.


On the top is the most deliciously crunchy crust made from sugar and cinnamon...I just love it. Oh by the way, I halved the amount of crunchy topping you need, and even then I didn't use it all...worth noting.

So, have I tempted you yet? I hope so, this was such a quick and easy bake to make, and so deliciously moist and flavoursome. 
And the best bit? My son, who hates zucchini, said he absolutely LOVED this cake (I didn't tell him the secret ingredient!!)

You can find the recipe here:

Happy baking!
Kris x


Saturday, 25 July 2015

Raspberry Ripple and Pistachio Partfait


I subscribe to Delicious magazine and in the July issue they featured this parfait on the cover. It looked 'delicious', no actual pun intended!
Anyway as I browsed the mag and read this recipe I noticed they said you can cook the cover and enter the comp, so I thought, oh well, why not?
I have never even eaten, let alone made a parfait before, so I wasn't sure what to expect, but I can tell you now, it is one of the best desserts I have EVER eaten! Ever!

And it's incredibly easy to make....I kid you not!


When I put it on my Facebook page, a few people asked for the recipe, but I only had it in print form. Now it's been published online, I can share it with you easily.

I urge you to try it...you will not be disappointed - just be aware, it is not suitable for pregnant women as it involves a lot of raw egg.


Find the recipe here.

Enjoy...and thank me later, you will love it!

Kris x


Friday, 24 July 2015

Mojito Cupcakes - Guest Post from Jane Gage


Thank you so much for inviting me to be a guest on your page! 


I have totally fallen in love with MOJITO CUPCAKES ! I have adapted the Hummingbird recipe a little to my taste, by adding finely chopped fresh mint in the icing and also using more lemon & lime zest. They are so easy to make and they taste incredible. 

If you like mojitos, beware....they are simply too good! 

Mojito Cupcakes
Makes 12

Ingredients

For the cake
280g caster sugar
80g unsalted butter
240g plain flour
1/2 tsp salt
3 tsp baking powder
2 tsp grated lime zest
2 tsp grated lemon zest
2 tablespoons mint, finely chopped
2 large eggs
240ml milk
1 tsp vanilla extract

For the drizzle
60g caster sugar
200ml white rum

For the Frosting
160g unsalted butter, softened to room temperature
500g icing sugar, sifted
1/2 tsp lime zest
1/2 tsp lemon zest
40ml milk
40ml rum
1 tsp mint, very finely chopped


Method:
1. Preheat oven to 180 degrees C. In a saucepan, combine the white rum and sugar for the drizzle. Boil and reduce by half. Set aside to cool.
2. Beat together the flour, baking powder, butter, salt, lemon/lime zest, mint, and sugar until it forms a crumbly consistency.
3. Mix egg, milk and vanilla in a jug and then pour into the cake mixture, beating to form a smooth batter.
4. Pour into the cupcake cases until 2/3 full. Cook for 12-15 mins until light golden brown and spongy.
5. While the cakes are still warm, poke a hole or two in the top with a skewer, and spoon the drizzle mixture over into the holes - be careful not to get any on the cases. Leave cakes to cool completely.
6. To make the frosting, cream the butter and icing sugar, adding in the zest and mint. If the mixture is stiff, add the milk to soften it up. Add the rum slowly, to suit your tastes. Pipe over the cupcakes and garnish with a small spring of mint.


Thank you so much Jane! I've eaten a few of her Mojito Cakes and can attest to their utter deliciousness!


Saturday, 18 July 2015

Triple Layer Chocolate Cake


I was looking for a good chocolate cupcake recipe recently, and asked out on my facebook page if anyone could recommend one. I had quite a few choices but decided to go with one from my sister-in-law, Bec. It's one she uses all the time. I read through the recipe and decided to go for a whole cake rather than cupcakes - this recipe has a tag line saying it's 'the best chocolate cake recipe ever'. Okay. We shall see.


It was super easy to make, using normal ingredients you'll find in your cupboard and it's even DAIRY FREE!


I made some slight changes to it:

  • I used coconut milk from the carton (not can) instead of cow's milk - this was to cater to my allergic son (there is no coconut taste at all in the cake)
  • I left out the coffee - I'm one of those odd people who doesn't like coffee.
  • I put raspberry jam between the layers as I don't like too much buttercream.
  • And I cheated and used a tub of Betty Crocker's Chocolate Fudge buttercream, as it is dairy-free, really tasty and much nicer than making buttercream with dairy free 'butter'.
  • So, if dairy is not a problem for you, then follow the recipe as it is (It will probably be even nicer!)
  • I used 3 x 8 inch (20cm) pans, rather than the 2 x 9 inch in the recipe.
Is it the best chocolate cake ever, I'm not sure, but it is really, really nice. The texture is moist and soft, and it feels really luxurious.


You want the recipe, don't you?

Okay well, it's not mine, so I will send you directly over to the site. You'll also find at the bottom of the page a link to her cupcake recipe, but it looks to me like it is pretty much half of this recipe.

From: Add a Pinch:   Best Chocolate Cake (ever)


Enjoy! Kris x


Sunday, 12 July 2015

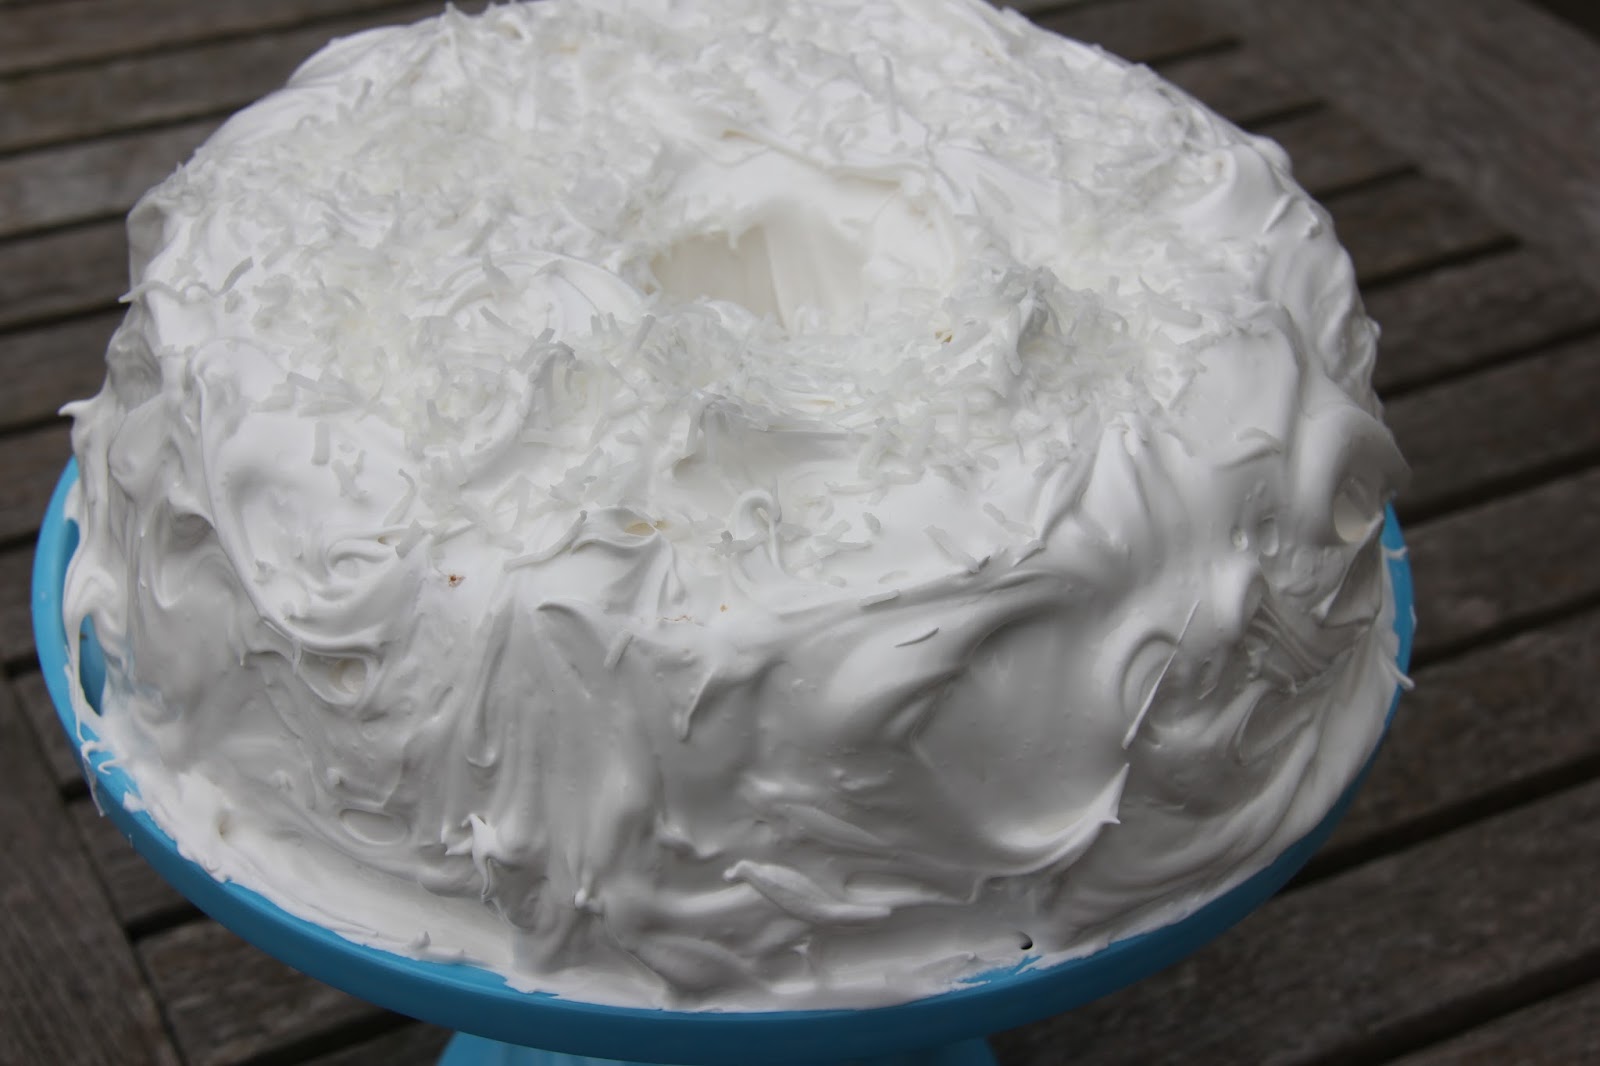
Coconut Angel Food Cake


I have been wanting to make an angel food cake for a while now and impulse purchased a Nordic Ware tin a couple of months ago. I had never even eaten one before, but really likes the lightness of how they looked.

Anyway, before you have a go yourself, and I hope you do, just know this cake itself takes 12 egg whites! I started by using Aldi's free range eggs, but their shells were so fragile, the separating was painfully tricky, so I switched to some Sainsbury's free range, and they were much for reliable. Of course if you have your own chickens, you'll have a ready supply.


The recipe I used for the cake can be found on the I am Baker website. I only had a few drops of coconut essence left so my cake was not as coconut-y as I would have liked, and I didn't put that cream coating on it either. I decided to add a marshmallow frosting that I have used before, with shredded coconut on top.


To make this cake, I assumed you needed the special angel food cake tin and I bought the one from Nordic Ware as it was recommended and comes in two parts. It's a nifty tin, as you need to invert the cake once it comes out of the oven, and it has three legs which means they support it fully while it cools. It was also easy to get out of the tin; I ran a palette knife around the edge and then on the base too.

So a couple of things to note when making this cake:

  • Do not grease the pan - at all.
  • Be careful when mixing to keep the egg whites full of air.
  • Add flavour to the mix if you want but be careful not to lose any of the air - the cake itself is not bursting with flavour - it has a very light, almost dry, spongey texture.
  • As soon as it comes out of the oven, invert it on the bench, the legs on this pan will support it - leave it upside down until completely cool.
  • Use a palette knife to loosen it from the edges before taking out of the pan.


Good luck and enjoy! K x