Tuesday, 30 September 2014

Raspberry and Elderflower Sorbet

We enjoyed it for pudding tonight - plenty left for tomorrow too!
It's been a busy few weeks which is why I haven't had anything new on the blog for a couple of weeks. This weekend, my son and I headed up to stay with our friends in Suffolk. They live in the country, with a huge vegetable patch and an abundance of raspberries. I love all the goodies we always come home with and this weekend it was a big container of freshly picked raspberries. Thank you, Anna, for the food and hospitality!
Hand picking the raspberries

What a stash!

I was thinking hard about what I could do with them that would do the lovely flavour justice.
Anyway, I turned to Donna Hay and searched her recipes and found so many choices. I decided on the sorbet as it was so simple and I knew it was something I could easily whip up. Have a look at her original here.

Raspberry and Elderflower Sorbet
 
Ingredients:
 
4 cups (500g) frozen raspberries  
½ cup (125ml) boiling water       
1¼ cups (310ml) elderflower cordial (see tip)  
 
Method:


Monday, 15 September 2014

Coconut "Bounty" Macarons

 
I'm on a run with macarons at the moment and I was keen to try some coconut ones - it's one of my most favourite flavours, and I will add coconut to anything I can! In the process of preparing to make ganache to fill them, I thought I would try making it with coconut milk instead of traditional cream. It has made such a light, silky filling, and utterly delicious!
I highly recommend using it as a substitute for cream in a variety of dishes.
 
When thinking about the filling, this is where I planned to add the coconut flavour. So I thought I would try and recreate one of my favourite chocolate bars, the Bounty. I used milk chocolate, some drops of coconut essence and after the coconut milk, I also added some desiccated coconut. Surprisingly, it has a distinct coconut flavour but it's not too overpowering.
Shredded coconut on top as the macarons dried, added texture and colour to the shell.
 
Bounty Macarons (milk chocolate and coconut)
 
 
Ingredients:
 
100 grams ground almonds (I actually use about 110g to then allow for large bits that can't be sieved)
100-110g egg whites (about 3 egg whites)
185g icing (powdered) sugar
4 tablespoons caster sugar

Ganache:
200g milk chocolate, finely chopped
5-6 drops coconut essence
150mls full fat coconut milk
2 Tablespoons of desiccated coconut

 
 Method:
 
  1. Preheat the oven to 140° C.
  2. Push the ground almond through a sieve to get rid of any large pieces or lumps.
  3. Mix the icing sugar and cocoa powder together with the ground almonds in a food processor. I do this twice - sieve, food processor, sieve, food processor.
  4. In a large bowl, whip the egg whites with a hand- or stand mixer. As the egg whites start foaming, add the sugar one tablespoon at a time and continue whipping until the mixture is glossy and stiff. You should be able to hold the bowl upside down without the meringue sliding out.
  5. Fold the dry mix carefully and slowly into the meringue, use a spatula. Don't over mix! You want the mixture to fall off the spatula like lava.
  6. Fill your piping bag and pipe the macarons onto a baking sheet. Sprinkle shredded coconut on top. Carefully tap the baking sheet on a hard surface such as a table to get all the air bubbles out. Let them set for 60 minutes to form a dry skin.
  7. Bake for about 14-16 minutes. Let cool completely, then fill with piped chocolate ganache and sandwich them together.
Ganache:
  1. Finely chop the chocolate. Add the coconut essence.
  2. Heat the coconut milk in a small saucepan on a low to medium heat until it begins to bubble and steam. You want it to be hot enough to melt the chocolate easily.
  3. Pour the coconut milk over the chocolate in a heatproof bowl, stir slightly and allow to sit for a few minutes.
  4. Whisk the chocolate and milk mixture until it becomes smooth and silky. If there are still lumps of chocolate you can place the bowl over a saucepan is simmering water to reheat and melt further. Add the desiccated coconut and stir in.
  5. Pour the melted mixture into a flat pan and place in the fridge to chill. Cover with cling film to avoid a skin forming.
I found the ganache didn't set as much as I has expected so I have reduced the coconut milk measurements slightly for you. I also whipped the ganache up using a hand mixer prior to piping it onto the shells.

Macarons taste best after they have developed their flavours for 24hrs in an airtight container in the fridge. Remove for about an hour prior to serving. Or if you are like me and can't resist, they do still taste good straight form the fridge!!


Sunday, 31 August 2014

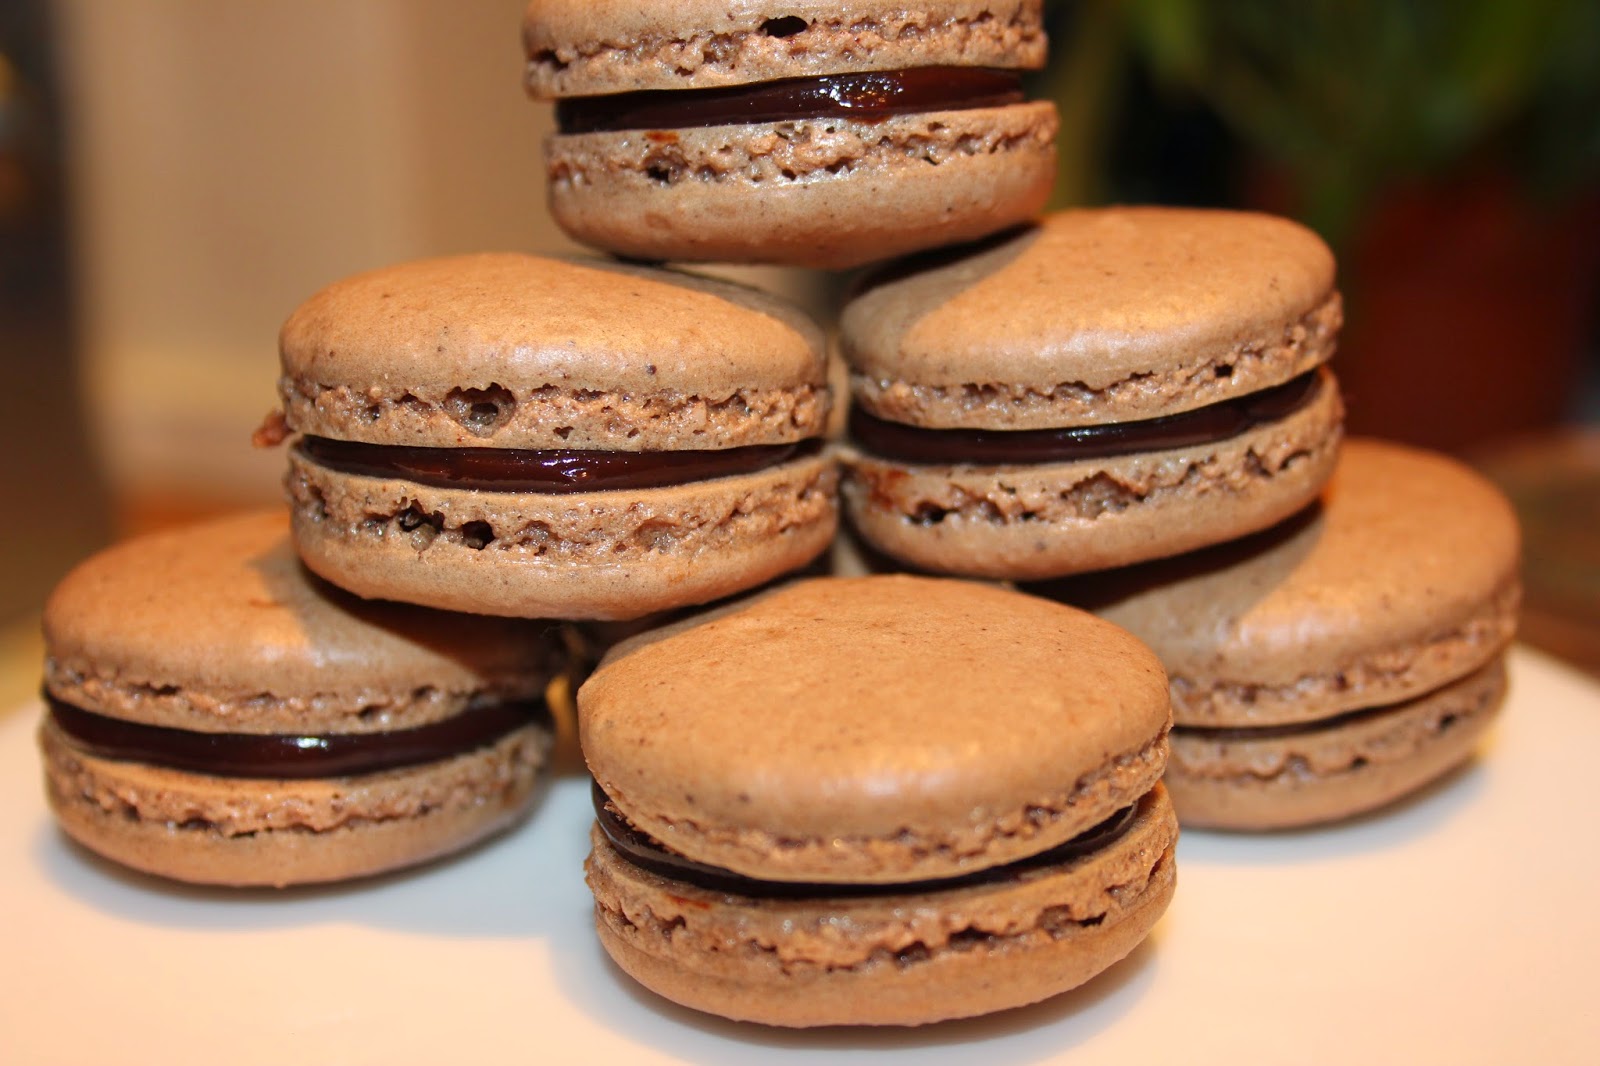
Chocolate Caramel Macarons


A mouthful of delicate deliciousness


I love macarons - anyone who knows me, knows that. I have been making them for a couple of years now, with mixed results. The thing to always remember with macarons, is that whether they work or not, they always taste good.
I had stopped making them a while ago after a few failed batches - when I say failed, to my super critical eye, they didn't work, but to my loyal taste testers, they were fine! I was convinced my oven was not working well enough for such a delicate treat.
Anyway this week I decided to try a new recipe and see how it went. I must say, I was so thrilled when they turned out perfectly. And taste oh so goooood.

 
I'll show you some of the steps I did to fill the macarons, as I have used a combination of flavours. I made a dark chocolate ganache, which I used on the outside of the filling, and then I used pre-made (gulp!) caramel. I thought about making my own but I love the Carnation Milk caramel. The problem it, it is too runny to use on it's own, so that's why I used the ganache to hold it in. The result is a really lovely combination of flavours, with the gooey caramel being the little surprise inside!


Remember to put your filled macarons into the fridge in a sealed container for 24 hours; this process helps the flavours to develop. Macarons are best eaten after being out of the fridge for about an hour.


Chocolate Caramel Macarons

Makes about 35 whole


Ingredients:
 
100 grams ground almonds (I actually use about 110g to then allow for large bits that can't be sieved)
100-110g egg whites (about 3 egg whites)
15g cocoa powder
185g icing (powdered) sugar
4 tablespoons caster sugar
 

Method:
  1. Preheat the oven to 150° C.
  2. Push the ground almond through a sieve to get rid of any large pieces or lumps.
  3. Mix the icing sugar and cocoa powder together with the ground almonds in a food processor. I do this twice - sieve, food processor, sieve, food processor.
  4. In a large bowl, whip the egg whites with a hand- or stand mixer. As the egg whites start foaming, add the sugar one tablespoon at a time and continue whipping until the mixture is glossy and stiff. You should be able to hold the bowl upside down without the meringue sliding out.
  5. Fold the dry mix carefully and slowly into the meringue, use a spatula. Add food colouring if desired until fully mixed. Don't overmix! You want the mixture to fall off the spatula like lava.
  6. Fill your piping bag and pipe the macarons onto a baking sheet. Let them set for 60 minutes to form a dry skin.
  7. Bake for about 14-16 minutes. Let cool completely, then fill with piped chocolate ganache and caramel and sandwich them together.

Sunday, 17 August 2014

Blackberry & Coconut Crumble Cake

Further to my blackberry post the other week, Thomas and I went out foraging again yesterday for more for this recipe. They were so juicy that I think we have caught them just before the season ends.


This is the second time I have made this now and tweaked it to make the base more cakey and fluffier. If you would prefer it more like a slice base, then halve the ingredients for the cake.

I served this up smothered in vanilla bean custard, to friends who came for lunch .... so delicious.

I can't claim this as an original. I took it from Raspberri Cupcakes, a Sydney based blogger I just love. She has based the cake on her mum's old apple cake recipe.

Freshly out of the oven - a lovely golden brown on top.

 I used just half of the crumble in this recipe and froze the rest as I prefer it thinner on top - but I put LOADS of blackberries on the cake mixture - covering the cake really.
The vanilla bean custard just topped it all off. So delicious. We all loved it.


Blackberry & Coconut Crumble Cake

For the cake:
230g self raising (approx. 2 cups plain flour + 4 tsp baking baking powder), sifted
a pinch of salt
120g butter, softened
120g sugar
2 eggs
1 tsp vanilla extract
2 tbsp milk 
1 cup blackberries - fresh or frozen. If using frozen, do not thaw before using. You can use more if you want. I used enough to completely cover my cake mixture.
  1.  Preheat the oven to 180 degrees C.
  2. Cream butter and sugar for the cake until light and creamy.
  3. Add in the egg and vanilla then beat on medium until combined.
  4. Add the flour (and baking powder if using), milk and the salt and beat on low until just combined. Avoid over-beating. The mixture should be a thick-ish paste. I actually added an extra tablespoon of milk to make it slightly wetter and easier to spread. 
  5. Spread the mixture fairly evenly over the base of a square cake tin, lined with baking parchment.
For the crumble:
85g self raising (approx. 1/2 cup plain flour + 1 tsp baking powder)
60g sugar
30 butter
1/2 c desiccated coconut
1 tbsp water for mixing

  1. Put butter, flour (+ baking powder), coconut and sugar in a bowl and rub the mixture between your fingers to combine them. Lift the mixture up high with your hands and let it fall so it traps a bit of air. Gradually add a 1/2 tablespoon of water at a time, while still combining with your fingertips until the mixture starts to form fairly bit clumps of around 0.5 cm diameter, rather than fine breadcrumbs. We added about 1.5 tbsp. water.
  2.  Place your blackberries over the cake mixture in the tin then top with the crumble mixture. As mentioned above, I used half the crumble mixture and froze the rest for the next time.
  3. Bake in the oven for 40 minutes or until a skewer comes out clean and the topping is a golden colour.


Saturday, 16 August 2014

Double Chocolate Muffins

I know most people have their favourite chocolate muffin recipe already, but in case you're looking for a new one to try, I highly recommend this one. Taken from 'Call Me Cupcake' it's utterly delicious and very chocolately.

I was watching the catch up to The Great British Bake Off this week, having missed the first show as we were away camping, and I was craving some chocolate muffins. Not sure why, since they were doing other cakes, but anyway.....

I have made these twice this week, the first time following the recipe and using chopped up chocolate throughout and on top.....and the second time I used chocolate chips. Both were lovely, with the chopped up chocolate melting more, but I do like the choc bits!

I substituted the buttermilk for soya milk, but only so my son can eat them. I'm sure it's a lovey richer flavour with the buttermilk.

Oh and in the second batch, I also added about half a cup of desiccated coconut, mainly because I love coconut in everything and I especially liked it in these.


I've also started using the baking cups which I buy from Iced Jems. You can buy here and this link will answer and questions you have about them. I love them!

Double Chocolate Muffins
Makes 12-18 in standard muffin tins, but makes 15-20 in the baking cups.

 Ingredients:
300 g plain  flour
80 g cocoa powder
1 tbsp baking powder
1/2 tsp bi-carb of soda
1/4 tsp salt
250 g granulated sugar
100 g butter, melted
250 ml buttermilk (about 1 cup or 8.45 US fluid ounces)
2 large eggs
150 g dark chocolate (70%), coarsely chopped (or chocolate chips)


Method:

1. Heat oven to 170°c (340F). Prepare a cupcake pan with 12 muffin liners or if using the baking cups, set them up on a baking tray.

2. Mix flour, cocoa powder, baking powder, baking soda, sugar and salt in bowl. Set aside.
3. Mix butter, buttermilk and eggs in a large bowl.
4. Add wet ingredients to dry ingredients and mix until just combined. Stir in chocolate, but save 1/4 of the chocolate to put on top of muffins.
5. Divide batter between 12 liners, filling them completely full or 3/4 full for the baking cups.
6. Sprinkle with remaining chocolate pieces.
7. Bake for 16-18 minutes or until a cake tester comes out almost clean - slightly less time for the baking cups, as they are smaller. 


Tuesday, 5 August 2014

Campfire Cones

I came across this fab idea for a camping cookout treat this afternoon. Since we are off camping tomorrow I thought I should test it out, and if successful, take some with us.
They were so simple to make - I followed the idea found on this site - and they worked a treat.


I filled the waffle cones with chocolate chips and mini marshmallows, then wrapped in tin foil and I 'cooked' them on the BBQ. Once melted the cones were also quite soft, but they hardened very quickly once I unwrapped the foil and they cooled down.

These were delicious, the tester agreed as you can see below - but can be a bit sickly, so next time I might add some banana or strawberry to the cone for a little bit of something different.

Overall, a success! I'll be pre-making them and taking them camping for the kids - all 15 of them!!


Monday, 4 August 2014

Blackberry Season!

It is blackberry season here in the UK and tonight we went out to pick some in the field behind our street. I was tossing up what to make with them all, but have settled on a compote for tonight. I've teamed it up with some dairy free and egg free chocolate mousse. They are setting in the fridge as I write. Tomorrow I'm going to have a go at making a blackberry crumble cake. I'll let you know once I've done and you can see it all for yourself.


Blackberry Compote

300 g blackberries - frozen or fresh
55g sugar
1 teaspoon of vanilla essence or vanilla bean paste

  1. Mix all together in a small saucepan, over a low to moderate heat until the sugar has dissolved and the mix has thickened slightly.
  2. Strain to remove the seeds if you wish.
  3. Allow to cool.
Enjoy. K x